Thursday, 6/13/19
Exam Times:
7:35-9:20
Passing time/break
9:30-11:15
We are in a testing environment for the next hour, forty-five minutes OR UNTIL THE LAST EXAM IS TURNED IN for Photo 1 students (the multiple choice).
Use this time to rehearse (in your head) what you will say for your presentation, finish any last minute edits on your photos or slideshow, AND review the requirements and grading rubric to make sure you are set. You will present to the Photo 2 group unless Photo 1 is done with everything....
CHECK SKYWARD! MAKE SURE YOU HAVE CREDIT FOR ALL YOU HAVE COMPLETED!!!
Artist as Mentor Slideshow Requirements
Student example in pdf form
Evaluation Form/Grade Sheet
Monday, 6/10/19
Bellwork:
Create Folder for Exam
PRESENTATION CHAT
Artist as Mentor Slideshow Requirements
Student example in pdf form
Evaluation Form/Grade Sheet
Things to do:
Create Folder for Exam
- Open your Google Folder for this class (The one you shared with me.)
- WITH THAT OPEN, create a new folder INSIDE YOUR CLASS FOLDER.
- Rename the new folder, "Last Name, First Name Exam" (You will move the Google Slideshow you've created for your presentation PLUS all 7 jpegs you've taken. PLEASE NAME THE JPEGS AND RECREATIONS AND ORIGINALS.
PRESENTATION CHAT
Artist as Mentor Slideshow Requirements
Student example in pdf form
Evaluation Form/Grade Sheet
Things to do:
- Mood Portraits
- Mood Portrait Weebly Post (4/25/19)
- Picture Frames (4/29/19)
- Screen Assignment (5/1/19)
- Picture Frames Weebly Post (5/8/19)
- Forced Perspective (5/9/19)
- Weebly comments for Mood Portraits (5/14/19)
- NEW Weebly comments for Break the Frame (5/22/19)
- NEW Artist as Mentor Slideshow Requirements
Thursday, 6/6/19 and 6/7/19
Our Top Shot this week was a tie! Between a Photo 1 AND a Photo 2! What a great way to end Friday Photo Challenges :)
Congratulations Meeghin and Quanilla!
Congratulations Meeghin and Quanilla!
THINK PACING! Are you on track to have your presentation finished by Friday? Ready to present Monday?
Artist as Mentor Slideshow Requirements
Student example in pdf form
Evaluation Form/Grade Sheet
Things to do:
Artist as Mentor Slideshow Requirements
Student example in pdf form
Evaluation Form/Grade Sheet
Things to do:
- Mood Portraits
- Mood Portrait Weebly Post (4/25/19)
- Picture Frames (4/29/19)
- Screen Assignment (5/1/19)
- Picture Frames Weebly Post (5/8/19)
- Forced Perspective (5/9/19)
- Weebly comments for Mood Portraits (5/14/19)
- NEW Weebly comments for Break the Frame (5/22/19)
- NEW Artist as Mentor Slideshow Requirements
Wednesday, 6/5/19
Vote for the Top Shot: Opposites (Mark 1 next to the Top Shot and a 2 next to all of the other shots)
Be sure to look at composition and technical aspects like focus, exposure, etc.
THINK PACING! Are you on track to have your presentation finished by Friday? Ready to present Monday?
Artist as Mentor Slideshow Requirements
Student example in pdf form
Evaluation Form/Grade Sheet
Things to do:
Be sure to look at composition and technical aspects like focus, exposure, etc.
THINK PACING! Are you on track to have your presentation finished by Friday? Ready to present Monday?
Artist as Mentor Slideshow Requirements
Student example in pdf form
Evaluation Form/Grade Sheet
Things to do:
- Mood Portraits
- Mood Portrait Weebly Post (4/25/19)
- Picture Frames (4/29/19)
- Screen Assignment (5/1/19)
- Picture Frames Weebly Post (5/8/19)
- Forced Perspective (5/9/19)
- Weebly comments for Mood Portraits (5/14/19)
- NEW Weebly comments for Break the Frame (5/22/19)
- NEW Artist as Mentor Slideshow Requirements
Tuesday, 6/4/19 Red 52 Schedule
Edit/email me your Top Shot: Opposites while I am getting Photo 1 students started.
More Artist as Mentor Tips to consider:
Don't forget you have FOUR shots that are original and YOURS that mimic your photographers style. By now you should have an idea of what that shoot is going to look like....lighting, setting, props/people......Are you on the right track?
For pacing, you should plan to have your shots (copies of artist shots AND your own creations in the style of artist) completed by Friday with the presentation ready to share with me by Monday of next week. REVISIT THE SLIDE REQUIREMENTS NOW SO THEY ARE FRESH IN YOUR HEAD.
Artist as Mentor Slideshow Requirements
Student example in pdf form
Evaluation Form/Grade Sheet
Things to do:
- Mood Portraits
- Mood Portrait Weebly Post (4/25/19)
- Picture Frames (4/29/19)
- Screen Assignment (5/1/19)
- Picture Frames Weebly Post (5/8/19)
- Forced Perspective (5/9/19)
- Weebly comments for Mood Portraits (5/14/19)
- NEW Weebly comments for Break the Frame (5/22/19)
- NEW Artist as Mentor Slideshow Requirements
Monday, 6/3/19
Use this time to edit/email me your Top Shot: Opposites while I am getting Photo 1 students started.
More Artist as Mentor Tips to consider:
You are asked to share 5 shots taken by your photographer WITH AN EXPLANATION FOR EACH. Choose shots that have been explained so you can share that information.
Possibilities include:
For pacing, you should plan to have your shots (copies of artist shots AND your own creations in the style of artist) completed by Friday with the presentation ready to share with me by Monday of next week.
Artist as Mentor Slideshow Requirements
Student example in pdf form
Evaluation Form/Grade Sheet
Things to do:
More Artist as Mentor Tips to consider:
You are asked to share 5 shots taken by your photographer WITH AN EXPLANATION FOR EACH. Choose shots that have been explained so you can share that information.
Possibilities include:
- Theme/Message of shot
- Where/when was it taken
- Purpose of shot
- Any extra interesting information
For pacing, you should plan to have your shots (copies of artist shots AND your own creations in the style of artist) completed by Friday with the presentation ready to share with me by Monday of next week.
Artist as Mentor Slideshow Requirements
Student example in pdf form
Evaluation Form/Grade Sheet
Things to do:
- Mood Portraits
- Mood Portrait Weebly Post (4/25/19)
- Picture Frames (4/29/19)
- Screen Assignment (5/1/19)
- Picture Frames Weebly Post (5/8/19)
- Forced Perspective (5/9/19)
- Weebly comments for Mood Portraits (5/14/19)
- NEW Weebly comments for Break the Frame (5/22/19)
- NEW Artist as Mentor Slideshow Requirements
Friday, 5/31/19
More Artist as Mentor Tips to consider:
Artist as Mentor Slideshow Requirements
Student example in pdf form
Evaluation Form/Grade Sheet
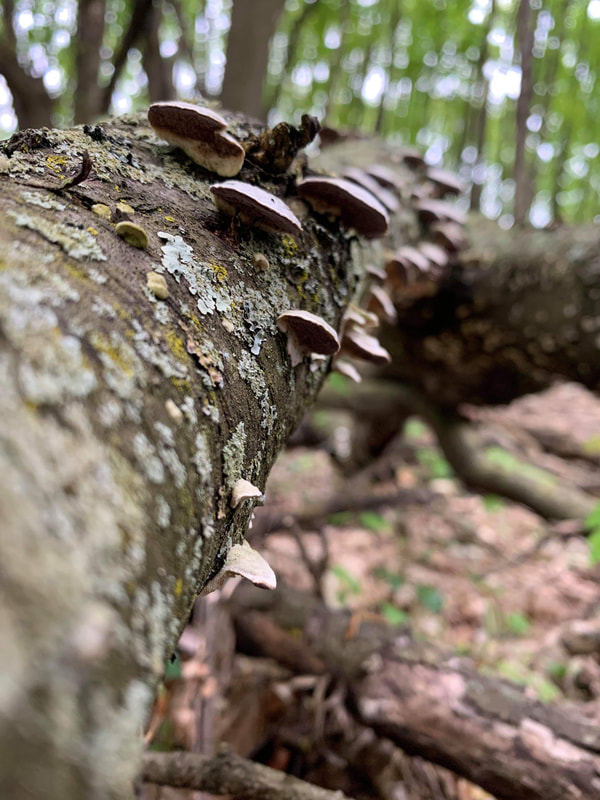
Friday Photo Challenge!! Over the weekend, you will find/make/take a shot that best illustrates the topic.
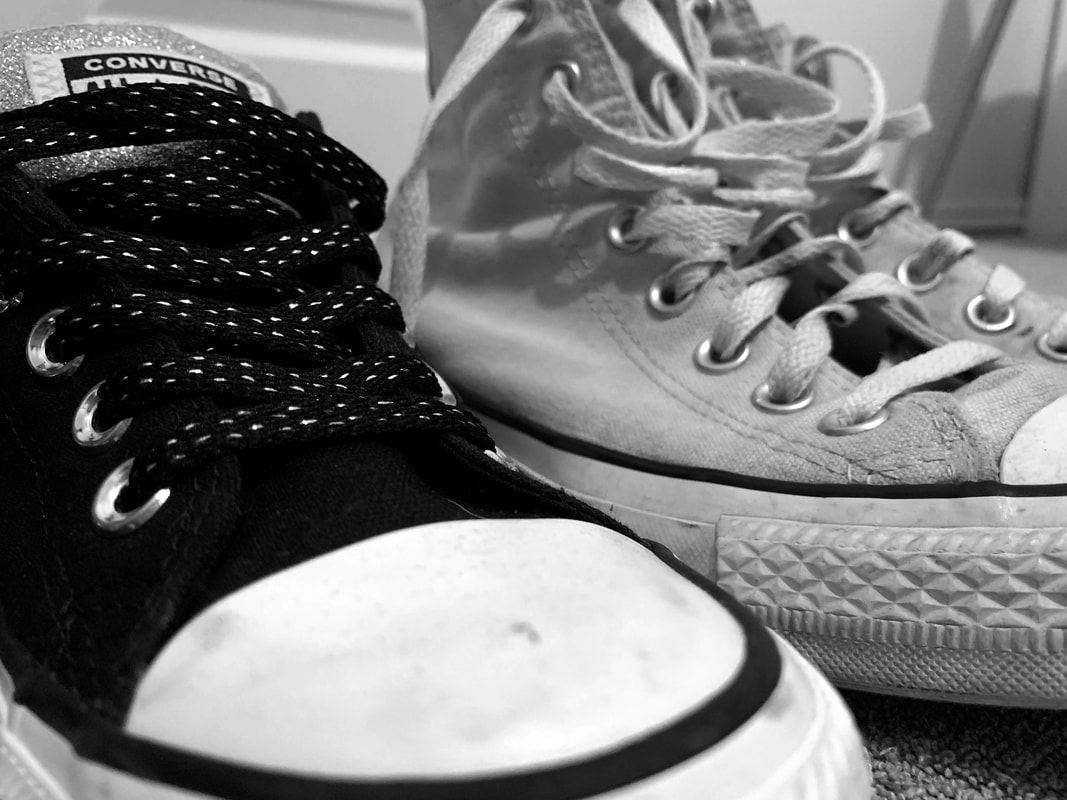
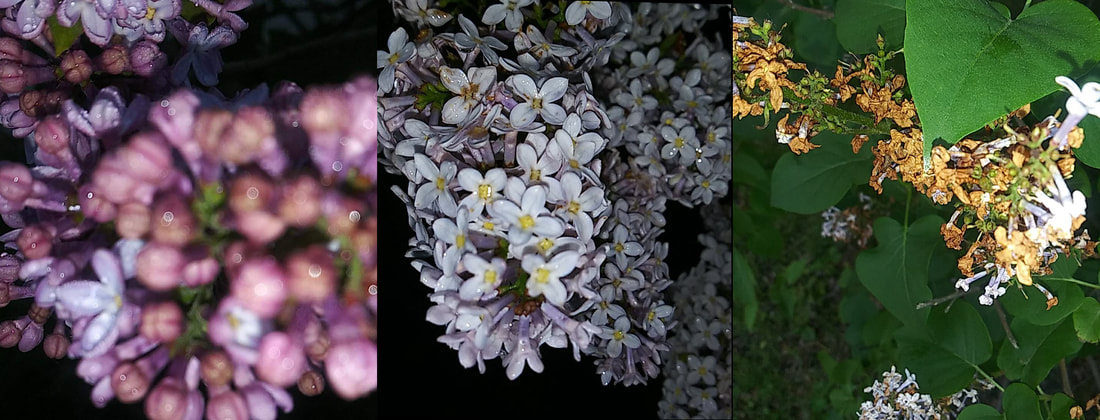
Your theme for this weekend is ......"Opposites"
The opportunity to capture an opposite is endless.
Textures...smooth vs rough, Colors….light vs dark, black vs white, Complementary colors, Size...large vs small, Age/Amount of wear and tear…..new vs old, fancy vs leisure, expensive vs cheap….
Here is a link to push your ideas but by no means a photo to copy! Use your brain to come up with something new and creative.
Your Top Shot should be:
Things to do:
- Make sure your sources are legitimate, not just a blogger or wikipedia:
- Consider museum sites
- Any sites that end in .edu
- Any documentaries on youtube, netflix, amazon? Expand your search!
- Try to find evidence/explanation of your photographer’s style in your resources in order to create your original shots. You’ll want more that just your eye finding the common traits. Look for a source!
Artist as Mentor Slideshow Requirements
Student example in pdf form
Evaluation Form/Grade Sheet
Friday Photo Challenge!! Over the weekend, you will find/make/take a shot that best illustrates the topic.
Your theme for this weekend is ......"Opposites"
The opportunity to capture an opposite is endless.
Textures...smooth vs rough, Colors….light vs dark, black vs white, Complementary colors, Size...large vs small, Age/Amount of wear and tear…..new vs old, fancy vs leisure, expensive vs cheap….
Here is a link to push your ideas but by no means a photo to copy! Use your brain to come up with something new and creative.
Your Top Shot should be:
- from an interesting angle
- in focus where intended to be in focus (the star of the photo)
- uses a composition technique
- is original....not a copy of examples.....
Things to do:
- Mood Portraits
- Mood Portrait Weebly Post (4/25/19)
- Picture Frames (4/29/19)
- Screen Assignment (5/1/19)
- Picture Frames Weebly Post (5/8/19)
- Forced Perspective (5/9/19)
- Weebly comments for Mood Portraits (5/14/19)
- NEW Weebly comments for Break the Frame (5/22/19)
- NEW Artist as Mentor Slideshow Requirements (5/28/19 has example and Grade sheet)
Thursday, 5/30/19 Red 52 Schedule
Congratulations Kaitlin on your Top Shot for the Forgotten/Abandoned Challenge! Look at that composition and angle! Excellent Shot!
More Artist as Mentor Tips to consider:
As you plan to recreate three of your photographers shots, think of the following:
Artist as Mentor Slideshow Requirements
Student example in pdf form
Evaluation Form/Grade Sheet
Things to do:
As you plan to recreate three of your photographers shots, think of the following:
- Angle of camera and distance from subject
- Lighting
- Props/Clothing/Background
- Depth of Field
Artist as Mentor Slideshow Requirements
Student example in pdf form
Evaluation Form/Grade Sheet
Things to do:
- Mood Portraits
- Mood Portrait Weebly Post (4/25/19)
- Picture Frames (4/29/19)
- Screen Assignment (5/1/19)
- Picture Frames Weebly Post (5/8/19)
- Forced Perspective (5/9/19)
- Weebly comments for Mood Portraits (5/14/19)
- NEW Weebly comments for Break the Frame (5/22/19)
- NEW Artist as Mentor Slideshow Requirements (5/28/19 has example and Grade sheet)
Wednesday, 5/29/19
Bellwork: Vote for the Top Shot: Abandoned or Forgotten
Be sure to look at composition and technical aspects like focus, exposure, etc.
Artist as Mentor Tips to consider:
Artist as Mentor Slideshow Requirements
Student example in pdf form
Evaluation Form/Grade Sheet
Things to do:
Be sure to look at composition and technical aspects like focus, exposure, etc.
Artist as Mentor Tips to consider:
- Create a Google Doc for any works cited to paste for later.
- Find the five photos you wish to share done by the artist. Choose five that you can find the required information for the presentation. Make those slides and add your information to the Notes section of your slideshow. Don't forget your work cited information......at least 3 credible sources.
- Find the required information/interesting facts about your artist. Remember, your slide may have the facts in bullet form but you'll want Notes for you to fill in the extra details.
- Start planning which three photos you will recreate.....do you need a list of props/places in order to plan accordingly? What lighting did they use? What camera angle?
Artist as Mentor Slideshow Requirements
Student example in pdf form
Evaluation Form/Grade Sheet
Things to do:
- Mood Portraits
- Mood Portrait Weebly Post (4/25/19)
- Picture Frames (4/29/19)
- Screen Assignment (5/1/19)
- Picture Frames Weebly Post (5/8/19)
- Forced Perspective (5/9/19)
- Weebly comments for Mood Portraits (5/14/19)
- NEW Weebly comments for Break the Frame (5/22/19)
- NEW Artist as Mentor Slideshow Requirements (5/28/19 has example and Grade sheet)
Tuesday, 5/28/19
Use this time to edit/email me your
Top Shot: Abandoned/Forgotten while I am getting Photo 1 students started.
I will be presenting your final project/exam as soon as they are situated.
Artist as Mentor Slideshow Requirements
Student example in pdf form
Evaluation Form/Grade Sheet
Things to do:
Top Shot: Abandoned/Forgotten while I am getting Photo 1 students started.
I will be presenting your final project/exam as soon as they are situated.
Artist as Mentor Slideshow Requirements
Student example in pdf form
Evaluation Form/Grade Sheet
Things to do:
- Mood Portraits
- Mood Portrait Weebly Post (4/25/19)
- Picture Frames (4/29/19)
- Screen Assignment (5/1/19)
- Picture Frames Weebly Post (5/8/19)
- Forced Perspective (5/9/19)
- Weebly comments for Mood Portraits (5/14/19)
- NEW Weebly comments for Break the Frame (5/22/19)
- NEW Artist as Mentor Slideshow Requirements (5/28/19 has example and Grade sheet)
Friday, 5/24/19
Friday Photo Challenge!! Over the weekend, you will find/make/take a shot that best illustrates the topic.
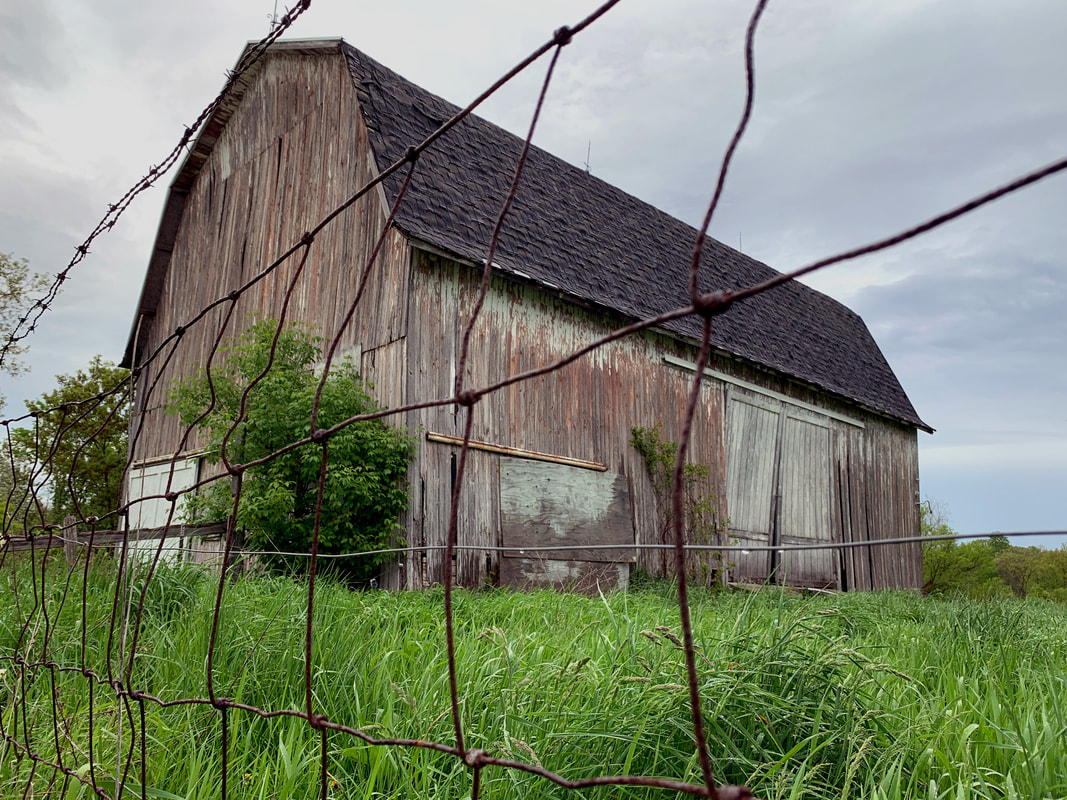
Your theme for this weekend is ......"Abandoned or Forgotten"
What people, places, or things are abandoned?
What people, places, or things are forgotten?
How can you capture one in a Top Shot?
Your Top Shot should be:
Don't forget to post your Weebly comments assignment for Break the Frame/Picture Frames project.
(Remember to screenshot the first comment BEFORE your post it and paste it into an email, then repeat for the second.) EMAILED TO ME BY THE END OF THE HOUR TODAY!
Possibilities for comments:
Your Forced Perspective Shots should be completed by today.
(This includes your weebly post with artist statement!)
SHOW ME FOR CREDIT WHEN YOU ARE DONE!
Here is your Artist Statement/Weebly Post:
Post your 3 favorite shots from each group, edited (Only for color/exposure/cropping! No compositing on this one!):
Artist Statement requirements:
At this point you should have all 8 successful shots at this point. Use today to edit for exposure and tone and publish your TOP 3 (1 from each category) to your weebly site!
If you have everything else done on the Things to Do list, and cannot shoot today, start the Dispersion assignment below!
Things to do:
Looking for something to do? No shots to work with? Move on the next Photoshop Project. You will master the technique with one or more of the tutorials, then use a shot of your own!
Examples of Dispersion
Dispersion Assignment
Your theme for this weekend is ......"Abandoned or Forgotten"
What people, places, or things are abandoned?
What people, places, or things are forgotten?
How can you capture one in a Top Shot?
Your Top Shot should be:
- from an interesting angle
- in focus where intended to be in focus (the star of the photo)
- uses a composition technique
- is original....not a copy of examples.....
Don't forget to post your Weebly comments assignment for Break the Frame/Picture Frames project.
(Remember to screenshot the first comment BEFORE your post it and paste it into an email, then repeat for the second.) EMAILED TO ME BY THE END OF THE HOUR TODAY!
Possibilities for comments:
- Technical aspects of the lighting or the shots.
- Photoshop aspects (editing or layout)
- Question or comment for the photographer about the process.
Your Forced Perspective Shots should be completed by today.
(This includes your weebly post with artist statement!)
SHOW ME FOR CREDIT WHEN YOU ARE DONE!
Here is your Artist Statement/Weebly Post:
Post your 3 favorite shots from each group, edited (Only for color/exposure/cropping! No compositing on this one!):
- With object
- With people
- With setting (architecture/nature/background)
Artist Statement requirements:
- Explain what forced perspective means.
- Explain what was the hardest part of this assignment and how you solved it/overcame it.
- What did you learn/improve upon with this project?
- What is your favorite shot and why?
At this point you should have all 8 successful shots at this point. Use today to edit for exposure and tone and publish your TOP 3 (1 from each category) to your weebly site!
If you have everything else done on the Things to Do list, and cannot shoot today, start the Dispersion assignment below!
Things to do:
- Mood Portraits
- Mood Portrait Weebly Post (4/25/19)
- Picture Frames (4/29/19)
- Screen Assignment (5/1/19)
- NEW Picture Frames Weebly Post (5/8/19)
- NEW Forced Perspective (5/9/19)
- NEW Weebly comments for Mood Portraits (5/14/19)
- NEW Weebly comments for Break the Frame (5/22/19)
Looking for something to do? No shots to work with? Move on the next Photoshop Project. You will master the technique with one or more of the tutorials, then use a shot of your own!
Examples of Dispersion
Dispersion Assignment
Thursday, 5/23/19
Bellwork: Weebly comments assignment for Break the Frame/Picture Frames project.
(Remember to screenshot the first comment BEFORE your post it and paste it into an email, then repeat for the second.) EMAILED TO ME BY FRIDAY!
Possibilities for comments:
Your Forced Perspective Shots should be completed by Friday.
Seniors, yours, as your exam, needs to be done by TODAY!! (Your weebly post AND a folder of ALL 8 of your shots in your folder for this class.)
(This includes your weebly post with artist statement!)
SHOW ME FOR CREDIT WHEN YOU ARE DONE!
Here is your Artist Statement/Weebly Post:
Post your 3 favorite shots from each group, edited (Only for color/exposure/cropping! No compositing on this one!):
Artist Statement requirements:
At this point you should have all 8 successful shots at this point. Use today to edit for exposure and tone and publish your TOP 3 (1 from each category) to your weebly site!
If you have everything else done on the Things to Do list, and cannot shoot today, start the Dispersion assignment below!
Things to do:
Looking for something to do? No shots to work with? Move on the next Photoshop Project. You will master the technique with one or more of the tutorials, then use a shot of your own!
Examples of Dispersion
Dispersion Assignment
(Remember to screenshot the first comment BEFORE your post it and paste it into an email, then repeat for the second.) EMAILED TO ME BY FRIDAY!
Possibilities for comments:
- Technical aspects of the lighting or the shots.
- Photoshop aspects (editing or layout)
- Question or comment for the photographer about the process.
Your Forced Perspective Shots should be completed by Friday.
Seniors, yours, as your exam, needs to be done by TODAY!! (Your weebly post AND a folder of ALL 8 of your shots in your folder for this class.)
(This includes your weebly post with artist statement!)
SHOW ME FOR CREDIT WHEN YOU ARE DONE!
Here is your Artist Statement/Weebly Post:
Post your 3 favorite shots from each group, edited (Only for color/exposure/cropping! No compositing on this one!):
- With object
- With people
- With setting (architecture/nature/background)
Artist Statement requirements:
- Explain what forced perspective means.
- Explain what was the hardest part of this assignment and how you solved it/overcame it.
- What did you learn/improve upon with this project?
- What is your favorite shot and why?
At this point you should have all 8 successful shots at this point. Use today to edit for exposure and tone and publish your TOP 3 (1 from each category) to your weebly site!
If you have everything else done on the Things to Do list, and cannot shoot today, start the Dispersion assignment below!
Things to do:
- Mood Portraits
- Mood Portrait Weebly Post (4/25/19)
- Picture Frames (4/29/19)
- Screen Assignment (5/1/19)
- NEW Picture Frames Weebly Post (5/8/19)
- NEW Forced Perspective (5/9/19)
- NEW Weebly comments for Mood Portraits (5/14/19)
- NEW Weebly comments for Break the Frame (5/22/19)
Looking for something to do? No shots to work with? Move on the next Photoshop Project. You will master the technique with one or more of the tutorials, then use a shot of your own!
Examples of Dispersion
Dispersion Assignment
Wednesday, 5/22/19
Seniors, a print folder was shared with you. I will send the end of the day, today, with pickup on Thurs./Fri.
Bellwork: Weebly comments assignment for Break the Frame/Picture Frames project.
(Remember to screenshot the first comment BEFORE your post it and paste it into an email, then repeat for the second.) EMAILED TO ME BY FRIDAY!
Possibilities for comments:
Congratulations Ramone on your Top Shot! Be ready Photo 2 peeps, Photo 1 is giving some shots to choose from!!!
(Remember to screenshot the first comment BEFORE your post it and paste it into an email, then repeat for the second.) EMAILED TO ME BY FRIDAY!
Possibilities for comments:
- Technical aspects of the lighting or the shots.
- Photoshop aspects (editing or layout)
- Question or comment for the photographer about the process.
Congratulations Ramone on your Top Shot! Be ready Photo 2 peeps, Photo 1 is giving some shots to choose from!!!
Your Forced Perspective Shots should be completed by Friday.
Seniors, yours, as your exam, needs to be done by Thursday (This includes your weebly post with artist statement!)
SHOW ME FOR CREDIT WHEN YOU ARE DONE!
Here is your Artist Statement/Weebly Post:
Post your 3 favorite shots from each group, edited (Only for color/exposure/cropping! No compositing on this one!):
Artist Statement requirements:
At this point you should have all 8 successful shots at this point. Use today to edit for exposure and tone and publish your weebly site!
If you have everything else done on the Things to Do list, and cannot shoot today, start the Dispersion assignment below!
Things to do:
Looking for something to do? No shots to work with? Move on the next Photoshop Project. You will master the technique with one or more of the tutorials, then use a shot of your own!
Examples of Dispersion
Dispersion Assignment
Seniors, yours, as your exam, needs to be done by Thursday (This includes your weebly post with artist statement!)
SHOW ME FOR CREDIT WHEN YOU ARE DONE!
Here is your Artist Statement/Weebly Post:
Post your 3 favorite shots from each group, edited (Only for color/exposure/cropping! No compositing on this one!):
- With object
- With people
- With setting (architecture/nature/background)
Artist Statement requirements:
- Explain what forced perspective means.
- Explain what was the hardest part of this assignment and how you solved it/overcame it.
- What did you learn/improve upon with this project?
- What is your favorite shot and why?
At this point you should have all 8 successful shots at this point. Use today to edit for exposure and tone and publish your weebly site!
If you have everything else done on the Things to Do list, and cannot shoot today, start the Dispersion assignment below!
Things to do:
- Mood Portraits
- Mood Portrait Weebly Post (4/25/19)
- Picture Frames (4/29/19)
- Screen Assignment (5/1/19)
- NEW Picture Frames Weebly Post (5/8/19)
- NEW Forced Perspective (5/9/19)
- NEW Weebly comments for Mood Portraits (5/14/19)
- NEW Weebly comments for Break the Frame (5/22/19)
Looking for something to do? No shots to work with? Move on the next Photoshop Project. You will master the technique with one or more of the tutorials, then use a shot of your own!
Examples of Dispersion
Dispersion Assignment
Tuesday, 5/21/19
Seniors, a print folder was shared with you. I will send the end of the day, Wednesday, with pickup on Thurs./Fri.
Bellwork: Vote for the Top Shot: Glossy/Shiny
Be sure to look at composition and technical aspects like focus, exposure, etc.
Your Forced Perspective Shots should be completed by Friday.
Seniors, yours, as your exam, needs to be done by Thursday (This includes your weebly post with artist statement!)
Here is your Artist Statement/Weebly Post:
Post your 3 favorite shots from each group, edited (Only for color/exposure/cropping! No compositing on this one!):
Artist Statement requirements:
At this point you should have at least 6 successful shots at this point. Use today to get more!
If you have everything else done on the Things to Do list, and cannot shoot today, start the Dispersion assignment below!
Things to do:
Looking for something to do? No shots to work with? Move on the next Photoshop Project. You will master the technique with one or more of the tutorials, then use a shot of your own!
Examples of Dispersion
Dispersion Assignment
Be sure to look at composition and technical aspects like focus, exposure, etc.
Your Forced Perspective Shots should be completed by Friday.
Seniors, yours, as your exam, needs to be done by Thursday (This includes your weebly post with artist statement!)
Here is your Artist Statement/Weebly Post:
Post your 3 favorite shots from each group, edited (Only for color/exposure/cropping! No compositing on this one!):
- With object
- With people
- With setting (architecture/nature/background)
Artist Statement requirements:
- Explain what forced perspective means.
- Explain what was the hardest part of this assignment and how you solved it/overcame it.
- What did you learn/improve upon with this project?
- What is your favorite shot and why?
At this point you should have at least 6 successful shots at this point. Use today to get more!
If you have everything else done on the Things to Do list, and cannot shoot today, start the Dispersion assignment below!
Things to do:
- Mood Portraits
- Mood Portrait Weebly Post (4/25/19)
- Picture Frames (4/29/19)
- Screen Assignment (5/1/19)
- NEW Picture Frames Weebly Post (5/8/19)
- NEW Forced Perspective (5/9/19)
- NEW Weebly comments for Mood Portraits (5/14/19)
Looking for something to do? No shots to work with? Move on the next Photoshop Project. You will master the technique with one or more of the tutorials, then use a shot of your own!
Examples of Dispersion
Dispersion Assignment
Monday, 5/20/19
Bellwork Tip: Your Forced Perspective Shots should be completed by Friday.
Seniors, yours, as your exam, needs to be done by Thursday.
There is still a weebly post and artist statement coming your way tomorrow!
At this point you should have at least 4 successful shots at this point. Use today to get more!
Don't forget to submit your Glossy/Shiny edited shot by the end of the hour! You have more competition this time :) I hope you captured a good one!
If you have everything else done on the Things to Do list, and cannot shoot today, start the Dispersion assignment below!
Things to do:
Looking for something to do? No shots to work with? Move on the next Photoshop Project. You will master the technique with one or more of the tutorials, then use a shot of your own!
Examples of Dispersion
Dispersion Assignment
Seniors, yours, as your exam, needs to be done by Thursday.
There is still a weebly post and artist statement coming your way tomorrow!
At this point you should have at least 4 successful shots at this point. Use today to get more!
Don't forget to submit your Glossy/Shiny edited shot by the end of the hour! You have more competition this time :) I hope you captured a good one!
If you have everything else done on the Things to Do list, and cannot shoot today, start the Dispersion assignment below!
Things to do:
- Mood Portraits
- Mood Portrait Weebly Post (4/25/19)
- Picture Frames (4/29/19)
- Screen Assignment (5/1/19)
- NEW Picture Frames Weebly Post (5/8/19)
- NEW Forced Perspective (5/9/19)
- NEW Weebly comments for Mood Portraits (5/14/19)
Looking for something to do? No shots to work with? Move on the next Photoshop Project. You will master the technique with one or more of the tutorials, then use a shot of your own!
Examples of Dispersion
Dispersion Assignment
Friday, 5/17/19
Your Friday Photo Challenge for unSeniors is 'Shiny/Glossy'. See Photo 1 for examples. Seniors, you are welcome to participate but it isn't necessary. Enjoy Prom!
Progress chat for Forced Perspective
Weebly comments assignment for Mood Portraits (Remember to screenshot the first comment BEFORE your post it and paste it into an email, then repeat for the second.) EMAILED TO ME BY FRIDAY!
Possibilities for comments:
Things to do:
Looking for something to do? No shots to work with? Move on the next Photoshop Project. You will master the technique with one or more of the tutorials, then use a shot of your own!
Examples of Dispersion
Dispersion Assignment
Progress chat for Forced Perspective
- Problems/Solutions
- Goal Setting
Weebly comments assignment for Mood Portraits (Remember to screenshot the first comment BEFORE your post it and paste it into an email, then repeat for the second.) EMAILED TO ME BY FRIDAY!
Possibilities for comments:
- Technical aspects of the lighting or the shots.
- Photoshop aspects (editing or layout)
- Question or comment for the photographer about the process.
Things to do:
- Mood Portraits
- Mood Portrait Weebly Post (4/25/19)
- Picture Frames (4/29/19)
- Screen Assignment (5/1/19)
- NEW Picture Frames Weebly Post (5/8/19)
- NEW Forced Perspective (5/9/19)
- NEW Weebly comments for Mood Portraits (5/14/19)
Looking for something to do? No shots to work with? Move on the next Photoshop Project. You will master the technique with one or more of the tutorials, then use a shot of your own!
Examples of Dispersion
Dispersion Assignment
Thursday, 5/16/19 Red 52 Schedule
Bellwork tip:
When shooting your forced perspective and trying to maintain focus, use the following tips to troubleshoot:
Progress chat for Forced Perspective
Weebly comments assignment for Mood Portraits (Remember to screenshot the first comment BEFORE your post it and paste it into an email, then repeat for the second.) EMAILED TO ME BY FRIDAY!
Possibilities for comments:
Things to do:
Looking for something to do? No shots to work with? Move on the next Photoshop Project. You will master the technique with one or more of the tutorials, then use a shot of your own!
Examples of Dispersion
Dispersion Assignment
When shooting your forced perspective and trying to maintain focus, use the following tips to troubleshoot:
- High #'d fstop for a small aperture/deeper depth of field.
- High lit areas (sunlight)
- Switch from AV to Manual if you are more comfortable...just remember to compensate for the smaller aperture with a higher ISO # and possible a longer shutter speed (1/60 or higher when shooting people/animals)
- Check your focus setting! Is it is auto or manual?
Progress chat for Forced Perspective
- Problems/Solutions
- Goal Setting
Weebly comments assignment for Mood Portraits (Remember to screenshot the first comment BEFORE your post it and paste it into an email, then repeat for the second.) EMAILED TO ME BY FRIDAY!
Possibilities for comments:
- Technical aspects of the lighting or the shots.
- Photoshop aspects (editing or layout)
- Question or comment for the photographer about the process.
Things to do:
- Mood Portraits
- Mood Portrait Weebly Post (4/25/19)
- Picture Frames (4/29/19)
- Screen Assignment (5/1/19)
- NEW Picture Frames Weebly Post (5/8/19)
- NEW Forced Perspective (5/9/19)
- NEW Weebly comments for Mood Portraits (5/14/19)
Looking for something to do? No shots to work with? Move on the next Photoshop Project. You will master the technique with one or more of the tutorials, then use a shot of your own!
Examples of Dispersion
Dispersion Assignment
Wednesday, 5/15/19
CONGRATULATIONS LEXI ON YOUR TOP SHOT!
Weebly comments assignment for Mood Portraits (Remember to screenshot the first comment BEFORE your post it and paste it into an email, then repeat for the second.) EMAILED TO ME BY FRIDAY!
Possibilities for comments:
Things to do:
Possibilities for comments:
- Technical aspects of the lighting or the shots.
- Photoshop aspects (editing or layout)
- Question or comment for the photographer about the process.
Things to do:
- Mood Portraits
- Mood Portrait Weebly Post (4/25/19)
- Picture Frames (4/29/19)
- Screen Assignment (5/1/19)
- NEW Picture Frames Weebly Post (5/8/19)
- NEW Forced Perspective (5/9/19)
- NEW Weebly comments for Mood Portraits (5/14/19)
Tuesday, 5/14/19 Red 52 Schedule
Vote for the Top Shot here. Look for the shot that captures your attention AND uses composition and photography techniques (focus, viewpoint, backgrounds) successfully.
Weebly comments assignment for Mood Portraits (Remember to screenshot the first comment BEFORE your post it and paste it into an email, then repeat for the second.) EMAILED TO ME BY FRIDAY!
Possibilities for comments:
Things to do:
Weebly comments assignment for Mood Portraits (Remember to screenshot the first comment BEFORE your post it and paste it into an email, then repeat for the second.) EMAILED TO ME BY FRIDAY!
Possibilities for comments:
- Technical aspects of the lighting or the shots.
- Photoshop aspects (editing or layout)
- Question or comment for the photographer about the process.
Things to do:
- Mood Portraits
- Mood Portrait Weebly Post (4/25/19)
- Picture Frames (4/29/19)
- Screen Assignment (5/1/19)
- NEW Picture Frames Weebly Post (5/8/19)
- NEW Forced Perspective (5/9/19)
- NEW Weebly comments for Mood Portraits (5/14/19)
Monday, 5/13/19
Bellwork: Title your entry, "Forced Perspective Tip #1"
Remember to set your aperture to deep depth of field (f16 or higher). However, this makes for a really small aperture which lets in a small amount of light.
You'll need to shoot on a sunny day or well lit interior to make up for that.
Experiment with how low your aperture # can come down and still achieve the focus throughout your design. YOUR ISO (Sensitivity) MAY NEED TO BE TURNED UP.....800 OR SO....
Your goals for today:
Things to do:
Remember to set your aperture to deep depth of field (f16 or higher). However, this makes for a really small aperture which lets in a small amount of light.
You'll need to shoot on a sunny day or well lit interior to make up for that.
Experiment with how low your aperture # can come down and still achieve the focus throughout your design. YOUR ISO (Sensitivity) MAY NEED TO BE TURNED UP.....800 OR SO....
Your goals for today:
- Edit/Email your Top Shot: NATURE-EMAIL ME THE JPEG!!!
- Plan and shoot for your Forced Perspective-Work together!!!
- Post Framing Shot AND artist statement to your weebly site.
- Complete any assignments from the Things to Do list that are still incomplete.
Things to do:
- Mood Portraits
- Mood Portrait Weebly Post (4/25/19)
- Picture Frames (4/29/19)
- Screen Assignment (5/1/19)
- NEW Picture Frames Weebly Post (5/8/19)
- NEW Forced Perspective (5/9/19)
Friday, 5/10/19
Bellwork: Title your entry, "How did they do that? #2"
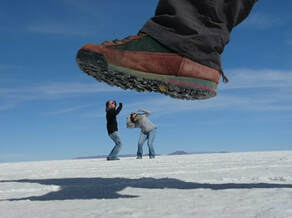
Analyze the image below. It was not created in Photoshop with different images. In your entry explain how you think it was shot.
Analyze the image below. It was not created in Photoshop with different images. In your entry explain how you think it was shot.
Demonstration of Forced Perspective Shooting
NEW Friday Photo Challenge!!!
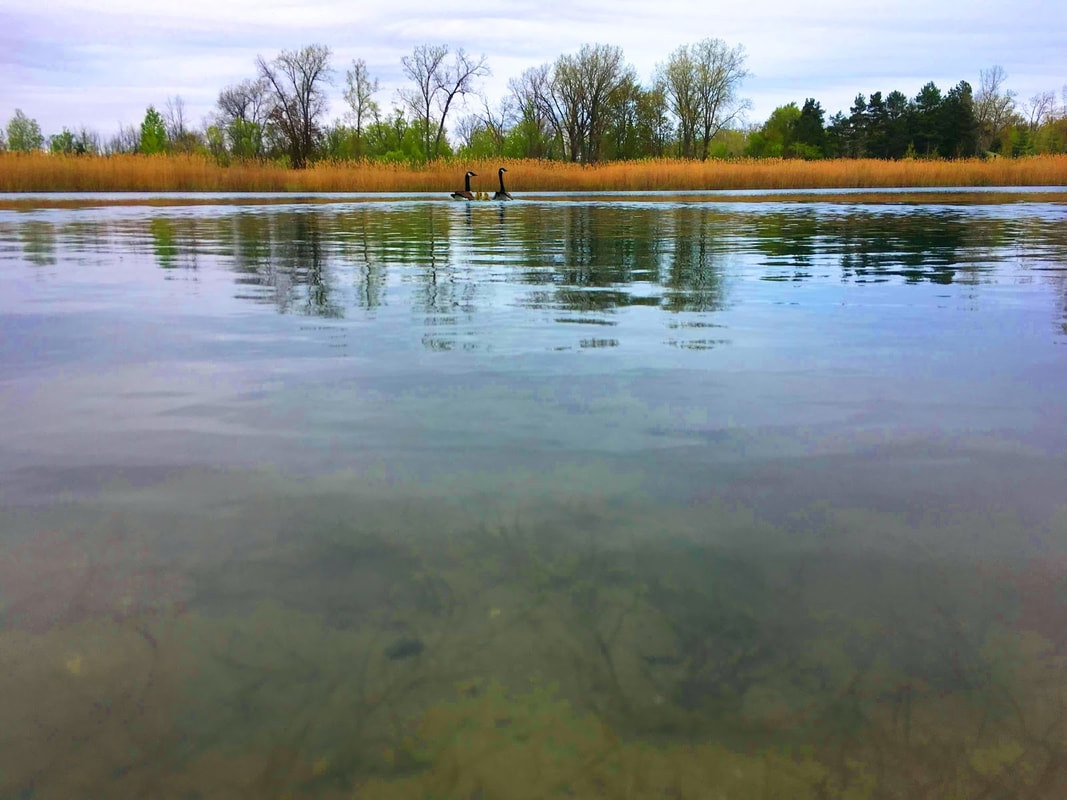
THEME: NATURE (Link to National Geographic examples)
As you look through the examples, notice the Depth of Field.....deep for landscapes, details sharp from foreground to background and shallow for for close ups of plants or animals.
Remember, the higher the fstop #, the smaller the aperture, the deeper the focus.
The lower the fstop#, the wider the aperture, the shallow-er the focus ;)
Think Vantage Point-Shooting from angles!
Think Background Clutter and Mergers
Only Color, Tone and/or Filter/Adjustment Layer edits on this one. No compositing!
Things to do:
NEW Friday Photo Challenge!!!
THEME: NATURE (Link to National Geographic examples)
As you look through the examples, notice the Depth of Field.....deep for landscapes, details sharp from foreground to background and shallow for for close ups of plants or animals.
Remember, the higher the fstop #, the smaller the aperture, the deeper the focus.
The lower the fstop#, the wider the aperture, the shallow-er the focus ;)
Think Vantage Point-Shooting from angles!
Think Background Clutter and Mergers
Only Color, Tone and/or Filter/Adjustment Layer edits on this one. No compositing!
Things to do:
- Mood Portraits
- Mood Portrait Weebly Post (4/25/19)
- Picture Frames (4/29/19)
- Screen Assignment (5/1/19)
- NEW Picture Frames Weebly Post (5/8/19)
- NEW Forced Perspective (5/9/19)
Thursday, 5/9/19 Red 52 Schedule
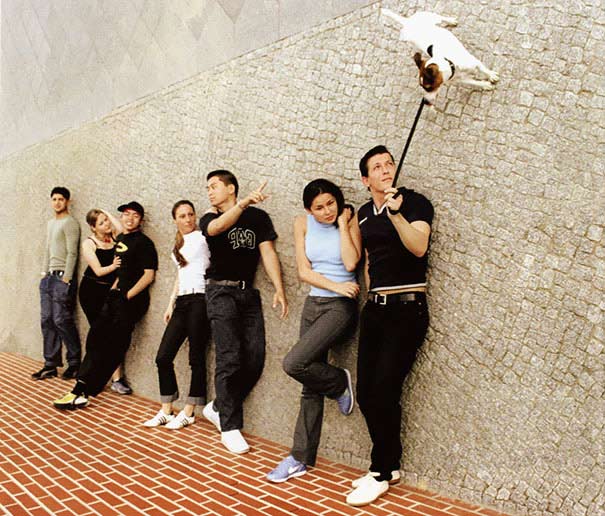
Bellwork: Title your entry, "How did they do that?"
Analyze the image below. It was not created in Photoshop with different images. In your entry explain how you think it was shot.
Analyze the image below. It was not created in Photoshop with different images. In your entry explain how you think it was shot.
Congratulations to Meeghin for the Top Shot: Phobia this week!!
NEW Photo Project: Forced Perspective
Things to do:
- Mood Portraits
- Mood Portrait Weebly Post (4/25/19)
- Picture Frames (4/29/19)
- Screen Assignment (5/1/19)
- NEW Picture Frames Weebly Post (5/8/19)
- NEW Forced Perspective (5/9/19)
Wednesday, 5/8/19
Bellwork: Vote for the Top Shot here. Choose the most creative interpretation that is also done technically well (exposure and composition)
Weebly post for 'Break the Frame' assignment:
Things to do:
Weebly post for 'Break the Frame' assignment:
- Post jpeg of final composition
- Explain the process of creating this piece.
- Explain the 'story/meaning' behind your piece.
- What was the most difficult step in the process and how did you overcome/solve it?
- What is something new you discovered from this assignment?
- What is you favorite part of this final piece?
Things to do:
- Mood Portraits
- NEW ASSIGNMENT! Mood Portrait Weebly Post (4/25/19)
- NEW ASSIGNMENT! Picture Frames (4/29/19)
- NEW Screen Assignment (5/1/19)
- NEW Picture Frames Weebly Post (5/8/19)
Monday, 5/6/19 and Tuesday, 5/7/19 Red 52 Schedule
Bellwork: No journal entry, just a reality check! If you do not have your photos for the Frame project by now, you need to plan on shooting at school, during this hour, ASAP! You have run out of time to coordinate a photo shoot after school, off school grounds.
Your goals for today:
Things to do:
Your goals for today:
- Edit/Email your Top Shot: Phobias-EMAIL ME THE JPEG!!!
- You should have your shots for your Framing. IF NOT, MAKE A PLAN FOR A SCHOOL PHOTO SHOOT AND GET IT DONE!
- Get as far as you can editing for the Framing Project.
- Post Framing Shot to your weebly site.
- Complete any assignments from the Things to Do list that are still incomplete.
Things to do:
- Mood Portraits
- NEW ASSIGNMENT! Mood Portrait Weebly Post (4/25/19)
- NEW ASSIGNMENT! Picture Frames (4/29/19)
- NEW Screen Assignment (5/1/19)
- Edit and submit Top Shot: Phobia
Friday, 5/3/19
No bellwork today! Get started right away! If you do not have the shots you planned for your Picture Frame shot, shoot some practice shots and put it together so you know the process and can work through problems...both shooting and Photoshop.
NEW Friday Photo Challenge!!!
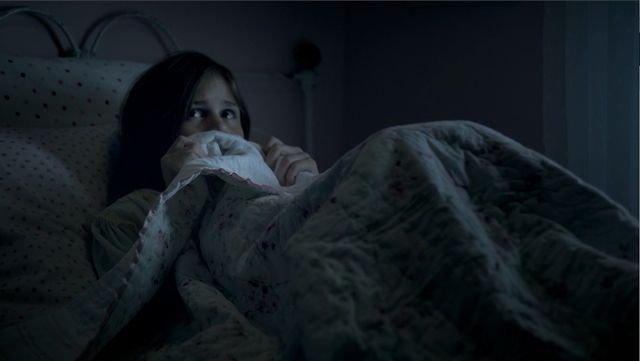
THEME: PHOBIA (Link to Top 100 phobias list)
While this challenge is ripe for photomanipulation, I want you to push yourself to create a shot/story with your camera. Any editing you do should just be retouching/photoediting NOT compositing.
See example below that illustrates fear of the dark. Think about how the lighting was achieved in this shot.....
NEW Friday Photo Challenge!!!
THEME: PHOBIA (Link to Top 100 phobias list)
While this challenge is ripe for photomanipulation, I want you to push yourself to create a shot/story with your camera. Any editing you do should just be retouching/photoediting NOT compositing.
See example below that illustrates fear of the dark. Think about how the lighting was achieved in this shot.....
How will you illustrate what the phobia so that people understand that it is something that is feared and not just a picture?
How might lighting play a role in telling your story?
Close up? Medium Shot? Wide shot? (Do you need to be close up to read the expression of a model?)
Does the background need to be included to tell the story? Does EVERYTHING within the frame contribute to the story?
Angle? Point of view?
Focus?
BE CREATIVE! USE YOUR COMPOSITION TECHNIQUES!
Interpret it any way you want and create a shot that will catch our attention with its quality and theme. Think about composition and quality (focus/exposure).
Things to do:
- Mood Portraits
- NEW ASSIGNMENT! Mood Portrait Weebly Post (4/25/19)
- NEW ASSIGNMENT! Picture Frames (4/29/19)
- NEW Screen Assignment (5/1/19)
- Plan for Phobia Challenge
Thursday, 5/2/19 Red 52 Schedule
Bellwork: Title your entry, "Transform trick for perspective"
With the bounding box open on an image, you can resize to make it look like it goes back in space/on an angle (perspective). What key do you hold down as you move a corner anchor on the bounding box to achieve this?
Things to do:
With the bounding box open on an image, you can resize to make it look like it goes back in space/on an angle (perspective). What key do you hold down as you move a corner anchor on the bounding box to achieve this?
Things to do:
- Mood Portraits
- NEW ASSIGNMENT! Mood Portrait Weebly Post (4/25/19)
- NEW ASSIGNMENT! Picture Frames (4/29/19)
- NEW Screen Assignment (5/1/19)
Wednesday, 5/1/19
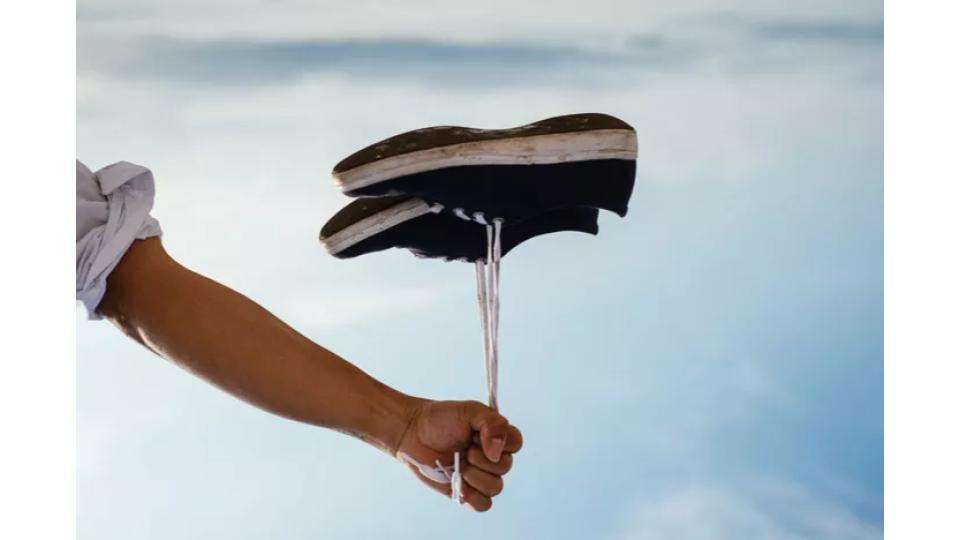
Bellwork: Title your entry, "Analyze Photos"
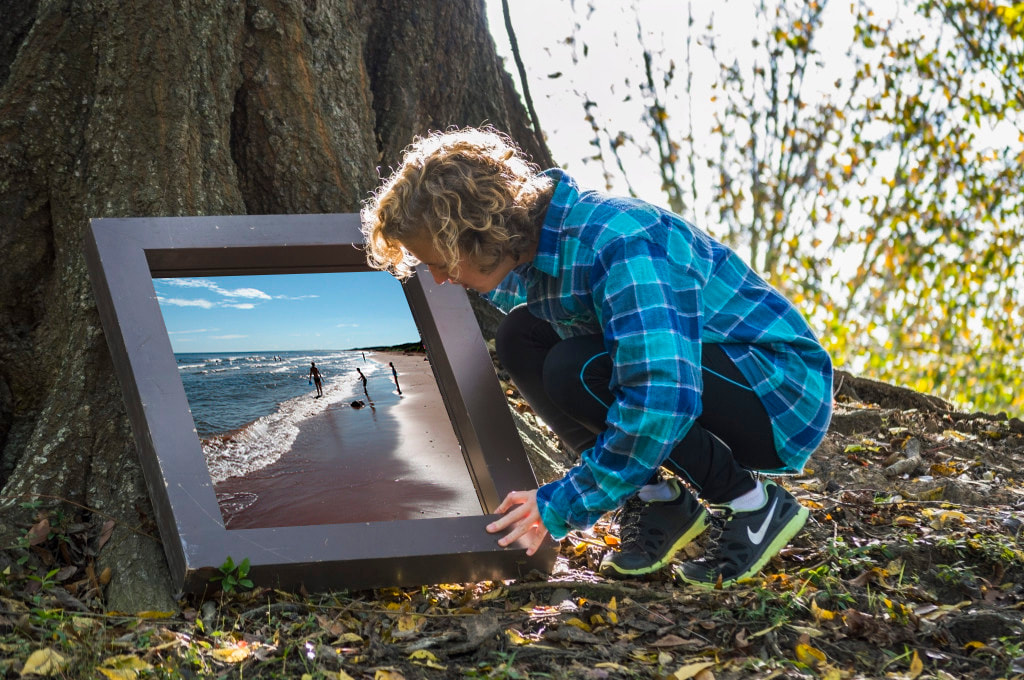
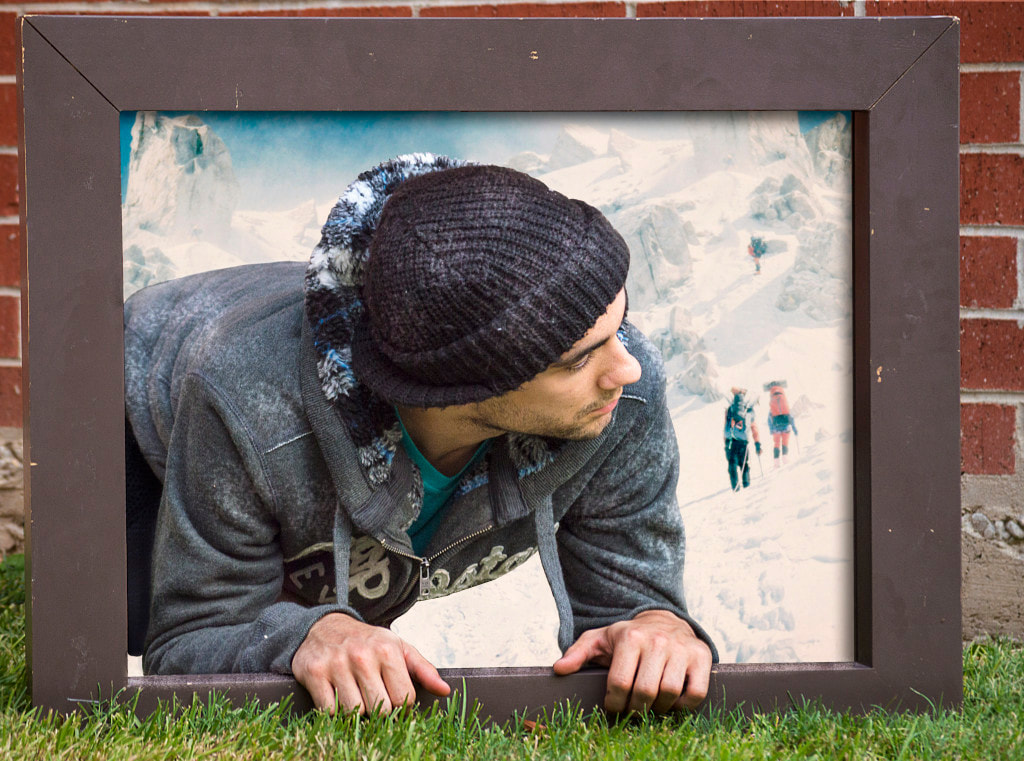
Look carefully at the photos below. Compare the two.
Be able to discuss the difference between the two. Jot down your idea in your journal.
Look carefully at the photos below. Compare the two.
Be able to discuss the difference between the two. Jot down your idea in your journal.

|
|
Stop your process and do the Screen assignment! It will open your eyes to the process of placing your pictures within the frame AND help you with perspective manipulation too!
Things to do:
Things to do:
- Mood Portraits
- NEW ASSIGNMENT! Mood Portrait Weebly Post (4/25/19)
- NEW ASSIGNMENT! Picture Frames (4/29/19)
- NEW Screen Assignment (5/1/19) Watch the Transform tricks video and create your own 'Screen' assignment using ONE of the jpegs below. Your challenge is:
- To transform a picture using shear or perspective perfectly fit the angle of the screen. (Use a layer mask....try making a selection first like he did in the video and then clicking on the layer mask. Also, try unlinking the layer mask so that you can move the picture around under the mask until it fits.
- To use a gradient on the selection so that it looks as if there is a glare on the screen consistent with the lighting or angle in the room.
|
| ||||
Tuesday, 4/30/19 Red 52 Schedule
Bellwork: Title your entry, "Process"
Analyze the picture below and see if you can determine the following:
Analyze the picture below and see if you can determine the following:
- How many different shots are being used?
- What are they?
- Briefly explain HOW it may have been pieced together in Photoshop.
Things to do:
- Mood Portraits
- NEW ASSIGNMENT! Mood Portrait Weebly Post (4/25/19)
- NEW ASSIGNMENT! Picture Frames (4/29/19)
Monday, 4/29/19
I CAN'T BELIEVE I DIDN'T POST YOUR PHOTO CHALLENGE ON FRIDAY!!!!! :( IT WAS A REALLY COOL THEME!
ALAS, I'LL SAVE IT FOR THIS FRIDAY......
Bellwork: Title your entry, "Places you could go"
If you could go, where would it be? Anywhere.....in the world? in the universe? in fiction?
List 3 possibilities
Discussion of new Photo Project-"Picture Frames"
Things to do:
ALAS, I'LL SAVE IT FOR THIS FRIDAY......
Bellwork: Title your entry, "Places you could go"
If you could go, where would it be? Anywhere.....in the world? in the universe? in fiction?
List 3 possibilities
Discussion of new Photo Project-"Picture Frames"
- Make a sketch of your idea first and show it to me so we can discuss possibilities and troubleshoot steps.
Things to do:
- Mood Portraits
- NEW ASSIGNMENT! Mood Portrait Weebly Post (4/25/19)
- NEW ASSIGNMENT! Picture Frames (4/29/19)
Friday, 4/26/19
No Bellwork! Today is the last day of the marking period! Everything on the agenda is included on this marking period EXCEPT MOOD PORTRAITS/WEEBLY POST.
SHOW ME POINTS FOR CREDIT AS SOON AS YOU COMPLETE SOMETHING!
If you are all done with everything, see me. I have jobs for you :)
NEW ASSIGNMENT! MOOD PORTRAIT WEEBLY POST
Things to do:
SHOW ME POINTS FOR CREDIT AS SOON AS YOU COMPLETE SOMETHING!
If you are all done with everything, see me. I have jobs for you :)
NEW ASSIGNMENT! MOOD PORTRAIT WEEBLY POST
- Post your final set of portraits
- List the emotions you tried to convey for each portrait.
- Explain what challenges you encountered while shooting this project and how you conquered them.
- Explain what challenges you encountered in post editing (photoshop) and how you conquered them.
- What was your takeaway from this project? What did you learn?
- What would you like to improve upon going forward?
- What do you like the most about your final product?
Things to do:
- Color Double Exposure Portraits
- Weebly Post: Color Double Exposure Post (3/15/19)
- 2 Adjustment Layer Pics (3/19/19)
- NEW ASSIGNMENT! Double Exposure tutorial- This link provides both a written step by step as well as a video version. Both may be helpful, but if you're like me and need to SEE it being done, scroll straight down to the video. Another Double Exposure tutorial from our PHLEARN buddy that goes a little more in depth on layer mask tricks. Worth the watch!
- Double Exposure Practice Assignment- Find two images from the web to practice this technique. Your goal is to use Layer Masks, Adjustment Layers, and Blend Modes to make the transitions between the two exposures as seamless as possible.
- Gradient Mapping Practice-(4/1/19)
- Levels v Curves Practice- (4/4/2019)
- NEW! Double Exposure Project- Use your own image for the main subject. Take a picture of a person or animal to use as one of your pictures, a head and shoulders shot with a simple, light background is preferred.
- Think lighting so you have better contrast of highlights and shadows. Manipulate natural light with reflectors and flags if necessary.
- You can use web images for the overlays (At least one, but you could use more.) There is a connection between the 'model' and the subject matter of the overlays.
- Adjustment layers (specifically Black and White and Levels, but you could use others) to 'sync' the photos color wise.
- Change the Blend modes to combine the pictures.
- Modification of the pictures with Adjustment Layers and Layers masks are done in such a way that the pictures blend seamlessly AND the important features of each are still visible.
- Think artistically! Will you finish with Color or Texture Overlays? Gradient Mapping? Photo Filters?
- Select and Mask Llama-(4/5/19)
- Mood Portraits
- NEW ASSIGNMENT! Mood Portrait Weebly Post (4/25/19)
Thursday, 4/25/19 Red 52 Schedule
CHECK SKYWARD TO MAKE SURE I HAVE ALL THE POINTS YOU DESERVE!
Bellwork: Title your entry, "Difficulties with Mood Portraits"
What has been the most challenging part of this project? How did you/do you plan to overcome it?
NEW ASSIGNMENT! MOOD PORTRAIT WEEBLY POST
Things to do (LAST WEEK OF THIS MARKING PERIOD!):
What has been the most challenging part of this project? How did you/do you plan to overcome it?
NEW ASSIGNMENT! MOOD PORTRAIT WEEBLY POST
- Post your final set of portraits
- List the emotions you tried to convey for each portrait.
- Explain what challenges you encountered while shooting this project and how you conquered them.
- Explain what challenges you encountered in post editing (photoshop) and how you conquered them.
- What was your takeaway from this project? What did you learn?
- What would you like to improve upon going forward?
- What do you like the most about your final product?
Things to do (LAST WEEK OF THIS MARKING PERIOD!):
- Color Double Exposure Portraits
- Weebly Post: Color Double Exposure Post (3/15/19)
- 2 Adjustment Layer Pics (3/19/19)
- NEW ASSIGNMENT! Double Exposure tutorial- This link provides both a written step by step as well as a video version. Both may be helpful, but if you're like me and need to SEE it being done, scroll straight down to the video. Another Double Exposure tutorial from our PHLEARN buddy that goes a little more in depth on layer mask tricks. Worth the watch!
- Double Exposure Practice Assignment- Find two images from the web to practice this technique. Your goal is to use Layer Masks, Adjustment Layers, and Blend Modes to make the transitions between the two exposures as seamless as possible.
- Gradient Mapping Practice-(4/1/19)
- Levels v Curves Practice- (4/4/2019)
- NEW! Double Exposure Project- Use your own image for the main subject. Take a picture of a person or animal to use as one of your pictures, a head and shoulders shot with a simple, light background is preferred.
- Think lighting so you have better contrast of highlights and shadows. Manipulate natural light with reflectors and flags if necessary.
- You can use web images for the overlays (At least one, but you could use more.) There is a connection between the 'model' and the subject matter of the overlays.
- Adjustment layers (specifically Black and White and Levels, but you could use others) to 'sync' the photos color wise.
- Change the Blend modes to combine the pictures.
- Modification of the pictures with Adjustment Layers and Layers masks are done in such a way that the pictures blend seamlessly AND the important features of each are still visible.
- Think artistically! Will you finish with Color or Texture Overlays? Gradient Mapping? Photo Filters?
- Select and Mask Llama-(4/5/19)
- Mood Portraits
- NEW ASSIGNMENT! Mood Portrait Weebly Post (4/25/19)
Wednesday, 4/24/19
Bellwork: Title your entry, "Pacing"
Your goal is to have your Mood Portraits completed by Friday. Break the project down into reachable goals per day. What do you want/need to complete today in order to have a final composition ready to post on your weebly site on Monday?
Things to do (LAST WEEK OF THIS MARKING PERIOD!):
Your goal is to have your Mood Portraits completed by Friday. Break the project down into reachable goals per day. What do you want/need to complete today in order to have a final composition ready to post on your weebly site on Monday?
Things to do (LAST WEEK OF THIS MARKING PERIOD!):
- Color Double Exposure Portraits
- Weebly Post: Color Double Exposure Post (3/15/19)
- 2 Adjustment Layer Pics (3/19/19)
- NEW ASSIGNMENT! Double Exposure tutorial- This link provides both a written step by step as well as a video version. Both may be helpful, but if you're like me and need to SEE it being done, scroll straight down to the video. Another Double Exposure tutorial from our PHLEARN buddy that goes a little more in depth on layer mask tricks. Worth the watch!
- Double Exposure Practice Assignment- Find two images from the web to practice this technique. Your goal is to use Layer Masks, Adjustment Layers, and Blend Modes to make the transitions between the two exposures as seamless as possible.
- Gradient Mapping Practice-(4/1/19)
- Levels v Curves Practice- (4/4/2019)
- NEW! Double Exposure Project- Use your own image for the main subject. Take a picture of a person or animal to use as one of your pictures, a head and shoulders shot with a simple, light background is preferred.
- Think lighting so you have better contrast of highlights and shadows. Manipulate natural light with reflectors and flags if necessary.
- You can use web images for the overlays (At least one, but you could use more.) There is a connection between the 'model' and the subject matter of the overlays.
- Adjustment layers (specifically Black and White and Levels, but you could use others) to 'sync' the photos color wise.
- Change the Blend modes to combine the pictures.
- Modification of the pictures with Adjustment Layers and Layers masks are done in such a way that the pictures blend seamlessly AND the important features of each are still visible.
- Think artistically! Will you finish with Color or Texture Overlays? Gradient Mapping? Photo Filters?
- Select and Mask Llama-(4/5/19)
- Mood Portraits
Tuesday, 4/23/19 Red 52 Schedule
DON'T FORGET TO UPLOAD ANY JPEGS/PDF'S TO THE PRINT FOLDER. I AM SENDING IT OUT AT THE END OF 6TH HOUR TODAY. (FOR PERSONAL PRINTS AND/OR FOR THE ART SHOW).
Things to do (LAST WEEK OF THIS MARKING PERIOD!):
- Double Exposure?
- Color Double Exposure?
- Any of the lighting portraits?
- Any of the Challenges?
Things to do (LAST WEEK OF THIS MARKING PERIOD!):
- Color Double Exposure Portraits
- Weebly Post: Color Double Exposure Post (3/15/19)
- 2 Adjustment Layer Pics (3/19/19)
- NEW ASSIGNMENT! Double Exposure tutorial- This link provides both a written step by step as well as a video version. Both may be helpful, but if you're like me and need to SEE it being done, scroll straight down to the video. Another Double Exposure tutorial from our PHLEARN buddy that goes a little more in depth on layer mask tricks. Worth the watch!
- Double Exposure Practice Assignment- Find two images from the web to practice this technique. Your goal is to use Layer Masks, Adjustment Layers, and Blend Modes to make the transitions between the two exposures as seamless as possible.
- Gradient Mapping Practice-(4/1/19)
- Levels v Curves Practice- (4/4/2019)
- NEW! Double Exposure Project- Use your own image for the main subject. Take a picture of a person or animal to use as one of your pictures, a head and shoulders shot with a simple, light background is preferred.
- Think lighting so you have better contrast of highlights and shadows. Manipulate natural light with reflectors and flags if necessary.
- You can use web images for the overlays (At least one, but you could use more.) There is a connection between the 'model' and the subject matter of the overlays.
- Adjustment layers (specifically Black and White and Levels, but you could use others) to 'sync' the photos color wise.
- Change the Blend modes to combine the pictures.
- Modification of the pictures with Adjustment Layers and Layers masks are done in such a way that the pictures blend seamlessly AND the important features of each are still visible.
- Think artistically! Will you finish with Color or Texture Overlays? Gradient Mapping? Photo Filters?
- Select and Mask Llama-(4/5/19)
- Mood Portraits
- Start planning your 'Mood Portraits'. Get some paper and make a plan.
- What twelve emotions will you portray?
- Where will you shoot? All should have a relatively empty background? Backdrop? Wall?
- Who will you shoot? All the same person? or all different?
- What lighting will you use? Manipulated natural light? The lights?
Monday, 4/22/19
- Review of bellworks/Mood Portraits
- Spring Art Show Discussion/Print folder/Senior Tables
- Progress Reports/Filling in Points from last week
Things to do (LAST WEEK OF THIS MARKING PERIOD!):
- Color Double Exposure Portraits
- Weebly Post: Color Double Exposure Post (3/15/19)
- 2 Adjustment Layer Pics (3/19/19)
- NEW ASSIGNMENT! Double Exposure tutorial- This link provides both a written step by step as well as a video version. Both may be helpful, but if you're like me and need to SEE it being done, scroll straight down to the video. Another Double Exposure tutorial from our PHLEARN buddy that goes a little more in depth on layer mask tricks. Worth the watch!
- Double Exposure Practice Assignment- Find two images from the web to practice this technique. Your goal is to use Layer Masks, Adjustment Layers, and Blend Modes to make the transitions between the two exposures as seamless as possible.
- Gradient Mapping Practice-(4/1/19)
- Levels v Curves Practice- (4/4/2019)
- NEW! Double Exposure Project- Use your own image for the main subject. Take a picture of a person or animal to use as one of your pictures, a head and shoulders shot with a simple, light background is preferred.
- Think lighting so you have better contrast of highlights and shadows. Manipulate natural light with reflectors and flags if necessary.
- You can use web images for the overlays (At least one, but you could use more.) There is a connection between the 'model' and the subject matter of the overlays.
- Adjustment layers (specifically Black and White and Levels, but you could use others) to 'sync' the photos color wise.
- Change the Blend modes to combine the pictures.
- Modification of the pictures with Adjustment Layers and Layers masks are done in such a way that the pictures blend seamlessly AND the important features of each are still visible.
- Think artistically! Will you finish with Color or Texture Overlays? Gradient Mapping? Photo Filters?
- Select and Mask Llama-(4/5/19)
- Mood Portraits
- Start planning your 'Mood Portraits'. Get some paper and make a plan.
- What twelve emotions will you portray?
- Where will you shoot? All should have a relatively empty background? Backdrop? Wall?
- Who will you shoot? All the same person? or all different?
- What lighting will you use? Manipulated natural light? The lights?
Wednesday, 4/17/19 and Thursday, 4/18/19
Bellwork: Title your entry, "Lighting for Mood"
What is the difference between split and broad lighting?
What mood would be appropriate for split?
What mood would be appropriate for broad?
I HAVE GIVEN YOU FREEDOM TO SET UP AND SHOOT AS NEEDED TODAY IN THE SUB PLANS. HELP EACH OTHER OUT. HELP THE PHOTO 1 STUDENTS AS THEY WORK ON THE ELEMENTS/COMPOSITION GRID. I AM AVAILABLE THROUGH EMAIL FOR QUESTIONS.
No Challenge this weekend as it is a holiday.
Congratulations to Meeghin for the Top Shot: Bad Habit this week!! Everyone is bringing their 'A' game now and the shots are incredible. Keep up the great work!
Things to do:
- Color Double Exposure Portraits
- Weebly Post: Color Double Exposure Post (3/15/19)
- 2 Adjustment Layer Pics (3/19/19)
- NEW ASSIGNMENT! Double Exposure tutorial- This link provides both a written step by step as well as a video version. Both may be helpful, but if you're like me and need to SEE it being done, scroll straight down to the video. Another Double Exposure tutorial from our PHLEARN buddy that goes a little more in depth on layer mask tricks. Worth the watch!
- Double Exposure Practice Assignment- Find two images from the web to practice this technique. Your goal is to use Layer Masks, Adjustment Layers, and Blend Modes to make the transitions between the two exposures as seamless as possible.
- Gradient Mapping Practice-(4/1/19)
- Levels v Curves Practice- (4/4/2019)
- NEW! Double Exposure Project- Use your own image for the main subject. Take a picture of a person or animal to use as one of your pictures, a head and shoulders shot with a simple, light background is preferred.
- Think lighting so you have better contrast of highlights and shadows. Manipulate natural light with reflectors and flags if necessary.
- You can use web images for the overlays (At least one, but you could use more.) There is a connection between the 'model' and the subject matter of the overlays.
- Adjustment layers (specifically Black and White and Levels, but you could use others) to 'sync' the photos color wise.
- Change the Blend modes to combine the pictures.
- Modification of the pictures with Adjustment Layers and Layers masks are done in such a way that the pictures blend seamlessly AND the important features of each are still visible.
- Think artistically! Will you finish with Color or Texture Overlays? Gradient Mapping? Photo Filters?
- Select and Mask Llama-(4/5/19)
- Mood Portraits
- Start planning your 'Mood Portraits'. Get some paper and make a plan.
- What twelve emotions will you portray?
- Where will you shoot? All should have a relatively empty background? Backdrop? Wall?
- Who will you shoot? All the same person? or all different?
- What lighting will you use? Manipulated natural light? The lights?
Tuesday, 4/16/19
Bellwork: Vote for the Top Shot here. Remember, the theme was Bad Habits. Look for the shot that captures your attention AND explains the story of the bad habit in a creative way. Analyze the photo for composition and technique (exposure, focus, adjustments).
Mood Portrait Shots Discussion
Things to do:
All Done with Everything? Here is where we are going next! Get a head start!
Mood Portrait Shots Discussion
Things to do:
- Color Double Exposure Portraits
- Weebly Post: Color Double Exposure Post (3/15/19)
- 2 Adjustment Layer Pics (3/19/19)
- NEW ASSIGNMENT! Double Exposure tutorial- This link provides both a written step by step as well as a video version. Both may be helpful, but if you're like me and need to SEE it being done, scroll straight down to the video. Another Double Exposure tutorial from our PHLEARN buddy that goes a little more in depth on layer mask tricks. Worth the watch!
- Double Exposure Practice Assignment- Find two images from the web to practice this technique. Your goal is to use Layer Masks, Adjustment Layers, and Blend Modes to make the transitions between the two exposures as seamless as possible.
- Gradient Mapping Practice-(4/1/19)
- Levels v Curves Practice- (4/4/2019)
- NEW! Double Exposure Project- Use your own image for the main subject. Take a picture of a person or animal to use as one of your pictures, a head and shoulders shot with a simple, light background is preferred.
- Think lighting so you have better contrast of highlights and shadows. Manipulate natural light with reflectors and flags if necessary.
- You can use web images for the overlays (At least one, but you could use more.) There is a connection between the 'model' and the subject matter of the overlays.
- Adjustment layers (specifically Black and White and Levels, but you could use others) to 'sync' the photos color wise.
- Change the Blend modes to combine the pictures.
- Modification of the pictures with Adjustment Layers and Layers masks are done in such a way that the pictures blend seamlessly AND the important features of each are still visible.
- Think artistically! Will you finish with Color or Texture Overlays? Gradient Mapping? Photo Filters?
- Select and Mask Llama-(4/5/19)
All Done with Everything? Here is where we are going next! Get a head start!
Monday, 4/15/19
Bellwork:
Take a minute to see how this professional photographer used his shots to comment on our addiction to handheld digital devices. Here's the link.
Your goals for today:
Help each out today! Be on the lookout for any Photo 1 students that are struggling and lend a hand. Email me with any problems or questions. I'll try to respond asap.
Things to do:
All Done with Everything? Here is where we are going next! Get a head start!
Take a minute to see how this professional photographer used his shots to comment on our addiction to handheld digital devices. Here's the link.
Your goals for today:
- Edit/Email your Top Shot: Vices/Habits-EMAIL ME THE JPEG!!!
- You should have your shot for your Double Exposure. Get as far as you can editing and merging the images for a successful final shot.
- Post Dbl Exp to your weebly site with artist statement.
- Complete any assignments from the Things to Do list that are still incomplete.
- Start planning your 'Mood Portraits'. Get some paper and make a plan.
- What twelve emotions will you portray?
- Where will you shoot? All should have a relatively empty background? Backdrop? Wall?
- Who will you shoot? All the same person? or all different?
- What lighting will you use? Manipulated natural light? The lights?
Help each out today! Be on the lookout for any Photo 1 students that are struggling and lend a hand. Email me with any problems or questions. I'll try to respond asap.
Things to do:
- Color Double Exposure Portraits
- Weebly Post: Color Double Exposure Post (3/15/19)
- 2 Adjustment Layer Pics (3/19/19)
- NEW ASSIGNMENT! Double Exposure tutorial- This link provides both a written step by step as well as a video version. Both may be helpful, but if you're like me and need to SEE it being done, scroll straight down to the video. Another Double Exposure tutorial from our PHLEARN buddy that goes a little more in depth on layer mask tricks. Worth the watch!
- Double Exposure Practice Assignment- Find two images from the web to practice this technique. Your goal is to use Layer Masks, Adjustment Layers, and Blend Modes to make the transitions between the two exposures as seamless as possible.
- Gradient Mapping Practice-(4/1/19)
- Levels v Curves Practice- (4/4/2019)
- NEW! Double Exposure Project- Use your own image for the main subject. Take a picture of a person or animal to use as one of your pictures, a head and shoulders shot with a simple, light background is preferred.
- Think lighting so you have better contrast of highlights and shadows. Manipulate natural light with reflectors and flags if necessary.
- You can use web images for the overlays (At least one, but you could use more.) There is a connection between the 'model' and the subject matter of the overlays.
- Adjustment layers (specifically Black and White and Levels, but you could use others) to 'sync' the photos color wise.
- Change the Blend modes to combine the pictures.
- Modification of the pictures with Adjustment Layers and Layers masks are done in such a way that the pictures blend seamlessly AND the important features of each are still visible.
- Think artistically! Will you finish with Color or Texture Overlays? Gradient Mapping? Photo Filters?
- Select and Mask Llama-(4/5/19)
All Done with Everything? Here is where we are going next! Get a head start!
Friday, 4/12/19
Interested in being on the Photo Crew with Mr. May for the sporting events. Fill out this application to be considered.
Congratulations to Lexi for her Top Shot this week! The texture, lighting, exposure and focus of details is INCREDIBLE! Nice work!
NEW Friday Photo Challenge!!!
Each Friday I will give you a theme and you'll have the weekend to try and get the best shot. Monday you'll have some time to edit if necessary and then submit. We will vote as a class for the Top Shot on Tuesday. Think composition techniques AND creativity as you create the best shot. 1 per person.
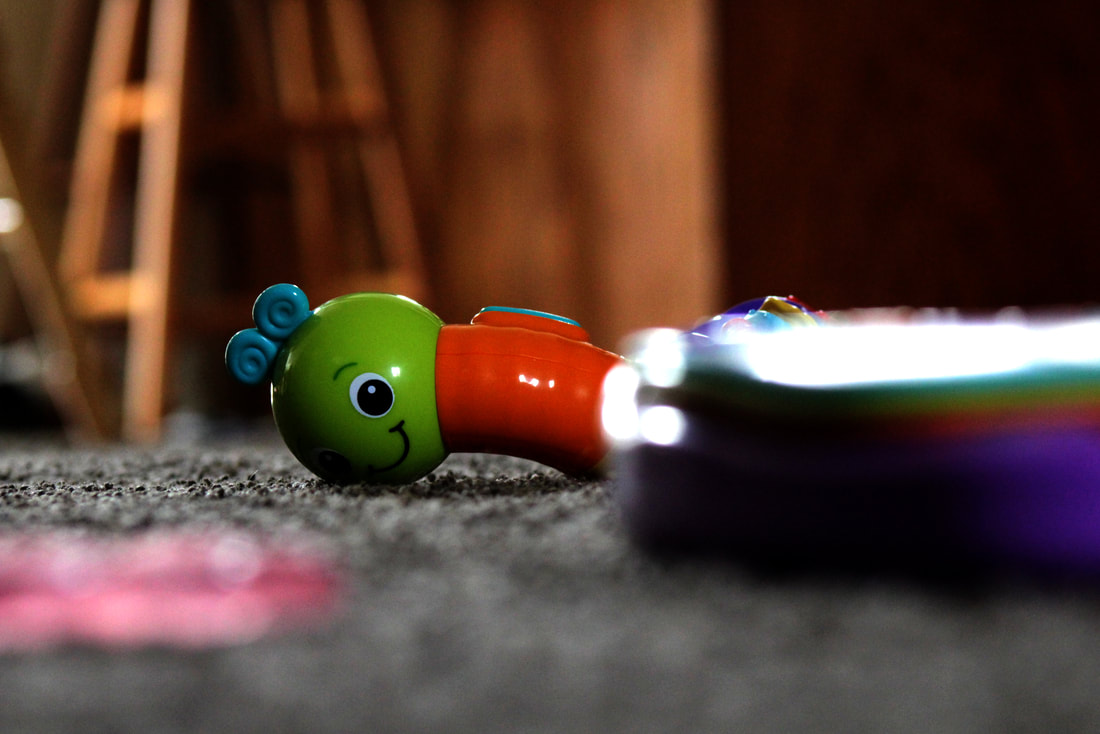
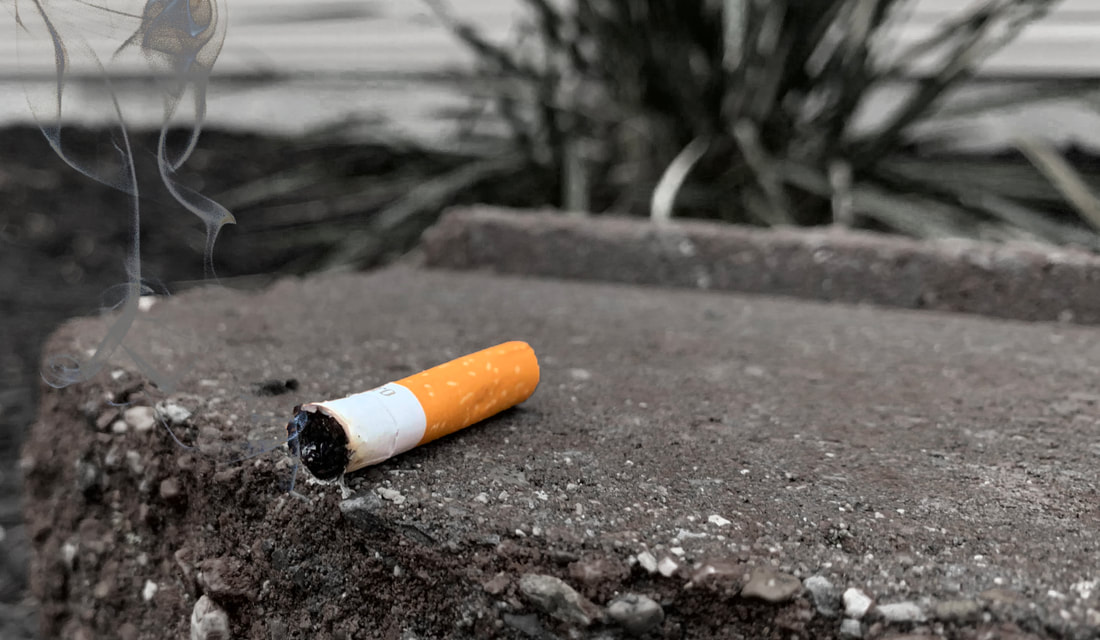
THEME: VICES OR HABITS (Link to list of habits)
How will you illustrate what the habit or vice is so that people understand that it is a habit or a vice and not just a picture of candy, phone, etc.?
How might lighting play a role in telling your story?
Close up? Medium Shot? Wide shot? (Does the background need to be included to tell the story? Does EVERYTHING within the frame contribute to the story?
Angle? Point of view?
Focus?
BE CREATIVE! USE YOUR COMPOSITION TECHNIQUES!
Interpret it any way you want and create a shot that will catch our attention with its quality and theme. Think about composition and quality (focus/exposure).
image source: https://pvhspanthertales.org/5197/opinion/cell-phone-addiction/
NEW Friday Photo Challenge!!!
Each Friday I will give you a theme and you'll have the weekend to try and get the best shot. Monday you'll have some time to edit if necessary and then submit. We will vote as a class for the Top Shot on Tuesday. Think composition techniques AND creativity as you create the best shot. 1 per person.
THEME: VICES OR HABITS (Link to list of habits)
How will you illustrate what the habit or vice is so that people understand that it is a habit or a vice and not just a picture of candy, phone, etc.?
How might lighting play a role in telling your story?
Close up? Medium Shot? Wide shot? (Does the background need to be included to tell the story? Does EVERYTHING within the frame contribute to the story?
Angle? Point of view?
Focus?
BE CREATIVE! USE YOUR COMPOSITION TECHNIQUES!
Interpret it any way you want and create a shot that will catch our attention with its quality and theme. Think about composition and quality (focus/exposure).
image source: https://pvhspanthertales.org/5197/opinion/cell-phone-addiction/

As soon as you finish with your Double Exposure, place the jpeg (you'll need an RGB version) on your weebly site. For the Artist Statement, explain:
Things to do:
All Done with Everything? Here is where we are going next! Get a head start!
- Who is the main subject
- What pictures did you blend into the main subject?
- What is the meaning behind each overlay you chose? How does it connect to the main subject?
- Explain something in the process that you learned or improved upon?
- What do you like most about your final product?
Things to do:
- Color Double Exposure Portraits
- Weebly Post: Color Double Exposure Post (3/15/19)
- 2 Adjustment Layer Pics (3/19/19)
- NEW ASSIGNMENT! Double Exposure tutorial- This link provides both a written step by step as well as a video version. Both may be helpful, but if you're like me and need to SEE it being done, scroll straight down to the video. Another Double Exposure tutorial from our PHLEARN buddy that goes a little more in depth on layer mask tricks. Worth the watch!
- Double Exposure Practice Assignment- Find two images from the web to practice this technique. Your goal is to use Layer Masks, Adjustment Layers, and Blend Modes to make the transitions between the two exposures as seamless as possible.
- Gradient Mapping Practice-(4/1/19)
- Levels v Curves Practice- (4/4/2019)
- NEW! Double Exposure Project- Use your own image for the main subject. Take a picture of a person or animal to use as one of your pictures, a head and shoulders shot with a simple, light background is preferred.
- Think lighting so you have better contrast of highlights and shadows. Manipulate natural light with reflectors and flags if necessary.
- You can use web images for the overlays (At least one, but you could use more.) There is a connection between the 'model' and the subject matter of the overlays.
- Adjustment layers (specifically Black and White and Levels, but you could use others) to 'sync' the photos color wise.
- Change the Blend modes to combine the pictures.
- Modification of the pictures with Adjustment Layers and Layers masks are done in such a way that the pictures blend seamlessly AND the important features of each are still visible.
- Think artistically! Will you finish with Color or Texture Overlays? Gradient Mapping? Photo Filters?
- Select and Mask Llama-(4/5/19)
All Done with Everything? Here is where we are going next! Get a head start!
Thursday, 4/11/19
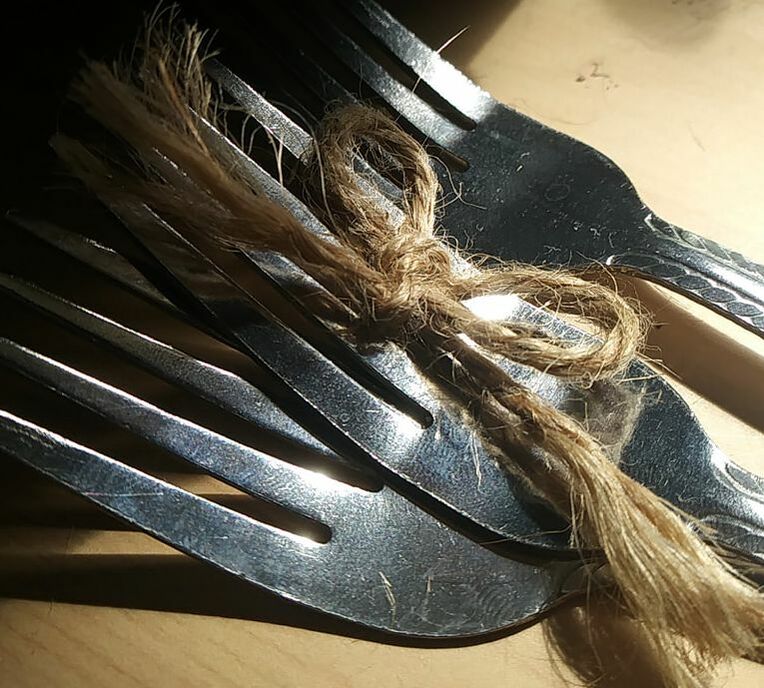
Vote for your last challenge for the Top Shot with the theme of 'Forks'. This time, click on '1' for your Top Shot and '2' for the rest. Here is the link.
Be picky! Look at composition, exposure, and focus.
Things to do:
All done with everything? Time to learn how to retouch photos using the Healing Brush and Clone Stamp.
Watch the tutorial below. Then use the jpeg below to practice. Show me for credit when you are done.
Healing Brush and Clone Stamp video
Be picky! Look at composition, exposure, and focus.
Things to do:
- Color Double Exposure Portraits
- Weebly Post: Color Double Exposure Post (3/15/19)
- 2 Adjustment Layer Pics (3/19/19)
- NEW ASSIGNMENT! Double Exposure tutorial- This link provides both a written step by step as well as a video version. Both may be helpful, but if you're like me and need to SEE it being done, scroll straight down to the video. Another Double Exposure tutorial from our PHLEARN buddy that goes a little more in depth on layer mask tricks. Worth the watch!
- Double Exposure Practice Assignment- Find two images from the web to practice this technique. Your goal is to use Layer Masks, Adjustment Layers, and Blend Modes to make the transitions between the two exposures as seamless as possible.
- Gradient Mapping Practice-(4/1/19)
- Levels v Curves Practice- (4/4/2019)
- NEW! Double Exposure Project- Use your own image for the main subject. Take a picture of a person or animal to use as one of your pictures, a head and shoulders shot with a simple, light background is preferred.
- Think lighting so you have better contrast of highlights and shadows. Manipulate natural light with reflectors and flags if necessary.
- You can use web images for the overlays (At least one, but you could use more.) There is a connection between the 'model' and the subject matter of the overlays.
- Adjustment layers (specifically Black and White and Levels, but you could use others) to 'sync' the photos color wise.
- Change the Blend modes to combine the pictures.
- Modification of the pictures with Adjustment Layers and Layers masks are done in such a way that the pictures blend seamlessly AND the important features of each are still visible.
- Think artistically! Will you finish with Color or Texture Overlays? Gradient Mapping? Photo Filters?
- Select and Mask Llama-(4/5/19)
All done with everything? Time to learn how to retouch photos using the Healing Brush and Clone Stamp.
Watch the tutorial below. Then use the jpeg below to practice. Show me for credit when you are done.
Healing Brush and Clone Stamp video
| baby_acne.jpg |
Wednesday, 4/10/19 (SAT Testing on Tues.)
SEND ME YOUR FORK PICS! I WILL NOT INCLUDE ANY SUBMITTED AFTER 12:45 TODAY!
Things to do:
Things to do:
- Color Double Exposure Portraits
- Weebly Post: Color Double Exposure Post (3/15/19)
- 2 Adjustment Layer Pics (3/19/19)
- NEW ASSIGNMENT! Double Exposure tutorial- This link provides both a written step by step as well as a video version. Both may be helpful, but if you're like me and need to SEE it being done, scroll straight down to the video. Another Double Exposure tutorial from our PHLEARN buddy that goes a little more in depth on layer mask tricks. Worth the watch!
- Double Exposure Practice Assignment- Find two images from the web to practice this technique. Your goal is to use Layer Masks, Adjustment Layers, and Blend Modes to make the transitions between the two exposures as seamless as possible.
- Gradient Mapping Practice-(4/1/19)
- Levels v Curves Practice- (4/4/2019)
- NEW! Double Exposure Project- Use your own image for the main subject. Take a picture of a person or animal to use as one of your pictures, a head and shoulders shot with a simple, light background is preferred.
- Think lighting so you have better contrast of highlights and shadows. Manipulate natural light with reflectors and flags if necessary.
- You can use web images for the overlays (At least one, but you could use more.) There is a connection between the 'model' and the subject matter of the overlays.
- Adjustment layers (specifically Black and White and Levels, but you could use others) to 'sync' the photos color wise.
- Change the Blend modes to combine the pictures.
- Modification of the pictures with Adjustment Layers and Layers masks are done in such a way that the pictures blend seamlessly AND the important features of each are still visible.
- Think artistically! Will you finish with Color or Texture Overlays? Gradient Mapping? Photo Filters?
- Select and Mask Llama-(4/5/19)
Monday, 4/8/19
Bellwork: Title your entry, "Refine Edge Brush"
Explain the difference between the Brush tool and the Refine Edge Brush tool in the Select and Mask workspace.
Your goals for today:
Things to do:
Explain the difference between the Brush tool and the Refine Edge Brush tool in the Select and Mask workspace.
Your goals for today:
- Edit/Email your Top Shot: Forks
- You should have your shot for your Double Exposure. Get as far as you can editing and merging the images for a successful final shot.
- Complete any assignments from the Things to Do list that are still incomplete.
Things to do:
- Color Double Exposure Portraits
- Weebly Post: Color Double Exposure Post (3/15/19)
- 2 Adjustment Layer Pics (3/19/19)
- NEW ASSIGNMENT! Double Exposure tutorial- This link provides both a written step by step as well as a video version. Both may be helpful, but if you're like me and need to SEE it being done, scroll straight down to the video. Another Double Exposure tutorial from our PHLEARN buddy that goes a little more in depth on layer mask tricks. Worth the watch!
- Double Exposure Practice Assignment- Find two images from the web to practice this technique. Your goal is to use Layer Masks, Adjustment Layers, and Blend Modes to make the transitions between the two exposures as seamless as possible.
- Gradient Mapping Practice-(4/1/19)
- Levels v Curves Practice- (4/4/2019)
- NEW! Double Exposure Project- Use your own image for the main subject. Take a picture of a person or animal to use as one of your pictures, a head and shoulders shot with a simple, light background is preferred.
- Think lighting so you have better contrast of highlights and shadows. Manipulate natural light with reflectors and flags if necessary.
- You can use web images for the overlays (At least one, but you could use more.) There is a connection between the 'model' and the subject matter of the overlays.
- Adjustment layers (specifically Black and White and Levels, but you could use others) to 'sync' the photos color wise.
- Change the Blend modes to combine the pictures.
- Modification of the pictures with Adjustment Layers and Layers masks are done in such a way that the pictures blend seamlessly AND the important features of each are still visible.
- Think artistically! Will you finish with Color or Texture Overlays? Gradient Mapping? Photo Filters?
- Select and Mask Llama-(4/5/19)
Friday, 4/5/19
Taking a break from Double Exposure for a specific Photoshop skill you need to master. It is called 'Select and Mask' aka Refine Edge. If you have done this with me in Digital Design, you will still want to watch this! It does a better job of our first tries with this technique AND will remind you of the tool!
Select and Mask allows you to make precise selections around difficult subjects like hair or trees.
Watch the video below and then practice with the jpegs provided below that. This will be a game changer moving forward. SHOW ME FOR CREDIT WHEN YOU ARE DONE!
START VIDEO AT 3 MINS 20 SECONDS
Select and Mask allows you to make precise selections around difficult subjects like hair or trees.
Watch the video below and then practice with the jpegs provided below that. This will be a game changer moving forward. SHOW ME FOR CREDIT WHEN YOU ARE DONE!
START VIDEO AT 3 MINS 20 SECONDS
|
| ||||
NEW Friday Photo Challenge!!!
Each Friday I will give you a theme and you'll have the weekend to try and get the best shot. Monday you'll have some time to edit if necessary and then submit. We will vote as a class for the Top Shot on Tuesday. Think composition techniques AND creativity as you create the best shot. 1 per person.
THEME: FORKS
Are you going to take this literal or conceptual? Actual forks? Forks in the road?
Arranged as a scene? Arranged in a pattern? Lights v Shadow?
Is there a story or a message to tell with this theme?
Close up? Medium Shot?
Angle? Point of view?
Focus?
BE CREATIVE! USE YOUR COMPOSITION TECHNIQUES!
Interpret it any way you want and create a shot that will catch our attention with its quality and theme. Think about composition and quality (focus/exposure).
Things to do:
- Color Double Exposure Portraits
- Weebly Post: Color Double Exposure Post (3/15/19)
- 2 Adjustment Layer Pics (3/19/19)
- NEW ASSIGNMENT! Double Exposure tutorial- This link provides both a written step by step as well as a video version. Both may be helpful, but if you're like me and need to SEE it being done, scroll straight down to the video. Another Double Exposure tutorial from our PHLEARN buddy that goes a little more in depth on layer mask tricks. Worth the watch!
- Double Exposure Practice Assignment- Find two images from the web to practice this technique. Your goal is to use Layer Masks, Adjustment Layers, and Blend Modes to make the transitions between the two exposures as seamless as possible.
- Gradient Mapping Practice-(4/1/19)
- Levels v Curves Practice- (4/4/2019)
- NEW! Double Exposure Project- Use your own image for the main subject. Take a picture of a person or animal to use as one of your pictures, a head and shoulders shot with a simple, light background is preferred.
- Think lighting so you have better contrast of highlights and shadows. Manipulate natural light with reflectors and flags if necessary.
- You can use web images for the overlays (At least one, but you could use more.) There is a connection between the 'model' and the subject matter of the overlays.
- Adjustment layers (specifically Black and White and Levels, but you could use others) to 'sync' the photos color wise.
- Change the Blend modes to combine the pictures.
- Modification of the pictures with Adjustment Layers and Layers masks are done in such a way that the pictures blend seamlessly AND the important features of each are still visible.
- Think artistically! Will you finish with Color or Texture Overlays? Gradient Mapping? Photo Filters?
- Select and Mask Llama-(4/5/19)
Thursday, 4/4/19 Red 52 Schedule
Bellwork: Title your entry, "Double Exposure Project"
Explain your plan for the Double Exposure project:
Things to do:
Explain your plan for the Double Exposure project:
- Who are you use as your main subject/Who will you be taking pictures of?
- What additional images will you use for the overlays? Remember, they should relate to your main subject.
- Besides the Black and White Adjustment layer, what other adjustment layers do you anticipate using to modify the jpegs to look as though they are one? Artistically? (Gradient Mapping/Photo Filters/Color or Texture Overlays?)
Things to do:
- Color Double Exposure Portraits
- Weebly Post: Color Double Exposure Post (3/15/19)
- 2 Adjustment Layer Pics (3/19/19)
- NEW ASSIGNMENT! Double Exposure tutorial- This link provides both a written step by step as well as a video version. Both may be helpful, but if you're like me and need to SEE it being done, scroll straight down to the video. Another Double Exposure tutorial from our PHLEARN buddy that goes a little more in depth on layer mask tricks. Worth the watch!
- Double Exposure Practice Assignment- Find two images from the web to practice this technique. Your goal is to use Layer Masks, Adjustment Layers, and Blend Modes to make the transitions between the two exposures as seamless as possible.
- Gradient Mapping Practice-(4/1/19)
- Levels v Curves Practice- (4/4/2019)
- NEW! Double Exposure Project- Use your own image for the main subject. Take a picture of a person or animal to use as one of your pictures, a head and shoulders shot with a simple, light background is preferred.
- Think lighting so you have better contrast of highlights and shadows. Manipulate natural light with reflectors and flags if necessary.
- You can use web images for the overlays (At least one, but you could use more.) There is a connection between the 'model' and the subject matter of the overlays.
- Adjustment layers (specifically Black and White and Levels, but you could use others) to 'sync' the photos color wise.
- Change the Blend modes to combine the pictures.
- Modification of the pictures with Adjustment Layers and Layers masks are done in such a way that the pictures blend seamlessly AND the important features of each are still visible.
- Think artistically! Will you finish with Color or Texture Overlays? Gradient Mapping? Photo Filters?
Wednesday, 4/3/19
Bellwork: Title your entry, "Levels vs Curves" Watch the tutorial on this link.
We've used the Levels adjustment layer to correct tone and color.....but not Curves. After watching the tutorial, you should be able to see the difference and when you might pick one over the other.
Answer the questions below in your entry:
What is one main difference between Levels and Curves?
What is the "S" curve?
Choose an image a place a Curves adjustment layer on it. Experiment with the panel as you saw in the video. Show me for credit so I can see the layers then screenshot it and paste it into your journal. SHOW ME FOR CREDIT!
Things to do:
- Color Double Exposure Portraits
- Weebly Post: Color Double Exposure Post (3/15/19)
- 2 Adjustment Layer Pics (3/19/19)
- NEW ASSIGNMENT! Double Exposure tutorial- This link provides both a written step by step as well as a video version. Both may be helpful, but if you're like me and need to SEE it being done, scroll straight down to the video. Another Double Exposure tutorial from our PHLEARN buddy that goes a little more in depth on layer mask tricks. Worth the watch!
- Double Exposure Practice Assignment- Find two images from the web to practice this technique. Your goal is to use Layer Masks, Adjustment Layers, and Blend Modes to make the transitions between the two exposures as seamless as possible.
- Gradient Mapping Practice-(4/1/19)
- NEW! Double Exposure Project- Use your own image for the main subject. Take a picture of a person or animal to use as one of your pictures, a head and shoulders shot with a simple, light background is preferred.
- Think lighting so you have better contrast of highlights and shadows. Manipulate natural light with reflectors and flags if necessary.
- You can use web images for the overlays (At least one, but you could use more.) There is a connection between the 'model' and the subject matter of the overlays.
- Adjustment layers (specifically Black and White and Levels, but you could use others) to 'sync' the photos color wise.
- Change the Blend modes to combine the pictures.
- Modification of the pictures with Adjustment Layers and Layers masks are done in such a way that the pictures blend seamlessly AND the important features of each are still visible.
- Think artistically! Will you finish with Color or Texture Overlays? Gradient Mapping? Photo Filters?
Tuesday, 4/2/19 Red 52 Schedule
Bellwork: Title your entry, "Double Exp. Artist Interview" Read this link.
Answer the questions below in your entry:
What are the five words this artist uses to describe his work?
What are the 'secret' tools/techniques he uses?
What are his favorite blend modes and adjustment layers?
What do you think about his work? What is your reaction to his pieces?
Things to do:
Answer the questions below in your entry:
What are the five words this artist uses to describe his work?
What are the 'secret' tools/techniques he uses?
What are his favorite blend modes and adjustment layers?
What do you think about his work? What is your reaction to his pieces?
Things to do:
- Color Double Exposure Portraits
- Weebly Post: Color Double Exposure Post (3/15/19)
- 2 Adjustment Layer Pics (3/19/19)
- NEW ASSIGNMENT! Double Exposure tutorial- This link provides both a written step by step as well as a video version. Both may be helpful, but if you're like me and need to SEE it being done, scroll straight down to the video. Another Double Exposure tutorial from our PHLEARN buddy that goes a little more in depth on layer mask tricks. Worth the watch!
- Double Exposure Practice Assignment- Find two images from the web to practice this technique. Your goal is to use Layer Masks, Adjustment Layers, and Blend Modes to make the transitions between the two exposures as seamless as possible.
- Gradient Mapping Practice-(4/1/19)
Monday, 4/1/19
Bellwork: Title your entry, "Gradient Map/Photographic Toning"
Watch the first five minutes of the Gradient Map Adjustment Layer Video
Remember this one! This could be very helpful in your Double Exposure Project!
Choose any image to open in Photoshop.
Apply a Gradient Map Adjustment layer. First, use a preset gradient. Adjust the panel to taste. Adjust the Opacity to taste. Take a screen shot or jpeg it and put it in your Journal.
Second, turn off the visibility or delete the first adjustment layer and add a new Gradient Map Adjustment layer. Go to the Photographic toning presets. Adjust the panel to taste. Adjust the Opacity to taste. Screenshot or jpeg and insert this version into your journal as well.
Show me for credit when you are done!
Things to do:
- Color Double Exposure Portraits
- Weebly Post: Color Double Exposure Post (3/15/19)
- 2 Adjustment Layer Pics (3/19/19)
- NEW ASSIGNMENT! Double Exposure tutorial- This link provides both a written step by step as well as a video version. Both may be helpful, but if you're like me and need to SEE it being done, scroll straight down to the video. Another Double Exposure tutorial from our PHLEARN buddy that goes a little more in depth on layer mask tricks. Worth the watch!
- Double Exposure Practice Assignment- Find two images from the web to practice this technique. Your goal is to use Layer Masks, Adjustment Layers, and Blend Modes to make the transitions between the two exposures as seamless as possible.
Friday, 3/22/19
Bellwork: Title your entry, "Blend modes #3"
Look at your cheat sheet for Blend modes from Monday. If Screen multiplies all the lighter pixels and Multiply multiplies all of the darker pixels, what does Overlay do? (Focus where the orange stripe layer is blended with the photo underneath, look closely at the example for help.......or, if you can't remember.....Google it)
Things to do:
- Color Double Exposure Portraits
- Weebly Post: Color Double Exposure Post (3/15/19)
- 2 Adjustment Layer Pics (3/19/19)
- NEW ASSIGNMENT! Double Exposure tutorial- This link provides both a written step by step as well as a video version. Both may be helpful, but if you're like me and need to SEE it being done, scroll straight down to the video. Another Double Exposure tutorial from our PHLEARN buddy that goes a little more in depth on layer mask tricks. Worth the watch!
- Double Exposure Practice Assignment- Find two images from the web to practice this technique. Your goal is to use Layer Masks, Adjustment Layers, and Blend Modes to make the transitions between the two exposures as seamless as possible.
Thursday, 3/21/19 Red Schedule
Bellwork: Title your entry, "Blend modes #2"
Look at your cheat sheet for Blend modes from Monday. Focusing specifically on 'Blend Modes 1', which Blend mode 'multiplies' all the darker pixels between the two layers? (Focus where the orange stripe layer is blended with the photo above it.)
Things to do:
Look at your cheat sheet for Blend modes from Monday. Focusing specifically on 'Blend Modes 1', which Blend mode 'multiplies' all the darker pixels between the two layers? (Focus where the orange stripe layer is blended with the photo above it.)
Things to do:
- Color Double Exposure Portraits
- Weebly Post: Color Double Exposure Post (3/15/19)
- 2 Adjustment Layer Pics (3/19/19)
Wednesday, 3/20/19
Bellwork: Title your entry, "Blend modes #1"
Look at your cheat sheet for Blend modes from Monday. Focusing specifically on 'Blend Modes 1', which Blend mode 'multiplies' all the lighter pixels between the two layers? (Focus where the orange stripe layer is blended with the photo underneath.)
Congratulations Ashley on your Top Shot for the Broken Challenge!
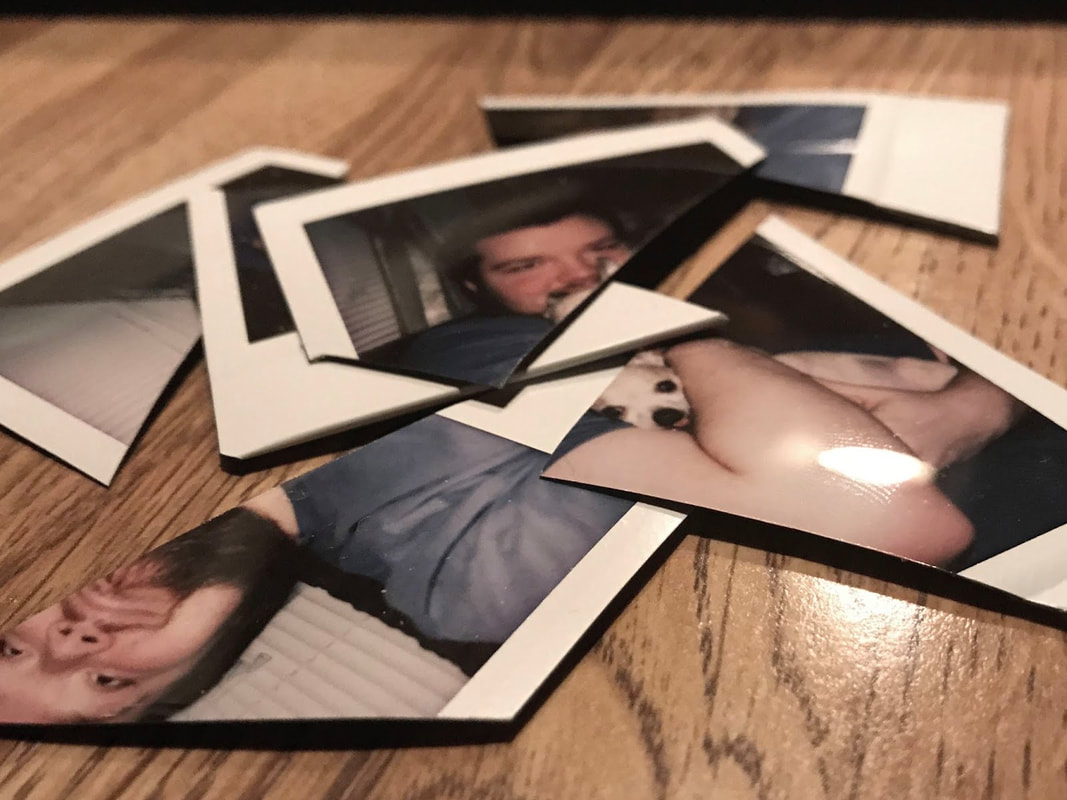
Things to do:
- Color Double Exposure Portraits
- Weebly Post: Color Double Exposure Post (3/15/19)
- 2 Adjustment Layer Pics (3/19/19)
Tuesday, 3/19/19 Red 52 Schedule
Bellwork: Title your entry, "Blend modes"
Copy and paste the Blend mode cheat sheet jpeg into your journal. You may want to download it to your desktop for an easy reference.
Copy and paste the Blend mode cheat sheet jpeg into your journal. You may want to download it to your desktop for an easy reference.
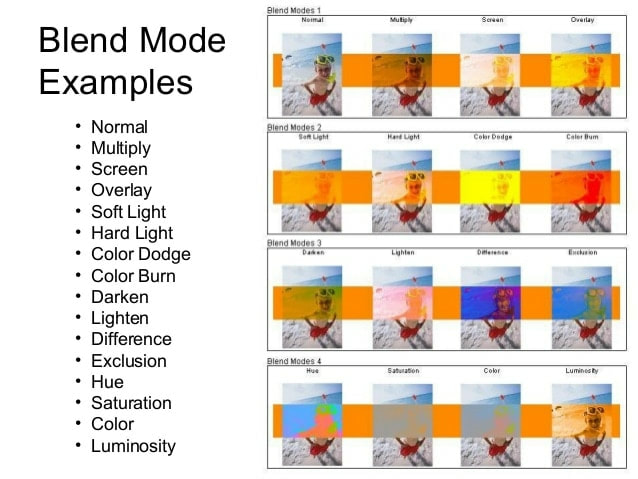
Don't forget to vote for the Photo Friday Top Shot (You can vote for your own, but be honest! Is it the BEST shot? Look at composition and quality.) Vote here.
NEW ASSIGNMENT!
Watch the Adjustment layer review tutorials: Some review/reminders about shortcuts and techniques along with new information on each type of layer described (Black and White, Hue and Saturation, Brightness and Contrast, Vibrance) and which you'll be asked to use in the next assignment. You can skip through saving methods as we WILL ALWAYS USE AN ADJUSTMENT LAYER and not Image>Adjustments
4 Tutorials- Adjustment Layer Videos Link
TIP: While it is not mentioned in the videos, do not forget the 'clipping mask' option to attach an adjustment layer solely to the layer directly below it.
Adjustment Layer assignment:
1. Open 2 jpegs in Photoshop (Each in their own file.) Let's review
what to look for and do when choosing a photo....
- Large pixel count, 1200 or higher
- When finding and image on Google search, go to the original site and save from there. Do not save from the search page.
your liking. At least one of the four should be the Black and White
Adjustment layer. You can use more than two if you'd like.
3. Use the layer masks within the Adjustment Layers to choose
specific areas of the jpeg to modify.
4. Change the Blend Mode of at least one layer per image.
5. Push your creativity and artistic eye to create something interesting.
This should take at least one class period.
I want to see the .psd files on this one. Call me over for credit when you are done.
Things to do:
- Color Double Exposure Portraits
- Weebly Post: Color Double Exposure Post (3/15/19)
- 2 Adjustment Layer Pics (3/19/19)
Monday, 3/18/19
Bellwork: Title your entry, "Adjustment Layer Cheat Sheet"
Download jpeg below to your desktop to use as an easy reference. Also, copy and paste it into your journal for your exam study guide.
Download jpeg below to your desktop to use as an easy reference. Also, copy and paste it into your journal for your exam study guide.

image source: http://pictoography.blogspot.com/2013/11/what-are-adjustment-layers-in-photoshop.html
Demo with Adjustment layers
You have two goals today:
Things to do:
You have two goals today:
- Edit/Email your Top Shot: Reflections
- Finish/post your Double Color Exposure to your weebly site. (Show Jones for credit.)
- Place a photo in Photoshop and experiment with the panels of each Adjustment layer.
Things to do:
- Color Double Exposure Portraits
- Weebly Post: Color Double Exposure Post (3/15/19)
Friday, 3/15/19
Bellwork: Title your entry, "Double Exposure"
Do a quick Google Image search with the key search work 'Double Exposure Photography'
Insert or Copy/Paste 3 of your favorite images.
New Weebly Post: Color Double Exposure
Include:
NEW Friday Photo Challenge!!!
Each Friday I will give you a theme and you'll have the weekend to try and get the best shot. Monday you'll have some time to edit if necessary and then submit. We will vote as a class for the Top Shot on Tuesday. Think composition techniques AND creativity as you create the best shot. 1 per person.
THEME: BROKEN
Are you going to take this literal or conceptual?
Dramatic lighting? Broad or Split? High or Low key?
Is there a story or a message to tell with this theme?
Close up? Medium Shot?
Angle? Point of view?
Focus?
BE CREATIVE! USE YOUR COMPOSITION TECHNIQUES!
Interpret it any way you want and create a shot that will catch our attention with its quality and theme. Think about composition and quality (focus/exposure).
Things to do:
Do a quick Google Image search with the key search work 'Double Exposure Photography'
Insert or Copy/Paste 3 of your favorite images.
New Weebly Post: Color Double Exposure
Include:
- Final Color Double Exposure jpeg
- Artist Statement:
- Explain how you shot your photos for this project. (lighting?, reflectors? flags? camera settings? angle?)
- Explain the contrast/theme between the two shots.
- Explain the Photoshop process to create the final result.
- What was new about this project? What did you learn?
- What do you like most about your final product?
- What do you wish you could go back and do over or fix?
NEW Friday Photo Challenge!!!
Each Friday I will give you a theme and you'll have the weekend to try and get the best shot. Monday you'll have some time to edit if necessary and then submit. We will vote as a class for the Top Shot on Tuesday. Think composition techniques AND creativity as you create the best shot. 1 per person.
THEME: BROKEN
Are you going to take this literal or conceptual?
Dramatic lighting? Broad or Split? High or Low key?
Is there a story or a message to tell with this theme?
Close up? Medium Shot?
Angle? Point of view?
Focus?
BE CREATIVE! USE YOUR COMPOSITION TECHNIQUES!
Interpret it any way you want and create a shot that will catch our attention with its quality and theme. Think about composition and quality (focus/exposure).
Things to do:
- Mandala/Tesselation in Photoshop (2/4/19) Don't forget the weebly posting of all four creations along with the artist statement.
- Final Shot posted on Weebly with Reflection from Exam
- Blog Comments (2) (2/8/19)
- Edpuzzle Exposure Triangle (2/8/19)
- Candy Shots in Manual Mode (2/13/19) Instructions
- Manipulating Natural Light #1
- Manipulating Light #2
- Edpuzzle for Portrait Lighting
- Portrait Lighting Cheat Sheet
- Portrait Lighting Shots
- Color Double Exposure Portraits
- Weebly Post: Color Double Exposure Post (3/15/19)
Thursday, 3/14/19 Red 52 Schedule
Bellwork: Title your entry, "Drama"
Of the four portrait lighting shots you created, which two would most likely be used for a dramatic/emotional setting? (Split, Rembrandt, Looping, Butterfly)
Explain your choices.
Things to do:
Of the four portrait lighting shots you created, which two would most likely be used for a dramatic/emotional setting? (Split, Rembrandt, Looping, Butterfly)
Explain your choices.
Things to do:
- Mandala/Tesselation in Photoshop (2/4/19) Don't forget the weebly posting of all four creations along with the artist statement.
- Final Shot posted on Weebly with Reflection from Exam
- Blog Comments (2) (2/8/19)
- Edpuzzle Exposure Triangle (2/8/19)
- Candy Shots in Manual Mode (2/13/19) Instructions
- Manipulating Natural Light #1
- Manipulating Light #2
- Edpuzzle for Portrait Lighting
- Portrait Lighting Cheat Sheet
- Portrait Lighting Shots
- Color Double Exposure Portraits
Wednesday, 3/13/19
Today is a work day! Use this time wisely! Do not be distracted by other digital devices, other websites, or other classmates.
Your guest teacher is comfortable in Illustrator AND Photoshop as well as Graphic Design. Ask for feedback and/or help on your designs. Another pair of trained eyes is a gift!
Between your guest teacher and those near you, you have plenty of help.
If you need personal help from me OR have some points to turn in, email me. I will try to respond ASAP.
Congratulations Brooklyn on another Top Shot! It is stunning!
As a group, your shots for these challenges are getting better and better! You are making the voting tougher and tougher. Keep up the great work!
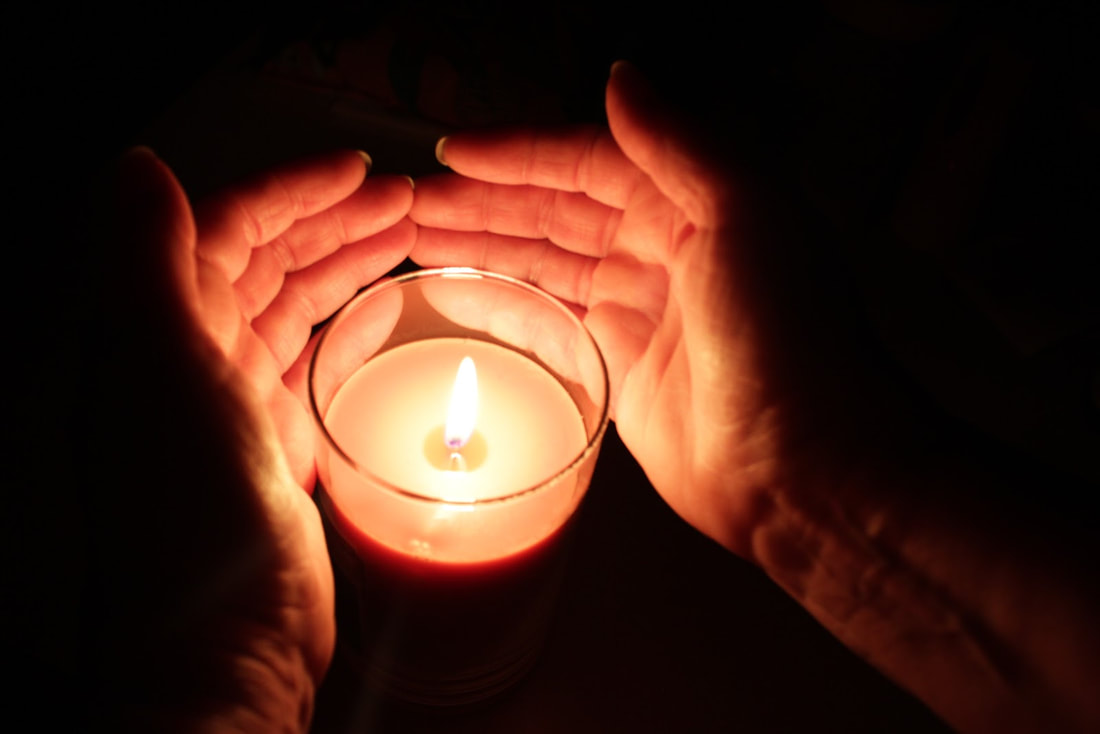
Check Skyward! Make sure I have points for all of the assignments you have done! End of the marking period is THIS Friday!
Things to do:
All Done with Everything? Get a jump on the next Photoshoot!
Things to do:
- Mandala/Tesselation in Photoshop (2/4/19) Don't forget the weebly posting of all four creations along with the artist statement.
- Final Shot posted on Weebly with Reflection from Exam
- Blog Comments (2) (2/8/19)
- Edpuzzle Exposure Triangle (2/8/19)
- Candy Shots in Manual Mode (2/13/19) Instructions
- Manipulating Natural Light #1
- Manipulating Light #2
- Edpuzzle for Portrait Lighting
- Portrait Lighting Cheat Sheet
- Portrait Lighting Shots
All Done with Everything? Get a jump on the next Photoshoot!
Tuesday, 3/12/19 Red 52 Schedule
Bellwork: Follow the link and vote for the Photo Friday Top Shot (You can vote for your own, but be honest! Is it the BEST shot? Look at composition and quality.) Vote here.
Any remaining portrait shots HAVE to be done today AND we need to take down the light studio. Time to start brainstorming a new spot....I have some ideas.
Check Skyward! Make sure I have points for all of the assignments you have done! End of the marking period is THIS Friday!
Things to do:
All Done with Everything? Get a jump on the next Photoshoot!
Any remaining portrait shots HAVE to be done today AND we need to take down the light studio. Time to start brainstorming a new spot....I have some ideas.
Check Skyward! Make sure I have points for all of the assignments you have done! End of the marking period is THIS Friday!
Things to do:
- Mandala/Tesselation in Photoshop (2/4/19) Don't forget the weebly posting of all four creations along with the artist statement.
- Final Shot posted on Weebly with Reflection from Exam
- Blog Comments (2) (2/8/19)
- Edpuzzle Exposure Triangle (2/8/19)
- Candy Shots in Manual Mode (2/13/19) Instructions
- Manipulating Natural Light #1
- Manipulating Light #2
- Edpuzzle for Portrait Lighting
- Portrait Lighting Cheat Sheet
- Portrait Lighting Shots
All Done with Everything? Get a jump on the next Photoshoot!
Monday, 3/11/19
Bellwork: Download the pdf below and upload it to your folder for this class. We will discuss it.
| exposure_diagram__1_.pdf |
Take some time to edit/submit your 'Hands' photo from your Friday Photo Challenge last week. Email me your shot by A lunch, Tuesday.
However, if you need to use the studio/lights to finish your shots, DO THAT FIRST! Tuesday is our last day to use that room.
Check Skyward! Make sure I have points for all of the assignments you have done! End of the marking period is THIS Friday!
Things to do:
- Mandala/Tesselation in Photoshop (2/4/19) Don't forget the weebly posting of all four creations along with the artist statement.
- Final Shot posted on Weebly with Reflection from Exam
- Blog Comments (2) (2/8/19)
- Edpuzzle Exposure Triangle (2/8/19)
- Candy Shots in Manual Mode (2/13/19) Instructions
- Manipulating Natural Light #1
- Manipulating Light #2
- Edpuzzle for Portrait Lighting
- Portrait Lighting Cheat Sheet
- Portrait Lighting Shots
All Done with Everything? Get a jump on the next Photoshoot!
Friday, 3/8/19- Half day schedule
|
Things to do:
|
NEW Friday Photo Challenge!!!
Each Friday I will give you a theme and you'll have the weekend to try and get the best shot. Monday you'll have some time to edit if necessary and then submit. We will vote as a class for the Top Shot on Tuesday. Think composition techniques AND creativity as you create the best shot. 1 per person.
THEME: HANDS
(Can you think of a way to integrate any of the 'manipulating light/lighting' tricks? hmmmmm, something to think about.)
What would they be doing? holding?
Is there a story or a message to tell with this theme?
Close up? Medium Shot?
Angle? Point of view?
Focus?
BE CREATIVE! USE YOUR COMPOSITION TECHNIQUES!
Interpret it any way you want and create a shot that will catch our attention with its quality and theme. Think about composition and quality (focus/exposure).
Thursday, 3/7/19 Red 52 Schedule
|
Bellwork: Title your entry, "Triangle Shape"
Which Portrait lighting has the characteristic of a triangle of light showing on the cheekbone of the shadowed side of the face? See image example for help |
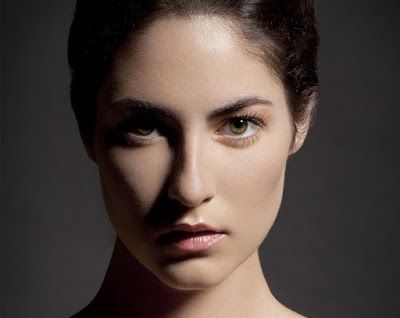
|
3 students in here will:
Things to do:
- Load/edit/insert photos from yesterday's shoot.
- Here assisting first semester students (They are starting Photoshop and will need your expertise.)
- Use this time to finish any missing assignments below.
Things to do:
- Mandala/Tesselation in Photoshop (2/4/19) Don't forget the weebly posting of all four creations along with the artist statement.
- Final Shot posted on Weebly with Reflection from Exam
- Blog Comments (2) (2/8/19)
- Edpuzzle Exposure Triangle (2/8/19)
- Candy Shots in Manual Mode (2/13/19) Instructions
- Manipulating Natural Light #1
- Manipulating Light #2
- Edpuzzle for Portrait Lighting
- Portrait Lighting Cheat Sheet
- Portrait Lighting Shots
Wednesday, 3/6/19
Bellwork: Title your entry, "Dramatic Lighting"
In your entry, which of the lighting set ups from yesterday will produce the most dramatic portrait (Split Lighting, Loop Lighting, Rembrandt Lighting or Butterfly Lighting) Explain why?
Congratulations to this week's winner of Top Photo: Reflection :)
In your entry, which of the lighting set ups from yesterday will produce the most dramatic portrait (Split Lighting, Loop Lighting, Rembrandt Lighting or Butterfly Lighting) Explain why?
Congratulations to this week's winner of Top Photo: Reflection :)
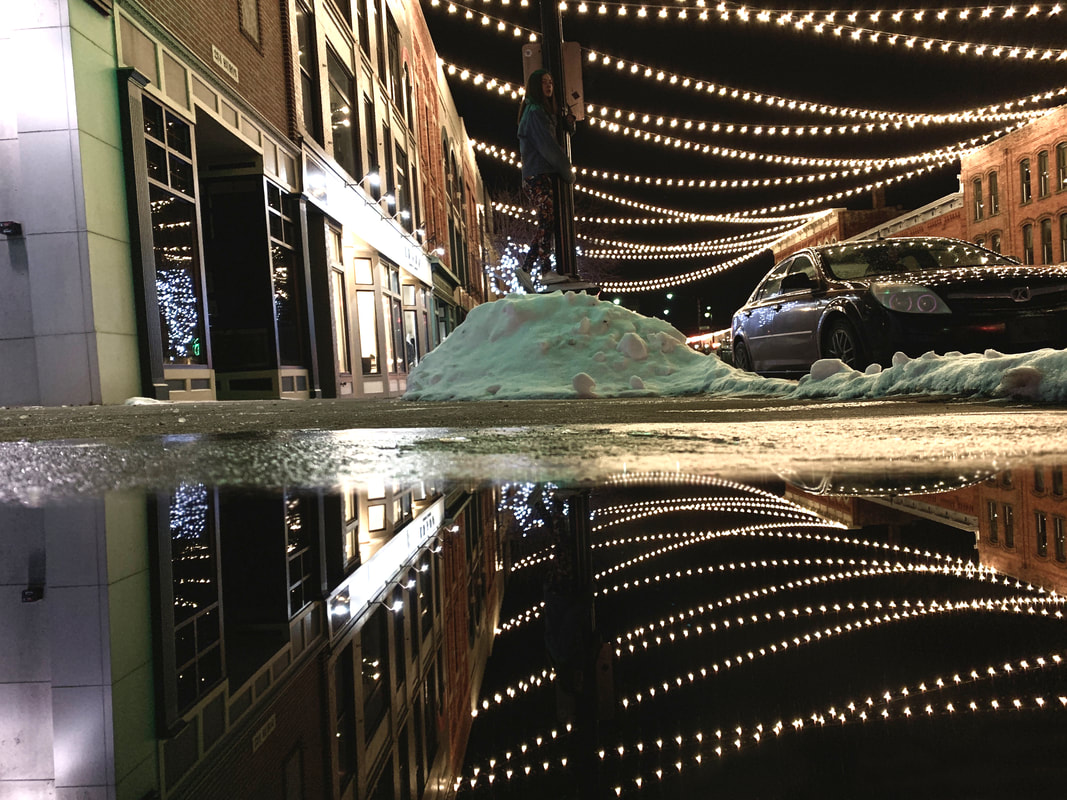
Explanation of Portrait Lighting Shots
Today we will be split in teams of 3. 3 will be shooting across the hall.
3 will be here assisting first semester students (They are starting Photoshop today and will need your expertise.) OR use this time to finish any missing assignments below.
Things to do:
Today we will be split in teams of 3. 3 will be shooting across the hall.
3 will be here assisting first semester students (They are starting Photoshop today and will need your expertise.) OR use this time to finish any missing assignments below.
Things to do:
- Mandala/Tesselation in Photoshop (2/4/19) Don't forget the weebly posting of all four creations along with the artist statement.
- Final Shot posted on Weebly with Reflection from Exam
- Blog Comments (2) (2/8/19)
- Edpuzzle Exposure Triangle (2/8/19)
- Candy Shots in Manual Mode (2/13/19) Instructions
- Manipulating Natural Light #1
- Manipulating Light #2
- Edpuzzle for Portrait Lighting
- Portrait Lighting Cheat Sheet
- Portrait Lighting Shots
Tuesday, 3/5/19 Red 52 Schedule
Bellwork: Follow the link and vote for the Photo Friday Top Shot (You can vote for your own, but be honest! Is it the BEST shot? Look at composition and quality.) Vote here.
Once Photo 1 is situated, we'll go through the slideshow and directions for your cheat sheet together.
Use this slideshow AND the edpuzzle from yesterday to help you fill out the cheat sheet. You will fill out the hard copy as you'll want to have it with you when you are shooting across the hall.
While I have some printed for you, here is the file below if you were absent or lost yours.
| portrait_lighting_cheat_sheet.pdf |
Things to do:
- Mandala/Tesselation in Photoshop (2/4/19) Don't forget the weebly posting of all four creations along with the artist statement.
- Final Shot posted on Weebly with Reflection from Exam
- Blog Comments (2) (2/8/19)
- Edpuzzle Exposure Triangle (2/8/19)
- Candy Shots in Manual Mode (2/13/19) Instructions
- Manipulating Natural Light #1
- Manipulating Light #2
- Edpuzzle for Portrait Lighting
- Portrait Lighting Cheat Sheet
Monday, 3/4/19
No Bellwork today! You have a lot to cram into this hour! Get started right away!
Things to do:
- Use today to edit your 'Reflection' photo. Submit your edited jpeg to me through email. Have this done by the end of the hour (at the very latest, lunch tomorrow) in order to have it included in the vote tomorrow!
- The next assignment will give you an introduction to some key words and techniques used in Portrait Photography. It is an edpuzzle assignment. Try to finish by the end of the hour OR at home tonight so that we can build on what you learned tomorrow!
Things to do:
- Mandala/Tesselation in Photoshop (2/4/19) Don't forget the weebly posting of all four creations along with the artist statement.
- Final Shot posted on Weebly with Reflection from Exam
- Blog Comments (2) (2/8/19)
- Edpuzzle Exposure Triangle (2/8/19)
- Candy Shots in Manual Mode (2/13/19) Instructions
- Manipulating Natural Light #1
- Manipulating Light #2
- Edpuzzle for Portrait Lighting
Friday, 3/1/19
Bellwork: Title your entry, "Diffusor vs No Diffusor"
After taking shots for the Manipulating Natural Light #2, you have shots to compare the differences between using the different tools.
In your entry, describe the difference between using a diffusor and not using a diffusor on your shots. How does it affect it?
NEW Friday Photo Challenge!!!
Each Friday I will give you a theme and you'll have the weekend to try and get the best shot. Monday you'll have some time to edit if necessary and then submit. We will vote as a class for the Top Shot on Tuesday. Think composition techniques AND creativity as you create the best shot. 1 per person.
THEME: REFLECTIONS Take a look at this link for inspiration.
Interpret it any way you want and create a shot that will catch our attention with its quality and theme. Think about composition and quality (focus/exposure).
Lets make a plan to finish up with the Manipulating Light #1 and #2 today. If you are done with everything, see me. I've got plans for you :)
Things to do:
All done with everything?
After taking shots for the Manipulating Natural Light #2, you have shots to compare the differences between using the different tools.
In your entry, describe the difference between using a diffusor and not using a diffusor on your shots. How does it affect it?
NEW Friday Photo Challenge!!!
Each Friday I will give you a theme and you'll have the weekend to try and get the best shot. Monday you'll have some time to edit if necessary and then submit. We will vote as a class for the Top Shot on Tuesday. Think composition techniques AND creativity as you create the best shot. 1 per person.
THEME: REFLECTIONS Take a look at this link for inspiration.
Interpret it any way you want and create a shot that will catch our attention with its quality and theme. Think about composition and quality (focus/exposure).
Lets make a plan to finish up with the Manipulating Light #1 and #2 today. If you are done with everything, see me. I've got plans for you :)
Things to do:
- Mandala/Tesselation in Photoshop (2/4/19) Don't forget the weebly posting of all four creations along with the artist statement.
- Final Shot posted on Weebly with Reflection from Exam
- Blog Comments (2) (2/8/19)
- Edpuzzle Exposure Triangle (2/8/19)
- Candy Shots in Manual Mode (2/13/19) Instructions
- Manipulating Natural Light #1
- NEW ASSIGNMENT Manipulating Light #2
All done with everything?
- Start researching for inspiration for the Reflection Theme shot for this weekend.
- Hunt for goodies in the art room attics for possible props/still life objects/backdrops
Thursday, 2/28/19 Red 52 Schedule
Bellwork: Title your entry, "Additive versus Subtractive Lighting"
Thinking in terms of math....add and subtract.....add light or subtract light.
Copy the terms for manipulating natural light below and then label them as additive or subtractive lighting.
Flag-
Diffusor-
Reflector-
Lets make a plan to finish up with the Manipulating Light #1 and #2 today. If you are done with everything, see me. I've got plans for you :)
Things to do:
- Mandala/Tesselation in Photoshop (2/4/19) Don't forget the weebly posting of all four creations along with the artist statement.
- Final Shot posted on Weebly with Reflection from Exam
- Blog Comments (2) (2/8/19)
- Edpuzzle Exposure Triangle (2/8/19)
- Candy Shots in Manual Mode (2/13/19) Instructions
- Manipulating Natural Light #1
- NEW ASSIGNMENT Manipulating Light #2
Wednesday, 2/27/19
Bellwork: Title your entry, "Flagging"
Go to this link and read to understand what 'flagging' is. Make sure to follow through to the end to see the pictures of the process too!
In your entry, describe what 'flagging' is in your own words.
Congratulations to this week's winner of Top Photo: Shadow :)
Go to this link and read to understand what 'flagging' is. Make sure to follow through to the end to see the pictures of the process too!
In your entry, describe what 'flagging' is in your own words.
Congratulations to this week's winner of Top Photo: Shadow :)
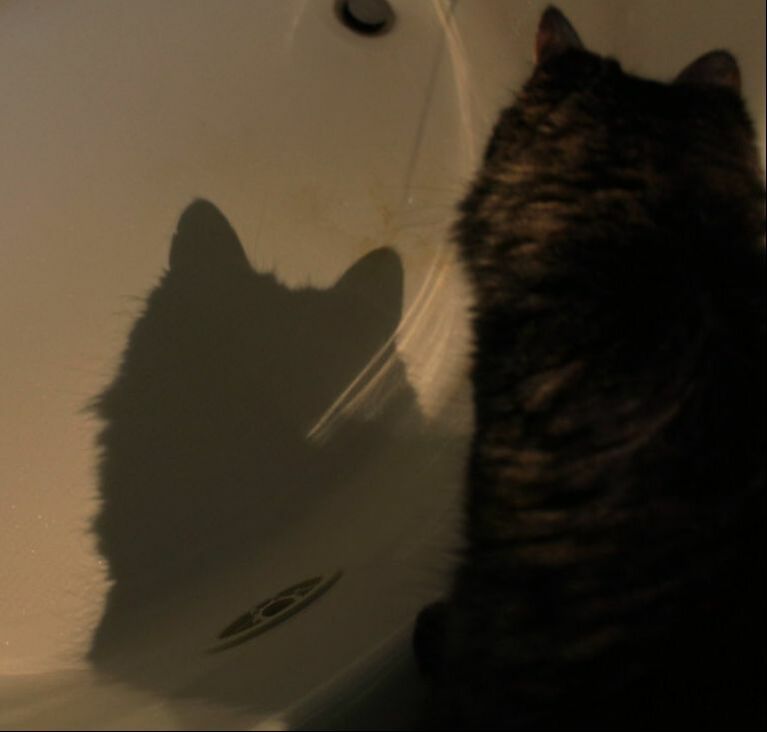
Things to do:
- Mandala/Tesselation in Photoshop (2/4/19) Don't forget the weebly posting of all four creations along with the artist statement.
- Final Shot posted on Weebly with Reflection from Exam
- Blog Comments (2) (2/8/19)
- Edpuzzle Exposure Triangle (2/8/19)
- Candy Shots in Manual Mode (2/13/19) Instructions
- Manipulating Natural Light #1
- NEW ASSIGNMENT Manipulating Light #2
Tuesday, 2/26/19 Red 52 Schedule
Bellwork: Follow the link and vote for the Photo Friday Top Shot (You can vote for your own, but be honest! Is it the BEST shot? Look at composition and quality.) Vote here.
NEW ASSIGNMENT Manipulating Light #2
Things to do:
NEW ASSIGNMENT Manipulating Light #2
Things to do:
- Mandala/Tesselation in Photoshop (2/4/19) Don't forget the weebly posting of all four creations along with the artist statement.
- Final Shot posted on Weebly with Reflection from Exam
- Blog Comments (2) (2/8/19)
- Edpuzzle Exposure Triangle (2/8/19)
- Candy Shots in Manual Mode (2/13/19) Instructions
- Manipulating Natural Light #1
- NEW ASSIGNMENT Manipulating Light #2
Friday, 2/22/19
Bellwork: Title your entry, "ISO". Use this site to help you.
Explain what ISO means.
What does a lower number mean, like 100?
What does a higher number mean, like 3200?
NEW Friday Photo Challenge!!!
Each Friday I will give you a theme and you'll have the weekend to try and get the best shot. Monday you'll have some time to edit if necessary and then submit. We will vote as a class for the Top Shot on Tuesday. Think composition techniques AND creativity as you create the best shot. 1 per person.
THEME: SHADOWS
Interpret it any way you want and create a shot that will catch our attention with its quality and theme. Think about composition and quality (focus/exposure).
Things to do:
All done with everything?
Start researching/brainstorming for your Top Shot
Explain what ISO means.
What does a lower number mean, like 100?
What does a higher number mean, like 3200?
NEW Friday Photo Challenge!!!
Each Friday I will give you a theme and you'll have the weekend to try and get the best shot. Monday you'll have some time to edit if necessary and then submit. We will vote as a class for the Top Shot on Tuesday. Think composition techniques AND creativity as you create the best shot. 1 per person.
THEME: SHADOWS
Interpret it any way you want and create a shot that will catch our attention with its quality and theme. Think about composition and quality (focus/exposure).
Things to do:
- Mandala/Tesselation in Photoshop (2/4/19) Don't forget the weebly posting of all four creations along with the artist statement.
- Final Shot posted on Weebly with Reflection from Exam
- Blog Comments (2) (2/8/19)
- Edpuzzle Exposure Triangle (2/8/19)
- Candy Shots in Manual Mode (2/13/19) Instructions
- Manipulating Natural Light
All done with everything?
Start researching/brainstorming for your Top Shot
Thursday, 2/21/19 Red 52 Schedule
Bellwork: Title your entry, "What would you do?".
You are shooting in manual mode. You want to create a motion blur in your shot so you purposefully choose a slow shutter speed. It is a bright sunny day.
In your journal, explain what you would try to do for the aperture and the ISO to get a good exposure
NEW ASSIGNMENT! Manipulating Natural Light
Things to do:
- Mandala/Tesselation in Photoshop (2/4/19) Don't forget the weebly posting of all four creations along with the artist statement.
- Final Shot posted on Weebly with Reflection from Exam
- Blog Comments (2) (2/8/19)
- Edpuzzle Exposure Triangle (2/8/19)
- Friday Photo Challenge (2/8-2/11/19)
- Candy Shots in Manual Mode (2/13/19) Instructions
- Manipulating Natural Light
Wednesday, 2/20/19
Bellwork: Title your entry, "Light Meter and Exposure".
Copy and paste the jpeg below and answer the questions in your journal.
Copy and paste the jpeg below and answer the questions in your journal.
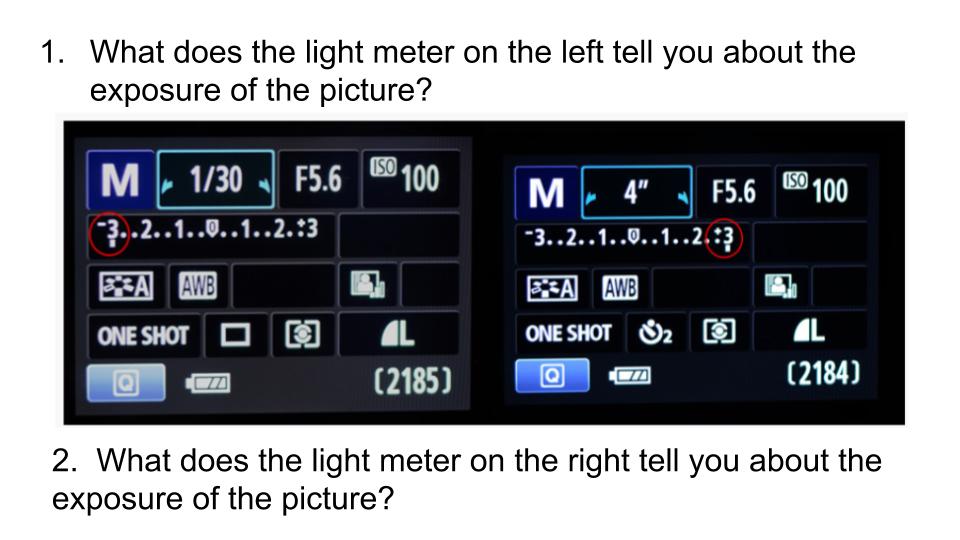
See this link for help if you need it. I will review this with you.
Quick demo on shooting with 'Q' in manual mode.
Things to do:
Quick demo on shooting with 'Q' in manual mode.
Things to do:
- Mandala/Tesselation in Photoshop (2/4/19) Don't forget the weebly posting of all four creations along with the artist statement.
- Final Shot posted on Weebly with Reflection from Exam
- Blog Comments (2) (2/8/19)
- Edpuzzle Exposure Triangle (2/8/19)
- Friday Photo Challenge (2/8-2/11/19)
- Candy Shots in Manual Mode (2/13/19) Instructions
Tuesday, 2/19/19
Bellwork: Check Skyward!
Congratulations to our first Top Photo Shot of the semester!
Top Photo Chat-New theme coming Friday!!
Congratulations to our first Top Photo Shot of the semester!
Top Photo Chat-New theme coming Friday!!
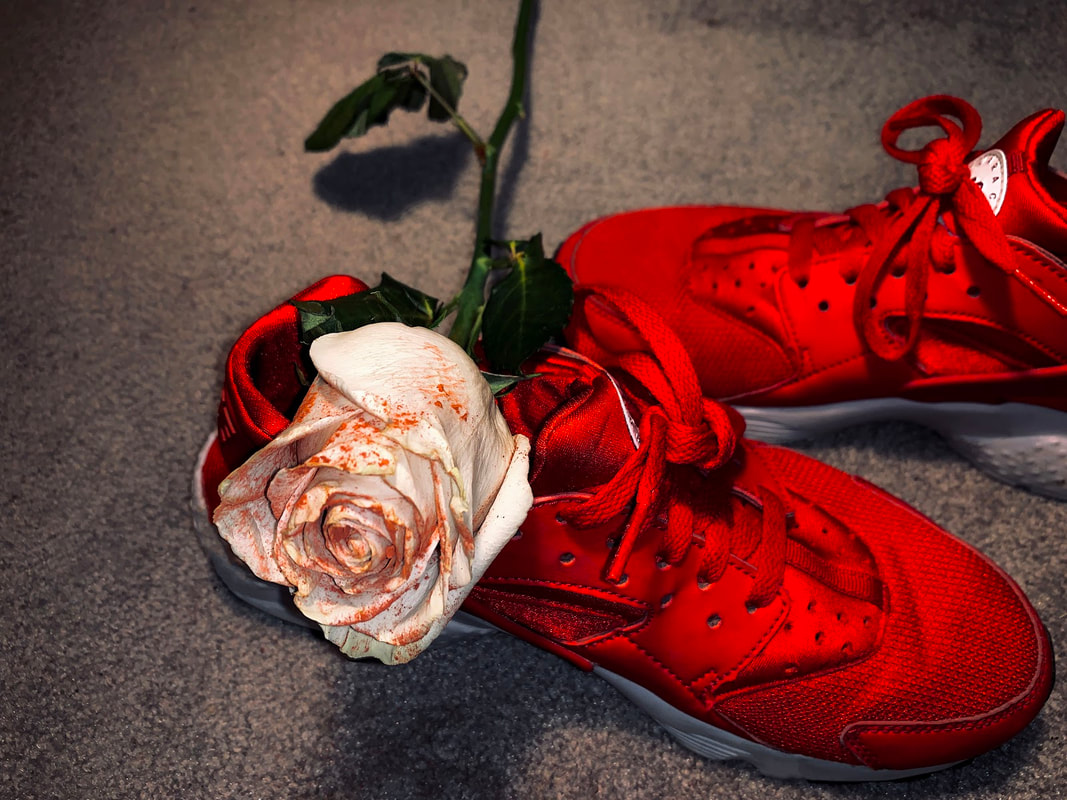
- Review Candy Shots Project
Things to do:
- Mandala/Tesselation in Photoshop (2/4/19) Don't forget the weebly posting of all four creations along with the artist statement.
- Final Shot posted on Weebly with Reflection from Exam
- Blog Comments (2) (2/8/19)
- Edpuzzle Exposure Triangle (2/8/19)
- Friday Photo Challenge (2/8-2/11/19)
- Candy Shots in Manual Mode (2/13/19) Instructions
Thursday, 2/14/19 (Snow day Tuesday and Wednesday)

Bellwork: Follow the link and vote for the Photo Friday Top Shot (You can vote for your own, but be honest! Is it the BEST shot? Look at composition and quality.)
image source: https://moncurephoto.weebly.com/2017--2018-assignments/category/candy
Candy Shots Chat- See Candy Instructions
Things to do:
image source: https://moncurephoto.weebly.com/2017--2018-assignments/category/candy
Candy Shots Chat- See Candy Instructions
Things to do:
- Mandala/Tesselation in Photoshop (2/4/19) Don't forget the weebly posting of all four creations along with the artist statement.
- Final Shot posted on Weebly with Reflection from Exam
- Blog Comments (2) (2/8/19)
- Edpuzzle Exposure Triangle (2/8/19)
- Friday Photo Challenge (2/8-2/11/19)
- Candy Shots in Manual Mode (2/13/19) Instructions
Monday, 2/9/19
Bellwork: Title your entry, "Aperture Review"
Which aperture below will give you the most shallow depth of field? Explain what shallow depth of field means.
f2, f2, f5.6, f8, f16, f22
Some tips for working this hour....
Which aperture below will give you the most shallow depth of field? Explain what shallow depth of field means.
f2, f2, f5.6, f8, f16, f22
Some tips for working this hour....
- Check your edpuzzle. You may want to change some answers....if you don't understand why your answer was wrong. ASK! I'll give credit back for fixed answers. ONLY 3 COMPLETED IT! Use today to get it done. New assignment tomorrow!
- Only 3 people emailed me with screenshots of comments on weebly sites. First, look to see if you have a new comment to view. Second, make sure you comment on two, hopefully a site that doesn't have one yet. See Friday for possible comment suggestions.
- Edit and upload your Red photo by the end of the hour. Voting tomorrow!
- Mandala/Tesselation in Photoshop (2/4/19) Don't forget the weebly posting of all four creations along with the artist statement.
- Final Shot posted on Weebly with Reflection from Exam
- Blog Comments (2) (2/8/19)
- Edpuzzle Exposure Triangle (2/8/19)
- Friday Photo Challenge (2/8-2/11/19) Make any edits you feel necessary to your Red Themed photo. (Levels? Cropping? Filters? Adjustment Layers?) When you are done, upload the jpeg to our class folder. It HAS to be in your folder by the end of the hour to be included in the vote!
Friday, 2/8/19
Bellwork: For your bellwork time today, I want you to look through and read the blog posts of your fellow Photo 2 students for their Final Shot and Reflection post. (See the link posted above.)
You will be responsible for commenting on AT LEAST TWO DIFFERENT BLOGS. Take a screenshot (print screen) of the comment you posted and paste it into an email. The comments need to be posted by next Thursday (2/14/19) The link for the sites can be found above in the description for this class.
The etiquette for blog comments is the same as if we were critiquing face to face.
POSSIBLE COMMENT TOPICS:
NEW ASSIGNMENT! Exposure Triangle Edpuzzle
Your new class code is wowcoeb.
Copy and paste this code. Go to edpuzzle.com. Log in with your Google account. Paste code into new class and join.
Remember to answer your questions with enough detail to demonstrate your understanding and get credit for the question.
You will be responsible for commenting on AT LEAST TWO DIFFERENT BLOGS. Take a screenshot (print screen) of the comment you posted and paste it into an email. The comments need to be posted by next Thursday (2/14/19) The link for the sites can be found above in the description for this class.
The etiquette for blog comments is the same as if we were critiquing face to face.
- Keep it respectful and supportive.
- Be specific with your comments and suggestions.
- Try not to get defensive. Be open to the suggestions. Explore the idea, then, make a decision as an artist whether to revise or keep 'as is'.
- Make sure no one is left out. As you start to think about who gets your second post, look for blogs that don't have a comment yet.
POSSIBLE COMMENT TOPICS:
- Comment on a technical aspect of the photo (good or bad). For example: focus, exposure, mergers/background clutter etc.
- Comment on the compositional technique...done correctly? the best one for this theme? suggestions?
- Comment on the subject matter/theme. Creativity? Questions?
NEW ASSIGNMENT! Exposure Triangle Edpuzzle
Your new class code is wowcoeb.
Copy and paste this code. Go to edpuzzle.com. Log in with your Google account. Paste code into new class and join.
Remember to answer your questions with enough detail to demonstrate your understanding and get credit for the question.
NEW Friday Photo Challenge!!! Just like Top Photographer!!
Each Friday I will give you a theme and you'll have the weekend to try and get the best shot. Monday you'll have some time to edit if necessary and then submit. We will vote as a class for the Top Shot on Tuesday. Think composition techniques AND creativity as you create the best shot. 1 per person.
THEME: Red
Interpret it any way you want and create a shot that will catch our attention with its quality and theme.
Things to do:
All done with everything?
Start brainstorming for your Top Shot
Each Friday I will give you a theme and you'll have the weekend to try and get the best shot. Monday you'll have some time to edit if necessary and then submit. We will vote as a class for the Top Shot on Tuesday. Think composition techniques AND creativity as you create the best shot. 1 per person.
THEME: Red
Interpret it any way you want and create a shot that will catch our attention with its quality and theme.
Things to do:
- Mandala/Tesselation in Photoshop (2/4/19) Don't forget the weebly posting of all four creations along with the artist statement.
- Final Shot posted on Weebly with Reflection from Exam
- Blog Comments (2) (2/8/19)
- Edpuzzle Exposure Triangle (2/8/19)
All done with everything?
Start brainstorming for your Top Shot
Thursday, 2/7/19 (Snow day Wednesday)
Bellwork: Title your entry, "Flip Horizontally/Vertically"
Explain the steps you take in order to flip a photo horizontally or vertically.
Things to do: Last day for Tesselations? I'll be around to ask...
Explain the steps you take in order to flip a photo horizontally or vertically.
Things to do: Last day for Tesselations? I'll be around to ask...
- Mandala/Tesselation in Photoshop (2/4/19) Don't forget the weebly posting of all four creations along with the artist statement.
- Final Shot posted on Weebly with Reflection from Exam
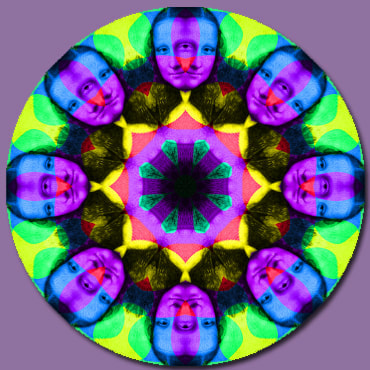
All Done with Everything? Take on a circular Mandala!
Tuesday, 2/5/19
Bellwork: Title your entry, "Rulers"
Explain how you open the Rulers in the Photoshop workspace?
Explain how you create a guideline in Photoshop?
Things to do:
Explain how you open the Rulers in the Photoshop workspace?
Explain how you create a guideline in Photoshop?
Things to do:
- Mandala/Tesselation in Photoshop (2/4/19) Don't forget the weebly posting of all four creations along with the artist statement.
- Final Shot posted on Weebly with Reflection from Exam
Monday, 2/4/19
You will need a new Google Folder for this class.
Go to your Google Drive and create a new folder.
Title it, 'Last Name, First Name Photo 2' and SHARE IT WITH ME ([email protected])
With the new folder opened, create a new Google Doc. Title it '1 Journal'. As you know this will be your study guide and resource throughout the semester and for the exam.
IF YOU DID NOT POST YOUR FINAL SHOT FROM FIRST SEMESTER TO YOUR WEEBLY SITE WITH YOUR REFLECTION, DO SO. WE'LL BE COMMENTING ON EACH OTHERS SHOTS THIS WEEK!
Next, the First Project! Read through the Document then begin the video.
- Mandala/Tesselation in Photoshop (2/4/19)

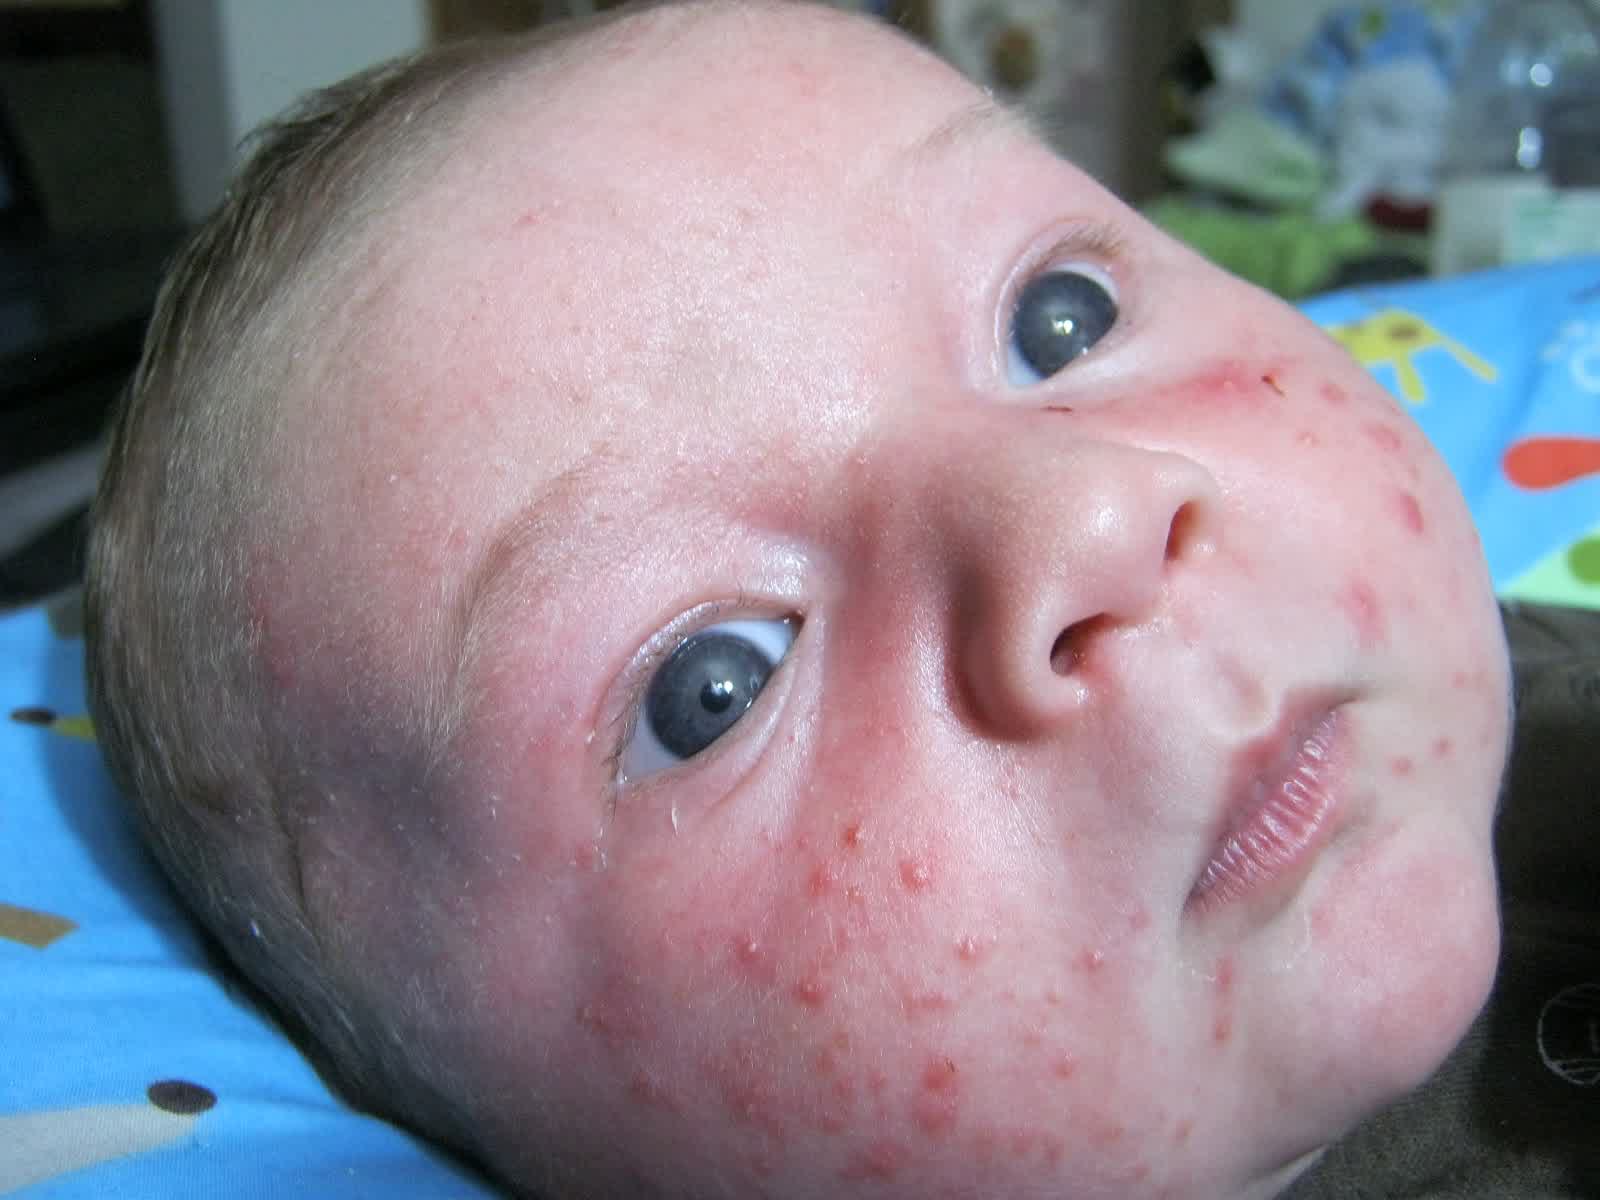