Online Learning
3/16/20-3/27/20
Use this extended time at home to finish your Abstract Sculpture Painting.
Use Photopea.com. It is VERY close to Photoshop. If you are not sure how to do a Photoshop step in Photopea, GOOGLE IT.....or email me :)
If you need reminders as to how to do an assignment, scroll down the agendas on this site to find the instruction links or tutorials. If you get stuck or have any questions, email me :)
WHEN YOU COMPLETE AN ASSIGNMENT, EMAIL ME AND I WILL LOOK AT YOUR FOLDER TO GET YOUR POINTS INTO SKYWARD AND CAUGHT UP!
Save any assignments finished in Photopea.com as a psd file and then upload it to your folder for this class. This way I will be able to look at your layers.
Things to do:
- Pitcher Rendering
- Abstract Sculpture Painting (3/6/20)
Friday, 3/13/20
MORE TIPS TO REMEMBER AS YOU PAINT:
Things to do:
- You are in Photoshop. Don't forget you have Adjustment layers to adjust photos before painting...turn in black and white, adjust the contrast. I suggest you flatten the image once you have it the way you want it, then start tracing and painting.
- You also have blend modes.....these may help in your initial photo touch up OR in your painted layers.
Things to do:
- Pitcher Rendering
- Abstract Sculpture Painting (3/6/20)
Thursday, 3/12/20 Red 52 Schedule
TIPS TO REMEMBER AS YOU PAINT:
Things to do:
- Fill your shape with a neutral base color on one layer. Then make a new layer and create a clipping mask to the layer below. You will be able to make wide, sweeping strokes with the paint brush for highlights or shadows and they will be contained within that base color shape.
- Don't forget when painting (or erasing) in a straight line you can click to start the line, then shift + click at the end of the line. It will paint (erase) in the straight line created by the two click points.
- Think Temp layers to create highlights and shadows and erase away the overspray.
- Create smooth blending using the eyedropper and half opacity or flow to build up the gradation in a smooth manner.
Things to do:
- Pitcher Rendering
- Abstract Sculpture Painting (3/6/20)
Wednesday, 3/11/20
Bellwork: Use Video #12 at approximately 2 minutes 25 seconds to help you answer the question below.
What is a light bleed? How does he do it?
As you get into your Abstract Sculpture project, think about all of the techniques you practiced on the Pitcher. Painting techniques BUT also using your observation skills to copy the values you see as closely as possible.
Things to do:
What is a light bleed? How does he do it?
As you get into your Abstract Sculpture project, think about all of the techniques you practiced on the Pitcher. Painting techniques BUT also using your observation skills to copy the values you see as closely as possible.
Things to do:
- Pitcher Rendering
- Abstract Sculpture Painting (3/6/20)
Tuesday, 3/10/20, Red 52 Schedule
(Monday, 3/9/20 both absent)
Bellwork: Use Video #13 at approximately 45 seconds to help you answer the question below.
What is vignetting (vin-yetting)? How does he do it?
Your goal was to have your Pitcher refined and shown to me Friday. If you missed that goal, get moving.
Once finished, move on the 'Abstract Sculpture Painting'- See Friday for details
Things to do:
What is vignetting (vin-yetting)? How does he do it?
Your goal was to have your Pitcher refined and shown to me Friday. If you missed that goal, get moving.
Once finished, move on the 'Abstract Sculpture Painting'- See Friday for details
Things to do:
- Pitcher Rendering
- Abstract Sculpture Painting (3/6/20)
Friday, 3/6/10 Half Day Schedule
|
Half Day Schedule:
1st Hour 7:35 - 8:05 2nd Hour 8:10 - 8:40 3rd Hour 8:45 - 9:15 4th Hour 9:20 - 9:50 5th Hour 9:55 - 10:25 6th Hour 10:30 - 11:00 |
Your goal is to have the Pitcher Painting done today and show me for credit. It goes on next marking period. But we are moving on.....
|
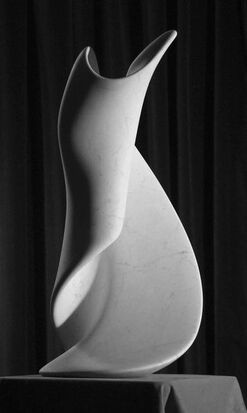
Next: Do a Google Image search for a black and white photograph of an abstract sculpture.
Save the high quality jpeg and use it as a reference. (see example below) You will recreate the image as a digital painting in Photoshop using what you learned in the Pitcher painting.
The biggest differences between this assignment and the Pitcher is that you will need to create a line drawing of the basic shapes first (You may trace it on a new layer this time) AND you'll be creating the temp layers and the digital blending on your own without step by step prompting.
Try to use your observational skills along with your digital painting skills to create as close a recreation of the original as you can.
Thursday, 3/5/20 Red 52 Schedule
Bellwork: Use Video #12 at approximately 40 seconds to help you answer the question below.
Where does he redo an occlusion shadow? Why is it really important to have one here?
Your goal today is to complete through videos 13 and the progress in your psd file to match it. Don't let my pace slow you down.
The last videos, 10-13, take the longest to make in Photoshop so if you are lagging, that's ok. Our goal is to finish up by Friday.
Things to do:
- Pen Practice- (2/3/20)
- Intro to Brush Panel Assignments 1-3 (2/4/20)
- Keyboard Shortcuts and Paint Practice (2/6/20)
- Color Mixing with Eyedropper (2/10/20)
- Brushblending (2/13/20)
- Temp Layers (2/13/20)
- NEW ASSIGNMENT! Basic Rendering, Pitcher (details on 2/19/20)
Wednesday, 3/4/20
Bellwork: Use Video #11 at approximately one minute: 25 seconds to help you answer the question below.
What phase of the painting takes the longest? Why?
Your goal today is to complete through videos 13 and the progress in your psd file to match it. Don't let my pace slow you down.
The last videos, 10-13, take the longest to make in Photoshop so if you are lagging, that's ok. Our goal is to finish up by Friday.
Things to do:
- Pen Practice- (2/3/20)
- Intro to Brush Panel Assignments 1-3 (2/4/20)
- Keyboard Shortcuts and Paint Practice (2/6/20)
- Color Mixing with Eyedropper (2/10/20)
- Brushblending (2/13/20)
- Temp Layers (2/13/20)
- NEW ASSIGNMENT! Basic Rendering, Pitcher (details on 2/19/20)
Tuesday, 3/3/20 Red 52 Schedule
Bellwork: Use Video #7 at approximately 25 seconds to help you answer the question below.
What are occlusion shadows? Where do they happen?
Your goal today is to complete through videos 10-12 and the progress in your psd file to match it. Don't let my pace slow you down. The later videos and the painting that goes with it may take longer than we anticipate.
Things to do:
What are occlusion shadows? Where do they happen?
Your goal today is to complete through videos 10-12 and the progress in your psd file to match it. Don't let my pace slow you down. The later videos and the painting that goes with it may take longer than we anticipate.
Things to do:
- Pen Practice- (2/3/20)
- Intro to Brush Panel Assignments 1-3 (2/4/20)
- Keyboard Shortcuts and Paint Practice (2/6/20)
- Color Mixing with Eyedropper (2/10/20)
- Brushblending (2/13/20)
- Temp Layers (2/13/20)
- NEW ASSIGNMENT! Basic Rendering, Pitcher (details on 2/19/20)
Monday, 3/2/20
Bellwork: Use Video #6 at approximately 15 seconds to help you answer the question below.
What is reflected light?
How does this affect your values?
Your goal today is to complete through video 9 and the progress in your psd file to match it. Don't let my pace slow you down. The later videos and the painting that goes with it may take longer than we anticipate.
Things to do:
What is reflected light?
How does this affect your values?
Your goal today is to complete through video 9 and the progress in your psd file to match it. Don't let my pace slow you down. The later videos and the painting that goes with it may take longer than we anticipate.
Things to do:
- Pen Practice- (2/3/20)
- Intro to Brush Panel Assignments 1-3 (2/4/20)
- Keyboard Shortcuts and Paint Practice (2/6/20)
- Color Mixing with Eyedropper (2/10/20)
- Brushblending (2/13/20)
- Temp Layers (2/13/20)
- NEW ASSIGNMENT! Basic Rendering, Pitcher (details on 2/19/20)
Wednesday, 2/26/20 - Friday, 2/28/20 Snow Days :)
Tuesday, 2/25/20 Red 52 Schedule
Bellwork: Use Video #4 at approximately 1 minute 5 sec to help you answer the question below.
What is a form shadow?
What is a cast shadow?
Your goal today is to complete through video 6 and the progress in your psd file to match it. Don't let my pace slow you down. The later videos and the painting that goes with it may take longer than we anticipate.
Things to do:
What is a form shadow?
What is a cast shadow?
Your goal today is to complete through video 6 and the progress in your psd file to match it. Don't let my pace slow you down. The later videos and the painting that goes with it may take longer than we anticipate.
Things to do:
- Pen Practice- (2/3/20)
- Intro to Brush Panel Assignments 1-3 (2/4/20)
- Keyboard Shortcuts and Paint Practice (2/6/20)
- Color Mixing with Eyedropper (2/10/20)
- Brushblending (2/13/20)
- Temp Layers (2/13/20)
- NEW ASSIGNMENT! Basic Rendering, Pitcher (details on 2/19/20)
Monday, 2/24/20
Bellwork: Copy and paste the Pacing guide below into your journal. This will give you an idea of where you should be approximately in your Pitcher Rendering Project.
Monday: Videos 1-4 and psd progress to match it.
Tuesday: Videos 5-6 and psd progress to match it.
Wednesday: Videos 7-9 and psd progress to match it.
Thursday: Videos 10-12 and psd progress to match it.
Friday: Video 13 and psd progress to match it.
If all goes well, you will be putting finishing touches on the Pitcher by Friday. Bellwork this week will come from the video explanation.
Things to do:
- Pen Practice- (2/3/20)
- Intro to Brush Panel Assignments 1-3 (2/4/20)
- Keyboard Shortcuts and Paint Practice (2/6/20)
- Color Mixing with Eyedropper (2/10/20)
- Brushblending (2/13/20)
- Temp Layers (2/13/20)
- NEW ASSIGNMENT! Basic Rendering, Pitcher (details on 2/19/20)
Friday, 2/21/20
Bellwork: Title your entry, "Digital Painting Progress"
In your entry describe how you are doing with the digital painting process. What is frustrating? What is easy?
NEW ASSIGNMENT! Basic Rendering, Pitcher Explanation
Things to do:
NEW ASSIGNMENT! Basic Rendering, Pitcher
In your entry describe how you are doing with the digital painting process. What is frustrating? What is easy?
NEW ASSIGNMENT! Basic Rendering, Pitcher Explanation
Things to do:
- Pen Practice- (2/3/20)
- Intro to Brush Panel Assignments 1-3 (2/4/20)
- Keyboard Shortcuts and Paint Practice (2/6/20)
- Color Mixing with Eyedropper (2/10/20)
- Brushblending (2/13/20)
- Temp Layers (2/13/20)
- NEW ASSIGNMENT! Basic Rendering, Pitcher (2/19/20)
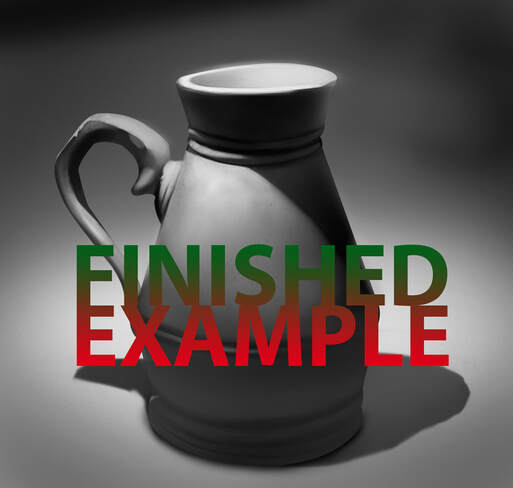
NEW ASSIGNMENT! Basic Rendering, Pitcher
- I have shared a folder called 1 Basic Rendering. Take a minute to go through the folder to find the following...... a psd file, a folder of videos, and jpegs. You will need to download the .psd file.
- The videos in the folder are broken down into 2-3 minute videos. WATCH THEM IN ORDER! DON'T SKIP! They build upon each other and will take you step by step through the process of creating your final image below. How you choose to watch and create is up to you. I watched them all to see where I was going, then went back and played and paused as I experimented. You may want to watch and play one at a time. It is up to you. Your final rendered vase is the goal. I will need to see your psd file to see the layers BEFORE YOU FLATTEN THEM!
- THERE IS A PSD FILE ALL SET UP AND READY TO GO IN THE FOLDER. You don't have to set it up from scratch this time.
- Obviously this is not a one day/baby assignment. Take the time to do it right. The rest of the semester will build from these techniques.
Thursday, 2/20/20 Red 52 Schedule
New Print Folder! Be sure to RENAME the jpeg as your Last name, First name so I know who to get it to. This folder will be closed at the end of the day on Thursday.
Bellwork: Title your entry, "Glaze Layers"
In your entry, explain what a Glaze Layer is and how it is different than a normal layer.
NEW ASSIGNMENT! Basic Rendering, Pitcher Explanation
Things to do:
Bellwork: Title your entry, "Glaze Layers"
In your entry, explain what a Glaze Layer is and how it is different than a normal layer.
NEW ASSIGNMENT! Basic Rendering, Pitcher Explanation
Things to do:
- Pen Practice- (2/3/20)
- Intro to Brush Panel Assignments 1-3 (2/4/20)
- Keyboard Shortcuts and Paint Practice (2/6/20)
- Color Mixing with Eyedropper (2/10/20)
- Brushblending (2/13/20)
- Temp Layers (2/13/20)
- NEW ASSIGNMENT! Basic Rendering, Pitcher (2/19/20)
Wednesday, 2/19/20
New Print Folder! Be sure to RENAME the jpeg as your Last name, First name so I know who to get it to. This folder will be closed at the end of the day on Thursday.
Bellwork: Title your entry, "Temp Layers"
In your entry, explain what a Temp Layer is and WHY is it used.
NEW ASSIGNMENT! Basic Rendering, Pitcher
Bellwork: Title your entry, "Temp Layers"
In your entry, explain what a Temp Layer is and WHY is it used.
NEW ASSIGNMENT! Basic Rendering, Pitcher
- I have shared a folder called 1 Basic Rendering. Take a minute to go through the folder to find the following...... a psd file, a folder of videos, and jpegs. You will need to download the .psd file.
- The videos in the folder are broken down into 2-3 minute videos. WATCH THEM IN ORDER! DON'T SKIP! They build upon each other and will take you step by step through the process of creating your final image below. How you choose to watch and create is up to you. I watched them all to see where I was going, then went back and played and paused as I experimented. You may want to watch and play one at a time. It is up to you. Your final rendered vase is the goal. I will need to see your psd file to see the layers BEFORE YOU FLATTEN THEM!
- THERE IS A PSD FILE ALL SET UP AND READY TO GO IN THE FOLDER. You don't have to set it up from scratch this time.
- Obviously this is not a one day/baby assignment. Take the time to do it right. The rest of the semester will build from these techniques.
Things to do:
- Pen Practice- (2/3/20)
- Intro to Brush Panel Assignments 1-3 (2/4/20)
- Keyboard Shortcuts and Paint Practice (2/6/20)
- Color Mixing with Eyedropper (2/10/20)
- Brushblending (2/13/20)
- Temp Layers (2/13/20)
- NEW ASSIGNMENT! Basic Rendering, Pitcher (2/19/20)
Tuesday, 2/18/20
No Bellwork! Jump right in! A bigger assignment is coming your way very soon. Finish these up so we can get there. I will check on your progress after 1st year critiques are finished.
2 NEW ASSIGNMENTS BELOW!
2 NEW ASSIGNMENTS BELOW!

NEW ASSIGNMENT
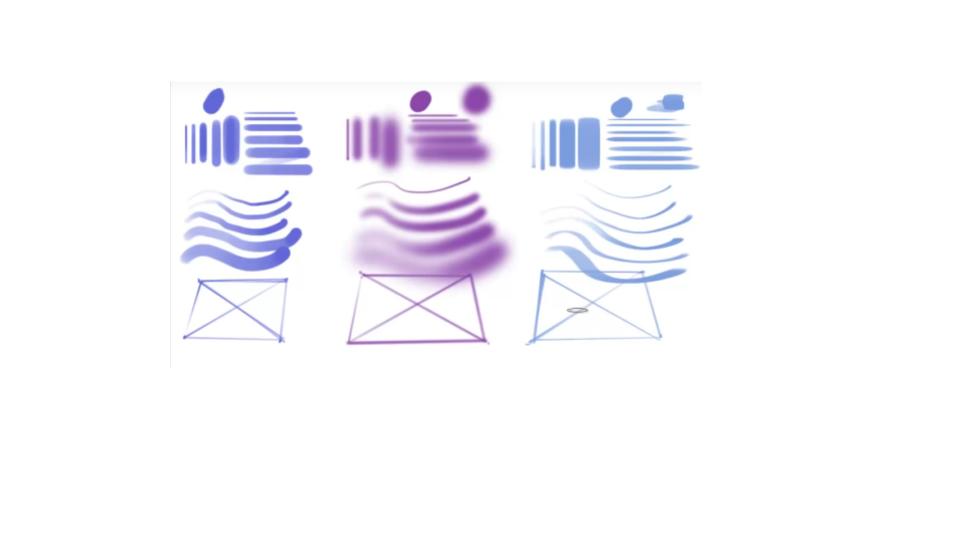
Brushblending with gradations- Go to this link for a break down of the process. Some will be reminders from yesterday, some will be new. Notice the difference in blending from yesterday.
Yesterday's paint blending was in done in squares or patches with sharp, clean edges between the colors....today's will show a smooth blend from one to the next. Notice how she loops the colors down from one to blend in the middle and then back up again. You will do the same. MAKE SURE YOU BLEND ENOUGH TO MAKE A SOLID COLOR THROUGHOUT, NOT TRANSPARENT IN THE MIDDLE. Use the file below in Photoshop. You may want to make a painting layer in case you need to start an area over.
NEW ASSIGNMENT
Brushblending with gradations- Go to this link for a break down of the process. Some will be reminders from yesterday, some will be new. Notice the difference in blending from yesterday.
Yesterday's paint blending was in done in squares or patches with sharp, clean edges between the colors....today's will show a smooth blend from one to the next. Notice how she loops the colors down from one to blend in the middle and then back up again. You will do the same. MAKE SURE YOU BLEND ENOUGH TO MAKE A SOLID COLOR THROUGHOUT, NOT TRANSPARENT IN THE MIDDLE. Use the file below in Photoshop. You may want to make a painting layer in case you need to start an area over.
| brushblending.psd |
NEW ASSIGNMENT- Temp Layers Watch the video below. There is some basic layer stuff, but keep pushing through that! His technique for adding highlights and shadows come from that. So does the Temp Layer technique. Sit back and enjoy! Then download the file and practice.
| temp_layers.psd |
Things to do:
- Pen Practice- (2/3/20)
- Intro to Brush Panel Assignments 1-3 (2/4/20)
- Keyboard Shortcuts and Paint Practice (2/6/20)
- Color Mixing with Eyedropper (2/10/20)
- Brushblending (2/13/20)
- Temp Layers (2/13/20)
Wednesday, 2/12/20
Bellwork: Title your entry, "Pen and Tablet Progress"
In your entry describe how you are doing with the using the pen and tablet versus the mouse. What is frustrating? What is easy?
Additional Dual Brush Help for future reference
Your goal is to finish the Paint Mixing with Eye dropper Assignment today so I can roll out the next project tomorrow. See me if this is not realistic.
Things to do:
- Pen Practice- (2/3/20)
- Intro to Brush Panel Assignments 1-3 (2/4/20)
- Keyboard Shortcuts and Paint Practice (2/6/20)
- Color Mixing with Eyedropper (2/10/20)
Tuesday, 2/11/20 Red 52 Schedule
Bellwork: Title your entry, "Opacity vs Flow"
Explain the difference between opacity and flow as it pertains to the brush in Photoshop. If you are not sure, do a Google search and double check your understanding. Put it in your own words!!
Things to do:
Explain the difference between opacity and flow as it pertains to the brush in Photoshop. If you are not sure, do a Google search and double check your understanding. Put it in your own words!!
Things to do:
- Pen Practice- (2/3/20)
- Intro to Brush Panel Assignments 1-3 (2/4/20)
- Keyboard Shortcuts and Paint Practice (2/6/20)
- Color Mixing with Eyedropper (2/10/20)
Monday, 2/10/20
Bellwork: Title your entry, "Scatter"
Based on Intro to Brush Panel assignments, explain in your own words what Scatter means? Double check your understanding with a Google search when you're done.
NEW ASSIGNMENT-Color Mixing with Eye Dropper. Watch the video below then download the jpeg and open it in Photoshop. Make a new layer on top and label it 'Painting layer' for easy do-overs and fixes.
| color_mixing_with_eye_dropper.jpg |
Things to do:
- Pen Practice- (2/3/20)
- Intro to Brush Panel Assignments 1-3 (2/4/20)
- Keyboard Shortcuts and Paint Practice (2/6/20)
- Color Mixing with Eyedropper (2/10/20)
Friday, 2/7/20
Bellwork: Title your entry, "Keyboard shortcuts for Brush"
Copy and Paste the following into your journal for a quick resource:
Things to do:
Copy and Paste the following into your journal for a quick resource:
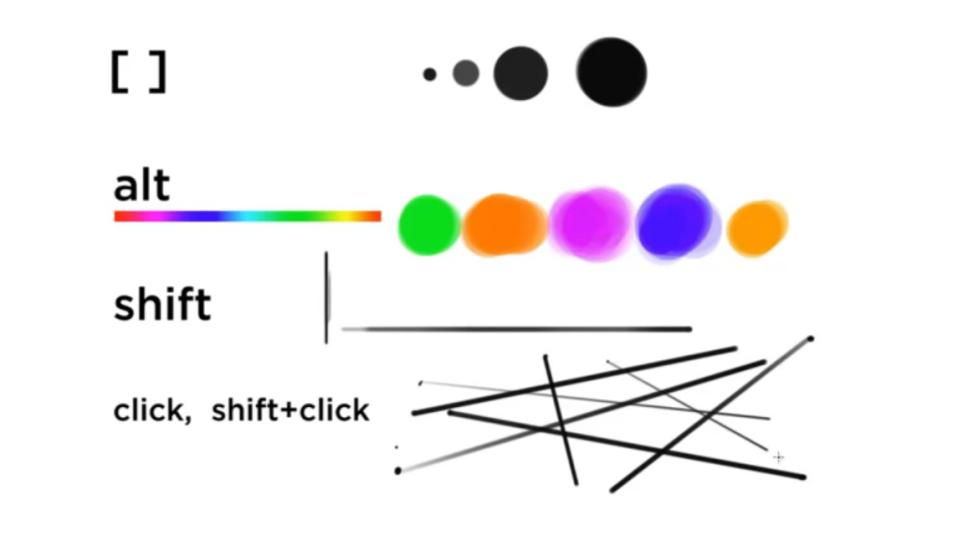
- Hit F5 for the Brush panel.
- Hitting B on the keyboard selects the Brush Tool.
- Hit D to paint with the Default Foreground and Background Colors (Black and White)
- [ or ] to Decrease or Increase the Brush Size (respectively).
- { or } (Shift-[ or Shift-]) to Decrease or Increase the Brush Hardness.
- Holding Alt while the Brush Tool (B) is selected will bring up the Eyedropper Tool (used for blending).
- Right-click while the Brush Tool (B) is selected to bring up a mini panel for Brush Presets as well as Size/Hardness.
Things to do:
- Pen Practice- (2/3/20)
- Intro to Brush Panel Assignments 1-3 (2/4/20)
- Keyboard Shortcuts and Paint Practice (2/6/20)
Thursday, 2/6/20
Bellwork: Title your entry, "Jitter"
Based on Intro to Brush Panel assignments, explain in your own words what Jitter means? Double check your understanding with a Google search when you're done.
Open up your pen tool exercises again today to start. Erase to make room and do it again OR create new layers and turn off the visibility to the old ones.
Do more, do extra, become one with the pen :)
Things to do:
NEW ASSIGNMENT-Keyboard shortcuts and paint practice. Watch the video below. Download the file and recreate using the tips he shared.
Based on Intro to Brush Panel assignments, explain in your own words what Jitter means? Double check your understanding with a Google search when you're done.
Open up your pen tool exercises again today to start. Erase to make room and do it again OR create new layers and turn off the visibility to the old ones.
Do more, do extra, become one with the pen :)
Things to do:
- Pen Practice- (2/3/20)
- Intro to Brush Panel Assignments 1-3 (2/4/20)
NEW ASSIGNMENT-Keyboard shortcuts and paint practice. Watch the video below. Download the file and recreate using the tips he shared.
| shortcuts_and_practice__1_.psd |
Examples of finished sections
|
|
Wednesday, 2/5/20
Bellwork: Title your entry, "Pen pressure and Transfer"
Watch Video 2 from the 1 min 50 secs to 4 minutes to answer the questions below:
Open up your pen tool exercises again today to start. Erase to make room and do it again OR create new layers and turn off the visibility to the old ones.
Do more, do extra, become one with the pen :)
Things to do:
Watch Video 2 from the 1 min 50 secs to 4 minutes to answer the questions below:
- How do you change your pen tool so that the line gets bigger or smaller according to how much pressure you use on the pen?
- What does the 'Transfer' option in your brush panel control?
Open up your pen tool exercises again today to start. Erase to make room and do it again OR create new layers and turn off the visibility to the old ones.
Do more, do extra, become one with the pen :)
Things to do:
- Cinemagraph Project/Rubric 1 from home, 1 from school
- Cinemagraph Blog Post- 1/31/20
- Pen Practice- (2/3/20)
- Intro to Brush Panel Assignments 1-3 (2/4/20)
Tuesday, 2/4/20
Bellwork: Title your entry," Tip from Tablets"
After playing with the tablet, what is the most important tip you want to remember from either of the videos, the demo, or just exploring on your own. Something that would be useful to the next 'first timer' on the tablet to know.
Carry over from yesterday...
Once you are done with the video above, do what he says...Play games to get used to using the Pen and tablet WITHOUT THE MOUSE! UNPLUG IT! Here's a link to get you started. I'm sure you have online gaming favorites :) Remember, the idea is to get use to using the pen and tablet over the mouse. Play with modifying the buttons if you so choose.
When you are comfortable using the tablet and pen, call me over for a demo on the next assignment. Here are the instructions if you'd like a preview. Then download and open the Photoshop file. You'll show it to me for credit when complete.
| pen_practice_with_dots_blank.psd |
Here's an easy trick to rotate your page if the touch pad on the tablet didn't do it for you. Watch this! Easy peasy in one minute or less.
If you are flying through and ready to move on....here is our next baby assignment.
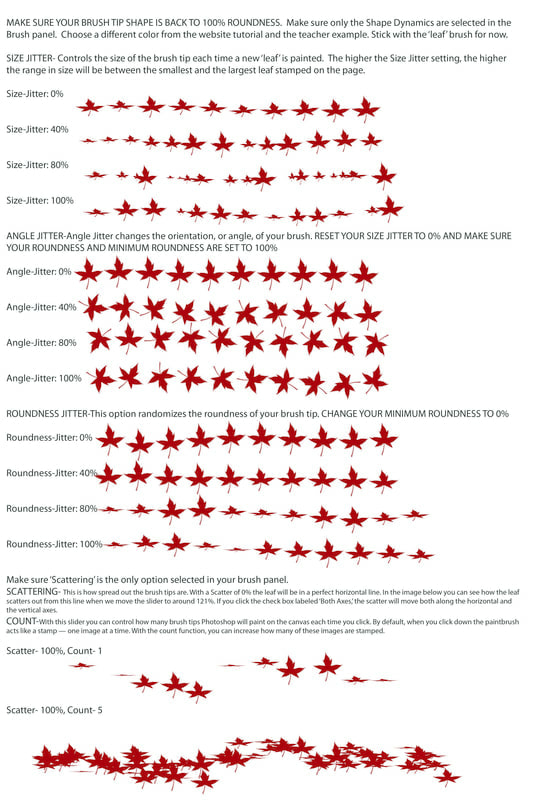
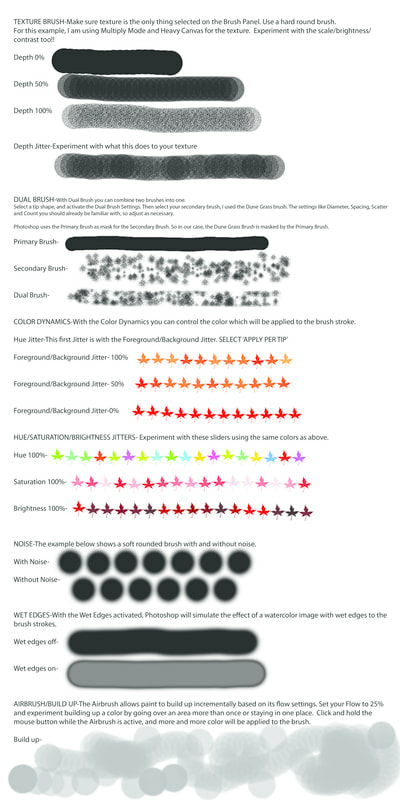
Intro to Brush Panel Assignments #1-3 in Photoshop. Use the same link for all 3 assignments. You are not expected to finish this in one day. I'm giving you all three so that you can immediately move on when you are ready. Do them in order though as they build upon each other.
If you are flying through and ready to move on....here is our next baby assignment.
Intro to Brush Panel Assignments #1-3 in Photoshop. Use the same link for all 3 assignments. You are not expected to finish this in one day. I'm giving you all three so that you can immediately move on when you are ready. Do them in order though as they build upon each other.
- Go to tutorial link.
- Download the file below.
- Carefully read each section and complete the exercise. Additional directions on the file will help too. Do not use the same color as the website or my examples below.
- Call me over for credit when you are done. Then JPEG it and place it in your folder.
|

| ||
|
| ||
|
| ||
Things to do:
- Cinemagraph Project/Rubric 1 from home, 1 from school
- Cinemagraph Blog Post- 1/31/20
- Pen Practice- (2/3/20)
- Intro to Brush Panel Assignments 1-3 (2/4/20)
Monday, 2/3/20
If you didn't get a chance to finish your Cinemagraphs and Post on Friday, take the time to get as far as you can now. If you are done, jump right in to the next tutorial....using a tablet.
Video #1-Excellent tips for getting used to the pen over the mouse
Once you are done with the video above, do what he says...Play games to get used to using the Pen and tablet WITHOUT THE MOUSE! UNPLUG IT! Here's a link to get you started. I'm sure you have online gaming favorites :) Remember, the idea is to get use to using the pen and tablet over the mouse. Play with modifying the buttons if you so choose.
When you are comfortable using the tablet and pen, call me over for a demo on the next assignment. Here are the instructions if you'd like a preview. Then download and open the Photoshop file. You'll show it to me for credit when complete.
| pen_practice_with_dots_blank.psd |
If you get done early, move on to this tutorial
Video #2- Five tips for Beginners with tablets-Customizing the pen, tablet, and shortcuts
Video #2- Five tips for Beginners with tablets-Customizing the pen, tablet, and shortcuts
Friday, 1/31/20
Bellwork: Cinemagraph Blog Post. Getting this to you now so that you can post as you go. Remember, the goal is to have both Cinemagraphs completed today with new techniques coming Monday :)
Cinemagraph blog post-artist statement (Include your Cinemagraphs!)
Things to do:
Cinemagraph blog post-artist statement (Include your Cinemagraphs!)
- What did you like/dislike about this project and why?
- What are some new skills that you learned in this project?
- What are some previously learned skills that were useful in creating this project?
- Name at least one thing you did well in this project and one thing that could be improved.
- How creative was your project?
Things to do:
- Cinemagraph research includes sketches. Be sure to explore these links before planning and sketching. Sketches will be an assignment grade and necessary before moving on to your project. (After researching the links, you may want to move on to the Coffee Practice before sketching so you have a better idea of where you are headed.)
- Coffee Cinemagraph Practice mp4 file found on 1/7/20
- Record/Begin your school cinemagraph
- Cinemagraph Project/Rubric 1 from home, 1 from school
- Cinemagraph Blog Post- 1/31/20
Thursday, 1/30/20
Bellwork: Title it, “Cinemagraph Strengths”
What about this assignment do/did you enjoy the most? OR What surprised you about the process that was easier than you expected?
Your goal is to have at least one cinemagraph by end of hour today with your second finished by end of hour Friday. The idea would be that we could blog about it Monday and start a new project then as well.
Things to do:
- Cinemagraph research includes sketches. Be sure to explore these links before planning and sketching. Sketches will be an assignment grade and necessary before moving on to your project. (After researching the links, you may want to move on to the Coffee Practice before sketching so you have a better idea of where you are headed.)
- Coffee Cinemagraph Practice mp4 file found on 1/7/20
- Record/Begin your school cinemagraph
- Cinemagraph Project/Rubric 1 from home, 1 from school
Wednesday, 1/29/20
Bellwork: Title it, “Cinemagraph Obstacles”
What has been the hardest part of creating the cinemagraph so far?
Your goal is to have at least one cinemagraph by end of hour today/tomorrow with your second finished by end of hour Friday? I'll chat with you about how realistic this timeline is to you.
Things to do:
What has been the hardest part of creating the cinemagraph so far?
Your goal is to have at least one cinemagraph by end of hour today/tomorrow with your second finished by end of hour Friday? I'll chat with you about how realistic this timeline is to you.
Things to do:
- Cinemagraph research includes sketches. Be sure to explore these links before planning and sketching. Sketches will be an assignment grade and necessary before moving on to your project. (After researching the links, you may want to move on to the Coffee Practice before sketching so you have a better idea of where you are headed.)
- Coffee Cinemagraph Practice mp4 file found on 1/7/20
- Record/Begin your school cinemagraph
- Cinemagraph Project/Rubric 1 from home, 1 from school
Tuesday, 1/28/20
Bellwork: Title your entry, "Camera or phone on tripod"
Why is it so important that your video be recorded on a phone/camera that is totally still (attached to a tripod or otherwise stationary)?
Things to do:
Why is it so important that your video be recorded on a phone/camera that is totally still (attached to a tripod or otherwise stationary)?
Things to do:
- Cinemagraph research includes sketches. Be sure to explore these links before planning and sketching. Sketches will be an assignment grade and necessary before moving on to your project. (After researching the links, you may want to move on to the Coffee Practice before sketching so you have a better idea of where you are headed.)
- Coffee Cinemagraph Practice mp4 file found on 1/7/20
- Record/Begin your school cinemagraph
- Cinemagraph Project/Rubric 1 from home, 1 from school
Monday, 1/27/20
Bellwork: Title your entry, "Analysis #2"
Analyze the student created cinemagraph below. What other photoshop techniques can you see that have been done besides adding the video and masking away all but one area of motion?
Also, as a side note, this is an example of motion that was copied/reversed/pasted :)
Analyze the student created cinemagraph below. What other photoshop techniques can you see that have been done besides adding the video and masking away all but one area of motion?
Also, as a side note, this is an example of motion that was copied/reversed/pasted :)
Today should be a day for filming. Remember, your goal is to create one Cinemagraph from school and one from home. If you haven't gotten your 3-5 second video from home yet, grab your school one today and let's start experimenting.
Things to do:
Things to do:
- Cinemagraph research includes sketches. Be sure to explore these links before planning and sketching. Sketches will be an assignment grade and necessary before moving on to your project. (After researching the links, you may want to move on to the Coffee Practice before sketching so you have a better idea of where you are headed.)
- Coffee Cinemagraph Practice mp4 file found on 1/7/20
- Record/Begin your school cinemagraph
- Cinemagraph Project/Rubric 1 from home, 1 from school
Tuesday, 1/21-Thursday, 1/23/20 Semester Exams
|
Exam Times:
7:35-9:15 BREAK: 9:15-9:35 (Grab and Go in Cafeteria) 9:35-11:15 We are in a testing environment. No talking! If you have a question, raise your hand. WHEN YOU FINISH, TELL ME SO I CAN CHECK YOUR EXAM FOLDER TO VERIFY YOU HAVE EVERYTHING YOU NEED TO GET CREDIT! |
When you are done with your exam, check the following:
|
Done early?
- Check Skyward!
- Complete any missing work and show for credit (Today is the last day to do that!)
- Work on your Cinemagraph
- Study for your next exam
- Quietly work on computer
Monday, 1/20/20
If you finish ALL parts of your exam today and plan on having your parent/guardian call in for an excused absence on your exam day, YOU MUST CHECK WITH ME TODAY TO MAKE SURE YOUR EXAM FOLDER IS SET UP CORRECTLY/SHARED WITH ME AND COMPLETE.
Reminder for Exam PSA Design:
Don't forget your Artist Statement Doc too!
Last PRINT FOLDER of the semester. This will close and be sent at the end of the day. Please RENAME the jpeg as your Last Name, First Name so that I can get it to you even if it is not ready by your exam day. Prints will be 8 x 10's.
Congratulations to the artists that had work awarded through Scholastic!!
Thank you to everyone that participated! There were limited amounts of awards and we made it really hard for them to choose :)
Reminder for Exam PSA Design:
- Slogan created by you, expresses the theme of the Public Service Announcement cause, is emphasized in the design.
- A Catch phrase or slogan is used as Level 1 text in the design of the poster. Saying or slogan relates to the cause and represents the problem or solution to the issue.
- A logo and name of sponsoring organization is incorporated into the design. This will most likely be level two or three text and size. It can be an originally designed logo for a made up organization OR a legitimate logo for an established organization.
- Images are used to illustrate the problem or solution to the issue.
- Images reinforce the problem or solution being advertised
- Illustrator images are vector based/Photoshopped images have been modified/manipulated from the original source. If working in Photoshop make sure the image is modified, not just uploaded and added to your design.
- Images reinforce the problem or solution being advertised
- A minimum of three images are combined/used in the making of the design, either in Illustrator or Photoshop. (Don’t forget blending of textures as a possibility.)
- The entire artboard is used for the design using Principles of Design (Balance/Unity) and Graphic Design Principles (CRAP and Hierarchy of text).
Don't forget your Artist Statement Doc too!
Last PRINT FOLDER of the semester. This will close and be sent at the end of the day. Please RENAME the jpeg as your Last Name, First Name so that I can get it to you even if it is not ready by your exam day. Prints will be 8 x 10's.
Congratulations to the artists that had work awarded through Scholastic!!
Thank you to everyone that participated! There were limited amounts of awards and we made it really hard for them to choose :)
Friday, 1/17/20
No Bellwork! Get started right away! Do your Exam first! Leave any missing assignments for when you have your exam completed.
Reminder for PSA Design:
Don't forget your Artist Statement Doc too!
Performance exams again today!
If you have a question OR have an assignment to show me for credit, please wait until I have finished with the student currently testing. I will ask in between each exam if anyone needs help.
If you are stuck and need help, check with the person next to you or ask Google or ask Adobe Help. Otherwise, move on to a different area or assignment until I'm done :)
Things to do: (Check Skyward/Progress Report for points I don't have yet. Use before/after school for extra lab time!)
Reminder for PSA Design:
- Slogan created by you, expresses the theme of the Public Service Announcement cause, is emphasized in the design.
- A Catch phrase or slogan is used as Level 1 text in the design of the poster. Saying or slogan relates to the cause and represents the problem or solution to the issue.
- A logo and name of sponsoring organization is incorporated into the design. This will most likely be level two or three text and size. It can be an originally designed logo for a made up organization OR a legitimate logo for an established organization.
- Images are used to illustrate the problem or solution to the issue.
- Images reinforce the problem or solution being advertised
- Illustrator images are vector based/Photoshopped images have been modified/manipulated from the original source. If working in Photoshop make sure the image is modified, not just uploaded and added to your design.
- Images reinforce the problem or solution being advertised
- A minimum of three images are combined/used in the making of the design, either in Illustrator or Photoshop. (Don’t forget blending of textures as a possibility.)
- The entire artboard is used for the design using Principles of Design (Balance/Unity) and Graphic Design Principles (CRAP and Hierarchy of text).
Don't forget your Artist Statement Doc too!
Performance exams again today!
If you have a question OR have an assignment to show me for credit, please wait until I have finished with the student currently testing. I will ask in between each exam if anyone needs help.
If you are stuck and need help, check with the person next to you or ask Google or ask Adobe Help. Otherwise, move on to a different area or assignment until I'm done :)
Things to do: (Check Skyward/Progress Report for points I don't have yet. Use before/after school for extra lab time!)
- Independent Project Blog Post: In your artist statement, include the following:
- What is the meaning/message/theme of your artwork?
- What colors/images did you use as symbolism to express that message?
- What about this artwork are you most proud of?
- Cinemagraph research includes sketches. Be sure to explore these links before planning and sketching. Sketches will be an assignment grade and necessary before moving on to your project. (After researching the links, you may want to move on to the Coffee Practice before sketching so you have a better idea of where you are headed.)
- Coffee Cinemagraph Practice mp4 file found on 1/7/20
- Record/Begin your school cinemagraph
- Cinemagraph Project/Rubric 1 from home, 1 from school
- Final Exam with example
Thursday, 1/16/20 Red 52 Schedule
No Bellwork today! Start Creating right away!
While I've got your whole list of Things to do, focus on your exam first. (Artist Statement and/or PSA poster.) Once that is complete and out of the way, you can go back to your Cinemagraph.
Things to do:
While I've got your whole list of Things to do, focus on your exam first. (Artist Statement and/or PSA poster.) Once that is complete and out of the way, you can go back to your Cinemagraph.
Things to do:
- Independent Project Blog Post: In your artist statement, include the following:
- What is the meaning/message/theme of your artwork?
- What colors/images did you use as symbolism to express that message?
- What about this artwork are you most proud of?
- Cinemagraph research includes sketches. Be sure to explore these links before planning and sketching. Sketches will be an assignment grade and necessary before moving on to your project. (After researching the links, you may want to move on to the Coffee Practice before sketching so you have a better idea of where you are headed.)
- Coffee Cinemagraph Practice mp4 file found on 1/7/20
- Record/Begin your school cinemagraph
- Cinemagraph Project/Rubric 1 from home, 1 from school
- Final Exam with example
Wednesday, 1/15/20
Bellwork: Creating Folder for Exam
Explanation of Final Exam with example after 1st year explanation of their exam. Feel free to read through it first though.
After we go through the exam together, use today to research and find what PSA you will create. Put your Cinemagraph on hold until you get an idea. The Cinemagraph will probably go on next semester, especially if you focus on your exam the rest of the week. I'm good with that. You decide :)
Things to do:
- Open your Google Folder for this class (The one you shared with me.)
- WITH THAT OPEN, create a new folder INSIDE YOUR CLASS FOLDER.
- Rename the new folder, "Last Name, First Name Exam"
- OPEN YOUR NEW EXAM FOLDER and create a Google Doc.
- Name the Google Doc, "Artist Statement"
- Create another Google Doc and title it Exam Works Cited
Explanation of Final Exam with example after 1st year explanation of their exam. Feel free to read through it first though.
After we go through the exam together, use today to research and find what PSA you will create. Put your Cinemagraph on hold until you get an idea. The Cinemagraph will probably go on next semester, especially if you focus on your exam the rest of the week. I'm good with that. You decide :)
Things to do:
- Independent Project Blog Post: In your artist statement, include the following:
- What is the meaning/message/theme of your artwork?
- What colors/images did you use as symbolism to express that message?
- What about this artwork are you most proud of?
- Cinemagraph research includes sketches. Be sure to explore these links before planning and sketching. Sketches will be an assignment grade and necessary before moving on to your project. (After researching the links, you may want to move on to the Coffee Practice before sketching so you have a better idea of where you are headed.)
- Coffee Cinemagraph Practice mp4 file found on 1/7/20
- Record/Begin your school cinemagraph
- Cinemagraph Project/Rubric 1 from home, 1 from school
- Final Exam with example
Tuesday, 1/14/20 Red 52 Schedule
Bellwork: Title your entry, "Analysis #1"
What was done well with the student created cinemagraph below? What bothers you? How would you fix it? (It's on your Project Explanation/Rubric page below if you need help. We'll discuss it together.)
What was done well with the student created cinemagraph below? What bothers you? How would you fix it? (It's on your Project Explanation/Rubric page below if you need help. We'll discuss it together.)
Explanation of Cinemagraph Project/Rubric and timeline for completion after demo with 1st year
Things to do:
- Independent Project Blog Post: In your artist statement, include the following:
- What is the meaning/message/theme of your artwork?
- What colors/images did you use as symbolism to express that message?
- What about this artwork are you most proud of?
- Cinemagraph research includes sketches. Be sure to explore these links before planning and sketching. Sketches will be an assignment grade and necessary before moving on to your project. (After researching the links, you may want to move on to the Coffee Practice before sketching so you have a better idea of where you are headed.)
- Coffee Cinemagraph Practice mp4 file found on 1/7/20
- Record/Begin your school cinemagraph
- Cinemagraph Project/Rubric 1 from home, 1 from school
Monday, 1/13/20
Bellwork: Title your entry, "1 at school and 1 at home"
What are your 2 ideas for your cinemagraph?
Explanation of Cinemagraph Project/Rubric and timeline for completion.
Things to do:
What are your 2 ideas for your cinemagraph?
Explanation of Cinemagraph Project/Rubric and timeline for completion.
Things to do:
- Independent Project Blog Post: In your artist statement, include the following:
- What is the meaning/message/theme of your artwork?
- What colors/images did you use as symbolism to express that message?
- What about this artwork are you most proud of?
- Cinemagraph research includes sketches. Be sure to explore these links before planning and sketching. Sketches will be an assignment grade and necessary before moving on to your project. (After researching the links, you may want to move on to the Coffee Practice before sketching so you have a better idea of where you are headed.)
- Coffee Cinemagraph Practice mp4 file found on 1/7/20
- Cinemagraph Project/Rubric 1 from home, 1 from school
Thursday, 1/9/20 and Friday, 1/10/20
Here's one more way to mask that seems easiest to me. PHLEARN style :) Cinemagraph Part 2
Things to do:
- NEW ASSIGNMENT Independent Project Blog Post: In your artist statement, include the following:
- What is the meaning/message/theme of your artwork?
- What colors/images did you use as symbolism to express that message?
- What about this artwork are you most proud of?
- NEW ASSIGNMENT Cinemagraph research includes sketches. Be sure to explore these links before planning and sketching. Sketches will be an assignment grade and necessary before moving on to your project. (After researching the links, you may want to move on to the Coffee Practice before sketching so you have a better idea of where you are headed.)
- NEW ASSIGNMENT Coffee Cinemagraph Practice mp4 file found on 1/7/20
Wednesday, 1/8/20
Bellwork: Title your entry,"Cinemagraph Shooting Tips"
Watch the 3 minute video below to see how to do the actual recording. Remember, you need two ideas: 1 you could shoot at school and 1 from home.
In your entry, list at least one thing to remember when shooting/designing your cinemagraphs.
Watch the 3 minute video below to see how to do the actual recording. Remember, you need two ideas: 1 you could shoot at school and 1 from home.
In your entry, list at least one thing to remember when shooting/designing your cinemagraphs.
Things to do:
- NEW ASSIGNMENT Independent Project Blog Post: In your artist statement, include the following:
- What is the meaning/message/theme of your artwork?
- What colors/images did you use as symbolism to express that message?
- What about this artwork are you most proud of?
- NEW ASSIGNMENT Cinemagraph research includes sketches. Be sure to explore these links before planning and sketching. Sketches will be an assignment grade and necessary before moving on to your project. (After researching the links, you may want to move on to the Coffee Practice before sketching so you have a better idea of where you are headed.)
- NEW ASSIGNMENT Coffee Cinemagraph Practice mp4 file found on 1/7/20
Tuesday, 1/7/20 Red 52 Schedule
Bellwork: Title your entry, "Favorite Cinemagraph from compilation"
Watch the short video below and list your two favorite cinemagraphs.
Watch the short video below and list your two favorite cinemagraphs.
Things to do:
- NEW ASSIGNMENT Independent Project Blog Post: In your artist statement, include the following:
- What is the meaning/message/theme of your artwork?
- What colors/images did you use as symbolism to express that message?
- What about this artwork are you most proud of?
- NEW ASSIGNMENT Cinemagraph research includes sketches. Be sure to explore these links before planning and sketching. Sketches will be an assignment grade and necessary before moving on to your project. (After researching the links, you may want to move on to the Coffee Practice before sketching so you have a better idea of where you are headed.)
- NEW ASSIGNMENT Coffee Cinemagraph Practice
| coffee_footage__1_.mp4 |
Monday, 1/6/20
Bellwork: Title your entry, "Cinemagraph"
Visit this link. In your entry describe what you notice about all of the examples on this site? This is where we are heading next! Google it if you want to know more :)
Things to do:
Visit this link. In your entry describe what you notice about all of the examples on this site? This is where we are heading next! Google it if you want to know more :)
Things to do:
- Independent Project for Scholastics- (Scholastic link) HAS TO BE UPLOADED TO SCHOLASTIC LINK AND FORM PRINTED AND RETURNED TOMORROW IN ORDER FOR IT TO BE ELIGIBLE FOR JUDGING!
- NEW ASSIGNMENT Independent Project Blog Post: In your artist statement, include the following:
- What is the meaning/message/theme of your artwork?
- What colors/images did you use as symbolism to express that message?
- What about this artwork are you most proud of?
- NEW ASSIGNMENT Cinemagraph research includes sketches
Friday, 12/20/19
TODAY IS REALLY THE LAST DAY TO UPLOAD AND PRINT YOUR SCHOLASTIC PDFS IN ORDER TO GET THEM SIGNED AND RETURNED THE MONDAY WE COME BACK!!!.
YOUR WAIVER FORM SHOULD BE EMAILED TO ME TO BE PRINTED.
TELL ME WHEN YOU ARE DONE SO THAT WE CAN PRINT IT.
Scholastic link
YOUR WAIVER FORM SHOULD BE EMAILED TO ME TO BE PRINTED.
TELL ME WHEN YOU ARE DONE SO THAT WE CAN PRINT IT.
Scholastic link
Thursday, 12/19/19 Red 52 Schedule
TODAY IS THE LAST DAY TO UPLOAD AND PRINT YOUR SCHOLASTIC PDFS IN ORDER TO GET THEM SIGNED AND RETURNED TOMORROW.
YOUR WAIVER FORM SHOULD BE EMAILED TO ME TO BE PRINTED.
TELL ME WHEN YOU ARE DONE SO THAT WE CAN PRINT IT.
Scholastic link
YOUR WAIVER FORM SHOULD BE EMAILED TO ME TO BE PRINTED.
TELL ME WHEN YOU ARE DONE SO THAT WE CAN PRINT IT.
Scholastic link
Wednesday, 12/18/19
Your goal is to have your Scholastics Independent Project and any other projects uploaded to the site and pdf's downloaded and emailed to me for printing BY THE END OF THE HOUR TOMORROW.
You will need to download a waiver form, EVEN IF IT SAYS FEE WAIVED, as that may be a carry over from last year. We want the 2020 form to turn in. You'll need one per entry.
Scholastic link
You will need to download a waiver form, EVEN IF IT SAYS FEE WAIVED, as that may be a carry over from last year. We want the 2020 form to turn in. You'll need one per entry.
Scholastic link
Tuesday, 12/17/19 Red 52 Schedule
Get started right away......but, be ready to listen when I have the Scholastics chat with Year 1 so you have a good idea how to create your account, upload your image, AND download your pdfs correctly.
Your goal is to have ALL submissions uploaded with pdfs printed and signed by FRIDAY!!! Scholastic link
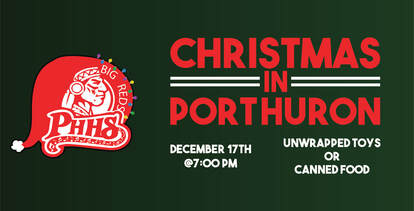
After showing your program design to the Band director, he gave some edits he'd like to see. They are explained below in the file.
This has to be completed before you leave today. I'll send it to the print shop immediately to be printed for tonight's show. YAY!!
Your goal is to have ALL submissions uploaded with pdfs printed and signed by FRIDAY!!! Scholastic link
After showing your program design to the Band director, he gave some edits he'd like to see. They are explained below in the file.
This has to be completed before you leave today. I'll send it to the print shop immediately to be printed for tonight's show. YAY!!
| program_edits_to_make.ai |
Monday, 12/17/19
Today is all about final edits on the Poster and Program.
Download the file below that has notes on necessary edits for the poster. That way you can get started right away while I work with 1st year. As soon as you finish with this. We'll discuss the Program.
Time is our enemy today!!! Tons to do so final edits can be sent to Print Shop immediately in order to be ready tomorrow!!!.
| edits_to_make_on_poster.ai |
Friday, 12/13/19

|
Half Day Schedule:
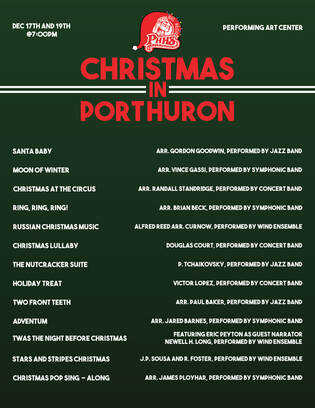
1st: 7:35-8:05 2nd: 8:10-8:40 3rd: 8:45-9:15 4th: 9:20-9:50 5th: 9:55-10:25 6th: 10:30-11:00 Example of program from 2018. Required text: Title, Date, time, location, logo, song titles with composer/arranger and performed by. |
Keep the repetition of elements within your set of arboards! Spacing, font style and size, etc. The above jpeg is just an example. Do not feel you have to copy this design.
Here is the song order with the arrangers/composers along with what bands will perform them. Please arrange them into your program artboard from the Christmas Design Package.
Use the CRAP design principles AND Hierarchy of Text. Keep in mind legibility.
The text should be big enough to read. Go to 'View > Actual Size' to see how big the text will actually be when printed 8.5 x 11.
Here you go:
Symphonic Band
Rejoice The Season!.......Rob Romeyn
It's Beginning To Look Like Christmas.......Arr. Michael Brown
Christmas "Pop" Sing-a-Long........Arr. James Ployhar
Jazz Band
You're A Mean One, Mr. Grinch......Arr. Mike Story
God Rest Ye Mambo, Gentlemen......Arr. Greg Moody
Carol of the Bells......Arr. Rich DeRosa
Concert Band
Christmas Can-Can......Larry Neeck
Christmas Overture For Band.....Arr. Robert Smith
Santa's Workshop Samba......Bryce Newton
Wind Ensemble
We Wish You A Klezmer Christmas.....Arr. Lauren Bernofsky
On That Night All Was Silent.......David Samuel
Christmas In A Nutshell......Arr. Chris Sharp
'Twas The Night Before Christmas......Newell Long
Guest Narrator.....Jim Langolf
WHEN YOU ARE DONE, PLACE A HIGH QUALITY PDF OF YOUR POSTER AND YOUR PROGRAM INTO THE CHRISTMAS FOLDER I SHARED WITH YOU.
Thursday, 12/12/19 Red 52 Schedule
Reminder and tip: "Wrap up for sources"
If you are using Google images for your Scholastic Independent Project, you will have to upload the url addresses when you upload your design. If you have not already, create a Google Doc. Name it 'Independent Project Wrapup' and copy any and all images AND their url addresses to that file. It will make your entry application easier and quicker to complete.
We should have the Song order and performer names tomorrow so you'll be able to finish the band program.
Things to do:
Be thinking about past pieces you can enter. Your best bet will be one we created a wrap up for because it will have the url addresses you'll need for the images you used. You can also be confident in the licensing of those images. Think Double exposure from last year! Disbursement from last year! Perspective grid from last year! Calligrams or Illustrated Photograph from this year? Independent projects?
If you are using Google images for your Scholastic Independent Project, you will have to upload the url addresses when you upload your design. If you have not already, create a Google Doc. Name it 'Independent Project Wrapup' and copy any and all images AND their url addresses to that file. It will make your entry application easier and quicker to complete.
We should have the Song order and performer names tomorrow so you'll be able to finish the band program.
Things to do:
- NEW ASSIGNMENT! PHHS Logo Modification Assignment
- NEW ASSIGNMENT! Christmas Concert Pack Assignment
- Scholastic Sign up
- Independent Project for Scholastics
Be thinking about past pieces you can enter. Your best bet will be one we created a wrap up for because it will have the url addresses you'll need for the images you used. You can also be confident in the licensing of those images. Think Double exposure from last year! Disbursement from last year! Perspective grid from last year! Calligrams or Illustrated Photograph from this year? Independent projects?
Tuesday, 12/10/19 and Wednesday, 12/11/19
Bellwork: Title your entry, "Scholastic Reminders"
Copy and Paste the descriptions below into your journal THEN READ IT!!!
ORIGINALITY - Work that challenges conventions, blurs the boundaries between genres, and shifts notions of how a particular concept or emotion can be expressed. Jurors are encouraged to look for works of art that surprise them and leave a lasting impression
PERSONAL VISION - Work with an authentic and unique point of view and style.
.
TECHNICAL SKILL - Work that uses a technique to advance an original perspective or a personal vision, and show skills being utilized to create something unique, powerful, and innovative. Exhibition of technical skill alone should not be rewarded unless it’s exercised in the service of expressing an idea that is unique, powerful, and innovative and helps to highlight the artist’s vision.
Things to do:
- NEW ASSIGNMENT! PHHS Logo Modification Assignment
- NEW ASSIGNMENT! Christmas Concert Pack Assignment
- Scholastic Sign up
- Independent Project for Scholastics
Monday, 12/9/19
Bellwork: It's Scholastic Time again!
Go to the Online Registration Site to create an account for the Scholastics competition and get all of your information entered. You will have to 'Create an account' again.
Be thinking about past pieces you can enter. Your best bet will be one we created a wrap up for because it will have the url addresses you'll need for the images you used. You can also be confident in the licensing of those images. Think Double exposure from last year! Disbursement from last year! Perspective grid from last year! Calligrams or Illustrated Photograph from this year? Independent projects?
See me about your possibilities...I have definite ideas of what I'd like you to enter.
We are waiting for the director to finish his song selection and order list for in order for you to finish your program as the final piece of your Christmas Design package.
In the meantime, we need to talk about your next project. I have one planned but if you'd like to create something new for Scholastics, I'm good with that too! All entries for Scholastic have to be uploaded and forms signed BEFORE Christmas break.
A quick reminder for Scholastics:
You can use either Illustrator or Photoshop or both.
My next project planned for you is below if you'd like to see both before you decide.
Visit this link. This is where we will be heading next if you choose this one! Google it if you want to know more. They are called Cinemagraphs :)
Things to do:
Go to the Online Registration Site to create an account for the Scholastics competition and get all of your information entered. You will have to 'Create an account' again.
Be thinking about past pieces you can enter. Your best bet will be one we created a wrap up for because it will have the url addresses you'll need for the images you used. You can also be confident in the licensing of those images. Think Double exposure from last year! Disbursement from last year! Perspective grid from last year! Calligrams or Illustrated Photograph from this year? Independent projects?
See me about your possibilities...I have definite ideas of what I'd like you to enter.
We are waiting for the director to finish his song selection and order list for in order for you to finish your program as the final piece of your Christmas Design package.
In the meantime, we need to talk about your next project. I have one planned but if you'd like to create something new for Scholastics, I'm good with that too! All entries for Scholastic have to be uploaded and forms signed BEFORE Christmas break.
A quick reminder for Scholastics:
You can use either Illustrator or Photoshop or both.
- Uses design principles to make an eye-catching, successful design (Unity, Balance, Contrast, Emphasis)
- Uses a new technique that we have not covered in class discovered by your own research. (Find a tutorial that teaches a new technique-keep the url source for your wrap up)
- Follows copyright rules (Free to share/modify) Keep the url sources for your wrap up OR did you make an idea YOUR OWN? Don't simply recreate a cool idea you find in your searching!
My next project planned for you is below if you'd like to see both before you decide.
Visit this link. This is where we will be heading next if you choose this one! Google it if you want to know more. They are called Cinemagraphs :)
Things to do:
- NEW ASSIGNMENT! PHHS Logo Modification Assignment
- NEW ASSIGNMENT! Christmas Concert Pack Assignment
- Scholastic Sign up and decision making
- Cinemagraph Research
Friday, 12/6/19
Bellwork: Title your entry, "Bad Example"
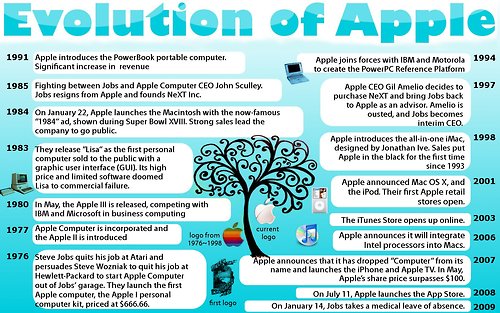
Analyze the infographic below. Keeping the CRAP principles and Hierarchy of Text in mind along with what you know about Balance and Unity, list at least two things that are a problem in this design.
Analyze the infographic below. Keeping the CRAP principles and Hierarchy of Text in mind along with what you know about Balance and Unity, list at least two things that are a problem in this design.
Things to do:
- NEW ASSIGNMENT! PHHS Logo Modification Assignment
- NEW ASSIGNMENT! Christmas Concert Pack Assignment
Thursday, 12/5/19 Red 52 Schedule
Bellwork: Title your entry, "Hierarchy of Text"
What does Hierarchy of Text mean? How does it help the viewer? (If you're not sure, see the Hierarchy of Information video from Monday.)
Things to do:
What does Hierarchy of Text mean? How does it help the viewer? (If you're not sure, see the Hierarchy of Information video from Monday.)
Things to do:
- NEW ASSIGNMENT! PHHS Logo Modification Assignment
- NEW ASSIGNMENT! Christmas Concert Pack Assignment
Wednesday, 12/4/19
Bellwork: Title your entry, "Making a symbol"
What is the reasoning behind turning objects or text into a symbol?
Things to do:
What is the reasoning behind turning objects or text into a symbol?
Things to do:
- NEW ASSIGNMENT! PHHS Logo Modification Assignment
- NEW ASSIGNMENT! Christmas Concert Pack Assignment
Tuesday, 12/3/19
Bellwork: Title your entry, "Alignment marks in Artboards"
Where do you find 'Show Center Mark' and 'Crosshairs' in your artboards and what do they do? (If you are not sure, see the multiple artboards video from 12/2 at 2 mins 40 secs.)
If you haven't watched those videos yet, do so today!
Example of Christmas set created last year. Notice how the elements are repeated to create unity between all 3 designs. Don't take this as a design to copy but just an example of how it could be done.
|
|
Things to do:
- NEW ASSIGNMENT! PHHS Logo Modification Assignment
- NEW ASSIGNMENT! Christmas Concert Pack Assignment
Monday, 12/2/19
Today is an information gathering day. Watch the tutorials below. I will be meeting with you to discuss the Design Checklist tomorrow (today if time) and my expectations for the Christmas Concert Package.
The tutorial below will demonstrate some very important tools/techniques necessary to build the flyer, program, and tickets for the Christmas Concert. (Specifically look for how to create centered guidelines per artboard, creating/deleting/copying/resizing each individual artboard.)
The tutorial below will demonstrate some very important tools/techniques necessary to build the flyer, program, and tickets for the Christmas Concert. (Specifically look for how to create centered guidelines per artboard, creating/deleting/copying/resizing each individual artboard.)
This tutorial is going to show you how to make a global edit. (You may find you want to edit text/images in your set of artboards. This short 3 minute tutorial will show you how you can change one and it will change all the rest simultaneously. A huge time saver!) This video shows you how to do it with text!
This tutorial reminds you of Hierarchy of Text as well as some suggestions for getting started in poster design with composition tips.
This tutorial reminds you of each of the CRAP Design Principles.
Explanation of Christmas Concert Pack Assignment
Things to do:
Things to do:
- NEW ASSIGNMENT! PHHS Logo Modification Assignment
- NEW ASSIGNMENT! Christmas Concert Pack Assignment
Monday, 11/25/19 and Tuesday, 11/26/19
Bellwork: It's printing time! I have shared a Google Folder with you titled 'Print Folder Nov 2019'. (Go to your Google Drive and click on 'Shared with Me' on the right OR check your gmail for the link. Sharing Rights on this folder will close after school, 11/26/19 and sent to the print shop.
At this point, you may want to print any of your Independent projects or your Calligrams or your Illustrated Photograph. You do not HAVE to print anything! You will get another opportunity closer to the end of the semester.
At this point, you may want to print any of your Independent projects or your Calligrams or your Illustrated Photograph. You do not HAVE to print anything! You will get another opportunity closer to the end of the semester.
Remember, your material fee covers 8 prints. After that it is $.25 cents a piece. See me if you're not sure if you paid yet. It's not too late! You can even pay me when the prints come in. (If you have any issues regarding the money, talk to me!)
Your goal is to finish the Modified Logo by the end of the hour tomorrow! I'll check in with you to see how realistic that is. Also, did you check out the curvature tools videos from Friday? It really is worth a peek!
Things to do:
Your goal is to finish the Modified Logo by the end of the hour tomorrow! I'll check in with you to see how realistic that is. Also, did you check out the curvature tools videos from Friday? It really is worth a peek!
Things to do:
- NEW ASSIGNMENT! PHHS Logo Modification Assignment
Friday, 11/22/19
Bellwork: Voting for the District Christmas Card Contest
Your task is to identify your top 3 favorite Christmas Card gif designs. These designs were created by 2nd year Digital Design students using both Illustrator and Photoshop.
The top three designs will be sent to the Superintendent and his administrative assistants to choose the winning design. That design will be sent to over 1,000 people through email AND be posted on the school's social media accounts.
You are looking for the best designs to represent our Digital Design program and our high school to the community.
Look closely at the NUMBER of each entry.CHOOSE YOUR TOP 3 DESIGNS. Click on the link to see all of the entries.
(Remember the number for the designs you like? Jot them down if you need to.....)
Go to this Google Form to vote!
Things to do:
Your task is to identify your top 3 favorite Christmas Card gif designs. These designs were created by 2nd year Digital Design students using both Illustrator and Photoshop.
The top three designs will be sent to the Superintendent and his administrative assistants to choose the winning design. That design will be sent to over 1,000 people through email AND be posted on the school's social media accounts.
You are looking for the best designs to represent our Digital Design program and our high school to the community.
Look closely at the NUMBER of each entry.CHOOSE YOUR TOP 3 DESIGNS. Click on the link to see all of the entries.
(Remember the number for the designs you like? Jot them down if you need to.....)
Go to this Google Form to vote!
- Click 'Yes, I like this one' on your THREE favorites. Click 'No, Thank you' on the remaining entries.
Things to do:
- NEW ASSIGNMENT! PHHS Logo Modification Assignment
- Did you check out the Curvature tool videos from Thursday?
Thursday, 11/21/19 Red 52 Schedule
Bellwork: Title your entry, "CRAP Cheat notes"
Copy and Paste the reminders below into your journal. As you will be creating a set of graphic design pieces for the upcoming Christmas concert (Flyer, Program, and tickets), I want to reinforce the CRAP principles again. ALL OF YOUR PRODUCTS WILL BE A UNIFIED SET.
ALSO, SOMETIME BEFORE THE END OF THE HOUR FRIDAY, WATCH BOTH OF THE VIDEOS BELOW ON THE 'CURVATURE' TOOL.
You do NOT want to miss this beauty! It could change how you create! Each video shows you a different way to use it. Watch both! You can start the second one at one minute. Both are short!)
Copy and Paste the reminders below into your journal. As you will be creating a set of graphic design pieces for the upcoming Christmas concert (Flyer, Program, and tickets), I want to reinforce the CRAP principles again. ALL OF YOUR PRODUCTS WILL BE A UNIFIED SET.
- CONTRAST- Important text and images stand out and are the first thing to catch the audience' eye because of the contrast in color, size, orientation, or placement.
- REPETITION- Your style (choices of font, color, symbols, spacing, etc.) should be repeated and unified throughout your designs.
- ALIGNMENT- Nothing is placed randomly in a design! It should 'line up' with the edge of other text or major images. Use the grid!
- PROXIMITY- Not only is 'like' information grouped together in the design, but there is also an obvious 'empty space or breathing room' around that group of information to make it easily recognized as unique/different. Don't forget about breathing space around the edge of your design as well...don't crowd the edge.
ALSO, SOMETIME BEFORE THE END OF THE HOUR FRIDAY, WATCH BOTH OF THE VIDEOS BELOW ON THE 'CURVATURE' TOOL.
You do NOT want to miss this beauty! It could change how you create! Each video shows you a different way to use it. Watch both! You can start the second one at one minute. Both are short!)
|
|
|
Things to do:
- NEW ASSIGNMENT! PHHS Logo Modification Assignment
Wednesday, 11/20/19
Bellwork: Title your entry, "Noise"
In your entry, explain what 'noise' adjusts on the panel when setting up your Image Trace of a jpeg. (if you don't remember, check the links on your new assignment page.)
Your goal is to have the modified logo complete by the end of next week (11/29/19) We will use that in the tickets and posters to advertise the concert. Those will need to be completed by the 6th of December.
Things to do:
- NEW ASSIGNMENT! PHHS Logo Modification Assignment
Tuesday, 11/19/19 Red 52 Schedule
Bellwork: Title your entry, "Ignore White"
In your entry, explain the advantage of choosing 'ignore white' when setting up your Image Trace of a jpeg. (if you don't remember, check the links on your new assignment page.)
Things to do:
In your entry, explain the advantage of choosing 'ignore white' when setting up your Image Trace of a jpeg. (if you don't remember, check the links on your new assignment page.)
Things to do:
- NEW ASSIGNMENT! PHHS Logo Modification Assignment
Monday, 11/18/19, Friday, 11/15/19
Thursday, 11/14/19 Red 52 Schedule
and Wednesday, 11/13/19 (Tuesday, 11/12/19 Snow Day)
Myles, PLEASE COME BACK!!!
Bellwork: Title your entry, "Logo brainstorming"
Review your list. How could you incorporate one or more of the themes in your Modified Logo.
Take the time to watch the video below. It shows this same brainstorming process and how the artist creates more than one logo from the ideas he gets. It also shows some smart, efficient techniques to modify/align/transform shapes. It's really worth the whole 12 minutes!
- List 10 things you think of when you think of Christmas.
- List 10 things you think of when you think of Winter.
- List 10 things you think of when you think of music or bands.
Review your list. How could you incorporate one or more of the themes in your Modified Logo.
Take the time to watch the video below. It shows this same brainstorming process and how the artist creates more than one logo from the ideas he gets. It also shows some smart, efficient techniques to modify/align/transform shapes. It's really worth the whole 12 minutes!
Things to do:
- NEW ASSIGNMENT! PHHS Logo Modification Assignment
Monday, 11/11/2019
Bellwork: Title your entry, "Threshold"
In your entry, explain what 'threshold' does/means on the Image Trace options panel. (if you don't remember, check the links on your new assignment page.)
CHECK OUT WHAT DD2 IS DOING. I DON'T THINK YOU HAD A CHANCE TO DO THIS ONE. IF YOU ARE INTERESTED IN PAUSING THE LOGO UNTIL YOU HAVE A BETTER IDEA, HEAD OVER THERE. THE LOGO WILL STILL NEED TO BE COMPLETED ASAP SO YOU CAN DESIGN THE TICKETS/POSTERS. I'LL LEAVE IT UP TO YOU.
Things to do:
I have copies of the logos at my desk. You can place a blank computer paper on top and modify or brainstorm ideas with paper/pencil first.
In your entry, explain what 'threshold' does/means on the Image Trace options panel. (if you don't remember, check the links on your new assignment page.)
CHECK OUT WHAT DD2 IS DOING. I DON'T THINK YOU HAD A CHANCE TO DO THIS ONE. IF YOU ARE INTERESTED IN PAUSING THE LOGO UNTIL YOU HAVE A BETTER IDEA, HEAD OVER THERE. THE LOGO WILL STILL NEED TO BE COMPLETED ASAP SO YOU CAN DESIGN THE TICKETS/POSTERS. I'LL LEAVE IT UP TO YOU.
Things to do:
- NEW ASSIGNMENT! PHHS Logo Modification Assignment
I have copies of the logos at my desk. You can place a blank computer paper on top and modify or brainstorm ideas with paper/pencil first.
Friday, 11/8/19
Bellwork-Title it , "CRAP Review-Proximity"
Analyze the image below. Explain how the Design Principle of Proximity is being used. If you can't remember this principle, look up, Graphic Design Principle-Proximity.
Analyze the image below. Explain how the Design Principle of Proximity is being used. If you can't remember this principle, look up, Graphic Design Principle-Proximity.
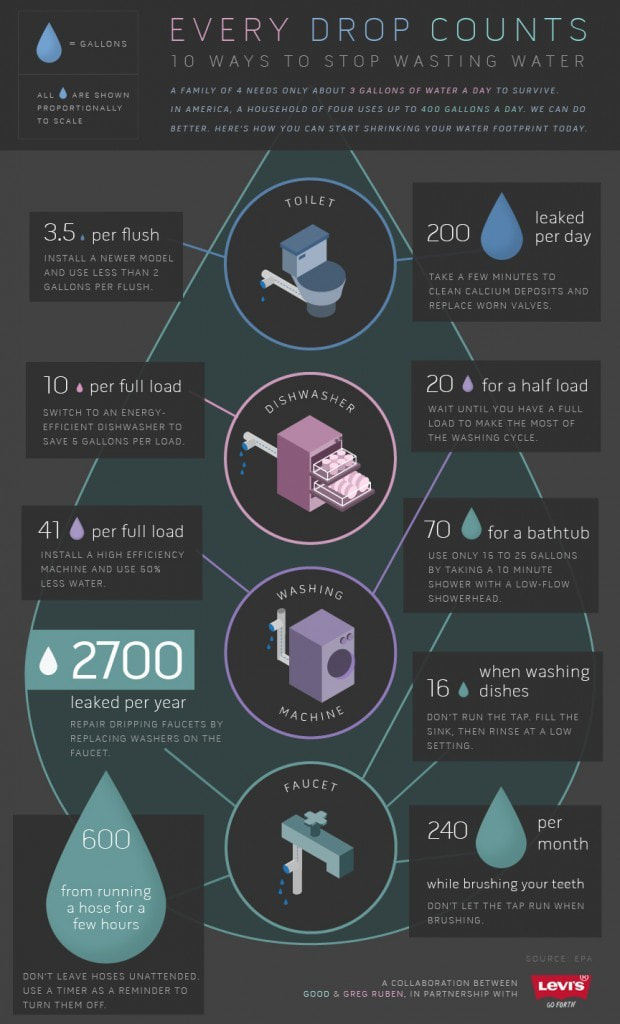
Explanation of PHHS Logo Modification Assignment
Read through this while I am demonstrating with Year 1 and Year 2 so that we can discuss it and I can answer any questions you may have. Here are some png's of our logo that you could use as a base if you'd like.
Read through this while I am demonstrating with Year 1 and Year 2 so that we can discuss it and I can answer any questions you may have. Here are some png's of our logo that you could use as a base if you'd like.
|
| ||||||||
Things to do:
- Calligram Blog Post
- Illustrated Photograph project.
- Illustrated Photograph Blog post (11/5/19)
- Photo and Text Effects (11/6/19) 2 from each folder.
- NEW ASSIGNMENT! PHHS Logo Modification Assignment
Thursday, 11/7/19
Bellwork-Title it , "CRAP Review-Alignment"
Analyze the image below. Explain how the Design Principle of Alignment is being used.
Analyze the image below. Explain how the Design Principle of Alignment is being used.
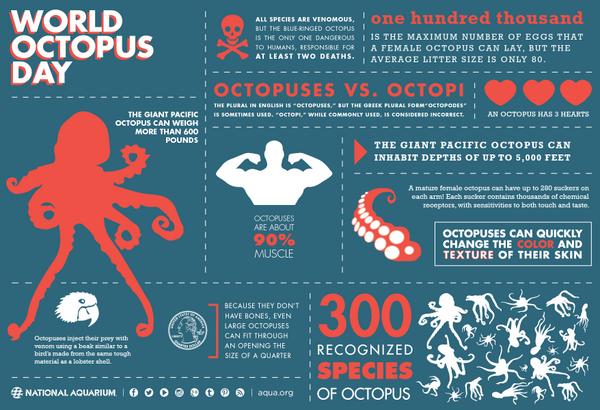
Things to do:
- Calligram Blog Post
- Illustrated Photograph project.
- NEW ASSIGNMENT! Illustrated Photograph Blog post (11/5/19)
- NEW ASSIGNMENT! Photo and Text Effects (11/6/19) 2 from each folder.
Wednesday, 11/6/19
Bellwork-Title it , "CRAP Review-Repetition"
Analyze the image below. Explain how the Design Principle of Repetition is being used.
Analyze the image below. Explain how the Design Principle of Repetition is being used.
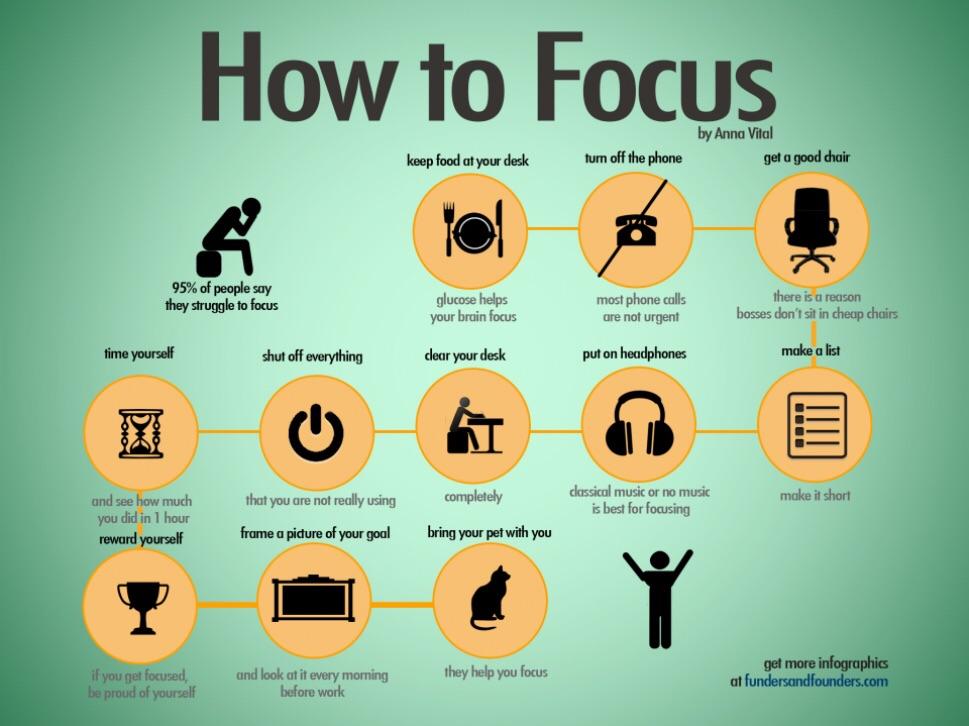
Old/New Assignment! Same folders, different technique.
Choose at least 2 Effects to try from each folder (download the pdf and follow the instructions).
Choose something different from last year and something you've never tried before.
I will need the .psd and the JPEG in your folder for credit. Call me over when it is complete.
Choose something that pushes you and teaches you something new. Choose something that interests you, but might also be used in an Independent Design:
Photo Effects
Text Effects
Things to do:
- Calligram Blog Post
- Illustrated Photograph project.
- NEW ASSIGNMENT! Illustrated Photograph Blog post (11/5/19)
- NEW ASSIGNMENT! Photo and Text Effects (11/6/19) 2 from each folder.
Tuesday, 11/5/19
Bellwork-Title it , "CRAP Review-Contrast"
Analyze the image below. Explain how the Design Principle of Contrast is being used.
Analyze the image below. Explain how the Design Principle of Contrast is being used.

New Blog Post "Illustrated Photograph" (I may be getting ahead of you a bit, but this is here for when you are ready.)
In your post itself, describe the following:
Things to do:
- Post the final JPEG for your Illustrated Photograph design.
- Post the original photograph as well.
In your post itself, describe the following:
- What was the main challenge for this design? What were you asked to do? (See the Design checklist page if you need a refresher.)
- What are you most proud of in this design?
- What was the most difficult portion of this design? How did you solve that problem?
Things to do:
- Calligram Blog Post
- Illustrated Photograph project.
- NEW ASSIGNMENT! Illustrated Photograph Blog post (11/5/19)
Monday, 11/4/19
Bellwork-Title it , "Pacing"
How many days do you think you need to complete this project to your satisfaction and fulfilling all the requirements from the checklist?
Use all of your mad illustrator AND Photoshop skills you've accumulated over the past two years to make this as professional looking as possible (Gradients, Mesh Gradients, Pen Tooling, Effects, Blend modes, Tricks to create depth-overlapping, large to small, detailed to plain/blurred, colorful to faded.)
Things to do:
- Post Calligram JPEGS to blog and write accompanying artist statement as described above.
- Illustrated Photograph project.
Friday, 11/1/19
Bellwork Tip:
You may want to export your separate characters/objects on their own artboards as a PNG (This will make the background transparent instead of white) when you are ready to move the vector stuff into Photoshop. It will make your life so much easier! :)
Use all of your mad illustrator skills you've accumulated over the past two years to make this as professional looking as possible (Gradients, Mesh Gradients, Pen Tooling, Effects, Blend modes, Tricks to create depth-overlapping, large to small, detailed to plain/blurred, colorful to faded.)
Things to do:
- Post Calligram JPEGS to blog and write accompanying artist statement as described above.
- Illustrated Photograph project.
Thursday, 10/31/19

|
Half Day Schedule:
1st: 7:35-8:05 2nd: 8:10-8:40 3rd: 8:45-9:15 4th: 9:20-9:50 5th: 9:55-10:25 6th: 10:30-11:00 |
TIPS:
Use all of your mad illustrator skills you've accumulated over the past two years to make this as professional looking as possible (Gradients, Mesh Gradients, Pen Tooling, Effects, Blend modes, Tricks to create depth-overlapping, large to small, detailed to plain/blurred, colorful to faded.)
Things to do:
- Make sure you overlap your vector artwork with pixel (Select and area and ctrl + J is to a new layer, restack your layer order is one way.)
- Make sure the lightsource from the photography creates a highlight and shadow on the vector AND pixels as your try to integrate the two. (Displacement map? Drop shadow? Remember the 'Girl in a Room' assignment last year?)
- Make sure your vector artwork follows the scale and depth of the photograph.
- Make sure your vector artwork is balanced in the design.
- Finally, how could adjustment layers help to tie it all together? Experiment.
Use all of your mad illustrator skills you've accumulated over the past two years to make this as professional looking as possible (Gradients, Mesh Gradients, Pen Tooling, Effects, Blend modes, Tricks to create depth-overlapping, large to small, detailed to plain/blurred, colorful to faded.)
Things to do:
- Post Calligram JPEGS to blog and write accompanying artist statement as described above.
- Illustrated Photograph project.
Wednesday, 10/30/19
No Bellwork but..... a tip to think about as you create!
Consider scale and proportion when you are creating your vector artwork within the photograph setting.
Does the size of your object 'fit in' with the size of its surroundings? OR consider deliberately playing with scale.
Will your vector artwork appear like giants in your scene or like miniatures?
Be sure to make it look like you mean it if that is your plan!
Use all of your mad illustrator skills you've accumulated over the past two years to make this as professional looking as possible (Gradients, Mesh Gradients, Pen Tooling, Effects, Blend modes, Tricks to create depth-overlapping, large to small, detailed to plain/blurred, colorful to faded.)
Things to do:
- Post Calligram JPEGS to blog and write accompanying artist statement as described above.
- Illustrated Photograph project.
Tuesday, 10/29/19
Bellwork: Title your entry, "Depth"
List some things to keep in mind/steps to take in order to create depth in your picture.
Use all of your mad illustrator skills you've accumulated over the past two years to make this as professional looking as possible (Gradients, Mesh Gradients, Pen Tooling, Effects, Blend modes, Tricks to create depth-overlapping, large to small, detailed to plain/blurred, colorful to faded.)
Things to do:
- Post Calligram JPEGS to blog and write accompanying artist statement as described above.
- Illustrated Photograph project.
Monday, 10/28/19
Bellwork: Title your entry, "Analyze the pic"
1. What did the artist do to the illustration(vector) portion to
make the doodle look as though it fits in this space?
2. What did the artist do to the photograph to make the doodle
look as though it fits in this space?
1. What did the artist do to the illustration(vector) portion to
make the doodle look as though it fits in this space?
2. What did the artist do to the photograph to make the doodle
look as though it fits in this space?

At this point you should be developing your 'Illustrated photograph' design. Know that both Illustrator and Photoshop are at your fingertips to illustrate with vector/modify photographs as you see fit. Review the Design Checklist (Illustrated Photograph) so you have a clear idea of what needs to be included in your design.
Use all of your mad illustrator skills you've accumulated over the past two years to make this as professional looking as possible (Gradients, Mesh Gradients, Pen Tooling, Effects, Blend modes, Tricks to create depth-overlapping, large to small, detailed to plain/blurred, colorful to faded.)
Things to do:
- Post Calligram JPEGS to blog and write accompanying artist statement as described above.
- Illustrated Photograph project.
Friday, 10/25/19
Bellwork: Title your entry, "How did he do that?"
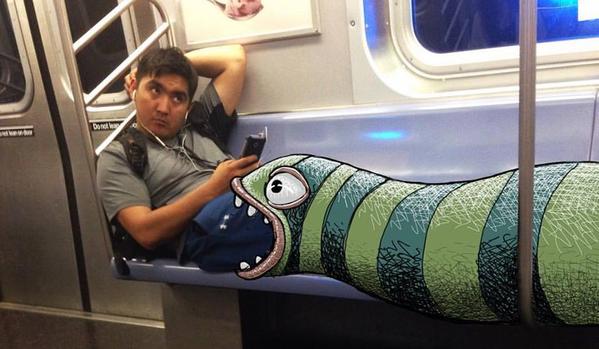
Imagine the picture above was created in both Illustrator (the doodle) and Photoshop. If the doodle was placed on the background in photoshop, how did he make it behind the pole from the photograph? (There is more than one way to solve this problem.) Explain one.
Use all of your mad illustrator skills you've accumulated over the past two years to make this as professional looking as possible (Gradients, Mesh Gradients, Pen Tooling, Effects, Blend modes, Tricks to create depth-overlapping, large to small, detailed to plain/blurred, colorful to faded.)
If you don't have a photograph, experiment with a Google Image. Make sure it is licensed to modify just in case it turns out amazing and we want to publish it :)
Things to do:
- Post Calligram JPEGS to blog and write accompanying artist statement as described above.
- Start brainstorming/planning Illustrated Photograph project.
Thursday, 10/24/19
Bellwork: Title your entry, "Illustrated Photograph Brainstorming #2- 3 questions"
Look at the images below. For each, imagine if this was your picture, explain what and where you add vector art in the foreground, middle, and background ?
#1 (Using a pic with a lot of depth so you can see the challenge of how you would balance the vector art and still make it recognizable (not too tiny).
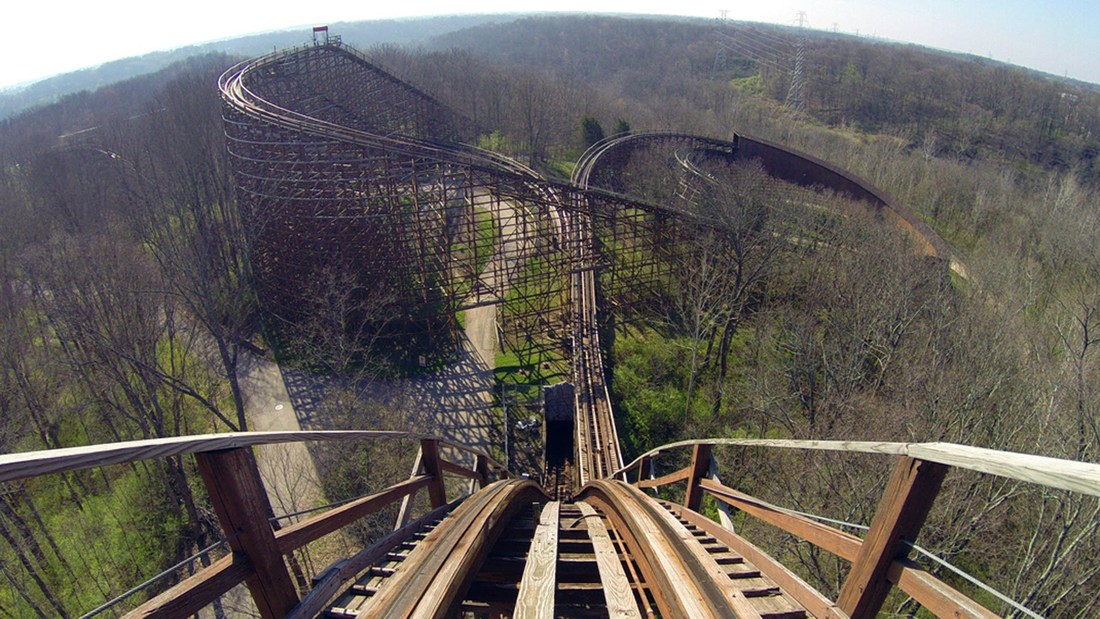
#2- While this image is the same subject matter, the depth is more shallow. Explain what and where you would place vector art in the fore/mid/background.
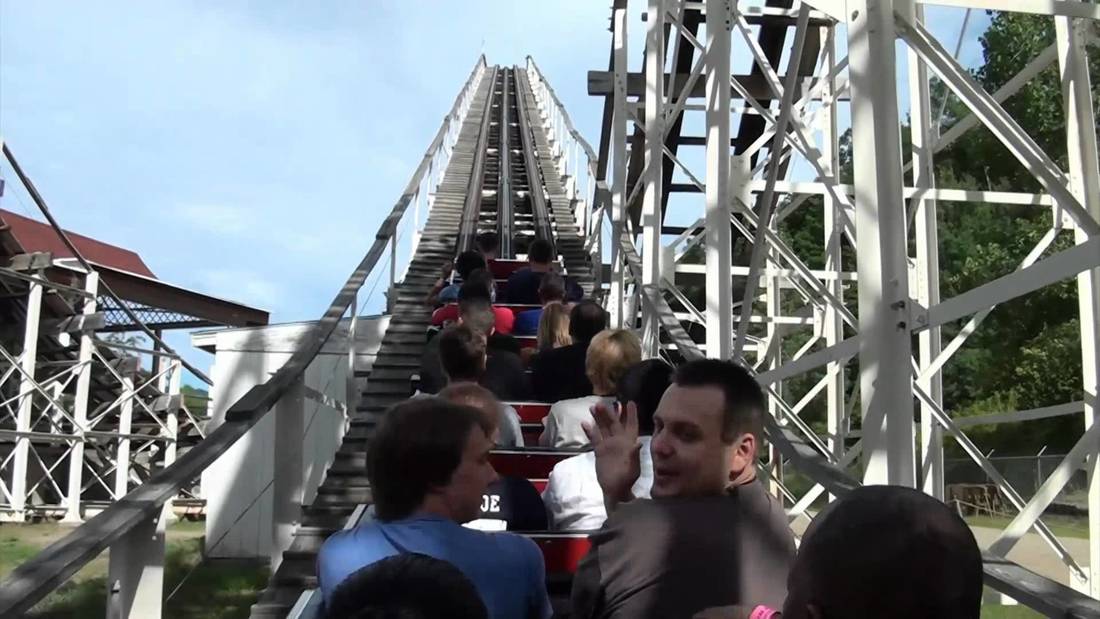
#3 Which type of picture do you think would be easier to design for this project? Deep or Shallow depth? Explain.
Begin experimenting with creating your vector art for your photograph. I suggest PLACING your photograph in Illustrator, locking that layer, and creating on a new layer. Experiment! If you find a better way to proceed, share it. I'll pass it on :)
Use all of your mad illustrator skills you've accumulated over the past two years to make this as professional looking as possible (Gradients, Mesh Gradients, Pen Tooling, Effects, Blend modes, Tricks to create depth-overlapping, large to small, detailed to plain/blurred, colorful to faded.)
If you don't have a photograph, experiment with a Google Image for now. Make sure it is licensed to modify just in case it turns out amazing and we want to publish it :)
Things to do:
- Post Calligram JPEGS to blog and write accompanying artist statement as described above.
- Start brainstorming/planning Illustrated Photograph project.
Wednesday, 10/23/19
Bellwork: Title your entry, "Illustrated Photograph Brainstorming #1"
List three possible scenes you can use for your Illustrated photograph project. Better yet, if you have the photos already, insert the jpegs to your journal entry. Otherwise, explain with words the possible backgrounds you are considering.
If you are done with everything, begin experimenting with creating your vector art for your photograph. I suggest PLACING your photograph in Illustrator, locking that layer, and creating on a new layer. Experiment! If you find a better way to proceed, share it. I'll pass it on :)
If you don't have a photograph, experiment with a Google Image for now. Make sure it is licensed to modify just in case it turns out amazing and we want to publish it :)
Things to do:
- Post Calligram JPEGS to blog and write accompanying artist statement as described above.
- Start brainstorming/planning Illustrated Photograph project.
Tuesday, 10/22/19
Bellwork: Open an Illustrator artboard. Get back in the habit of using gradients and blend modes to create form in a shape. Title it, "Sphere"
Call me over for credit THEN JPEG it and put it in your journal entry for today.
Things to do:
- Make a perfect circle
- Add as many gradients/blend modes as necessary to make it appear like a sphere.
- Add as many gradients/blend modes as necessary to make it cast a shadow on a flat surface.
Call me over for credit THEN JPEG it and put it in your journal entry for today.
Things to do:
- Post Calligram JPEGS to blog and write accompanying artist statement as described above.
- Start brainstorming/planning Illustrated Photograph project.
Monday, 10/21/19-3.5 assembly (shortened am hours)
Bellwork:
If/When you are done with your Calligram project, post the JPEG of all three designs in your blog along with post that covers the following:
Be specific with your answers. Complete paragraphs, not lists. Reread and edit as much as possible before posting public! Reread for clarity and check for grammar or spelling issues. This is a representation of you going world wide. Make a good impression! :)
Things to do:
If/When you are done with your Calligram project, post the JPEG of all three designs in your blog along with post that covers the following:
- Explain the project. What was your goal?
- What part/parts of this text project was difficult or frustrating for you from planning to final design?
- Which Calligram is your favorite? What about it are you most proud of?
- Which Calligram is your least favorite? What would you try differently with this design if you had another shot at it?
Be specific with your answers. Complete paragraphs, not lists. Reread and edit as much as possible before posting public! Reread for clarity and check for grammar or spelling issues. This is a representation of you going world wide. Make a good impression! :)
Things to do:
- Post Calligram JPEGS to blog and write accompanying artist statement as described above.
- Check out the following links to get inspired for our new project. Mixing Illustrations with Photos
- https://desket.co/blogs/news/awesome-subway-doodles
- http://theendearingdesigner.com/photographic-pencil/#here
- https://petapixel.com/2014/06/30/talented-artist-combines-photography-illustration-capture-sketch-life/
- https://www.pinterest.com/explore/photo-illustration/?lp=true
- https://www.pinterest.com/blabbermouse/illustration-photography-mashup/?lp=true
Friday, 10/18/19
|
No Bellwork!
You have 20 minutes! Log in and get started right away! The goal was to have all 3 calligrams completed by the end of the hour today. Make sure we talk about how realistic that is and if you'll be ready to start the next project on Monday. Feeling behind? You are welcome to grab some extra lab time before/after school or during A lunch. The expectation is that you are working in Illustrator the entire time for as short as it is. Do not let phones/videos distract you. |
Assembly/Half Day Schedule
1st hour 7:35-7:55 2nd hour 8:00-8:20 3rd hour 8:25-8:45 4th hour 8:50-9:10 5th hour 9:15-9:35 6th hour 9:40-10:00 Then dismissal to Gym: 9th grade: Boys 'P' 10th grade: Boy's 'H' 11th grade: Girl's 'P' 12th: Floor Band Girl's 'H' |
Wednesday, 10/16/19 and Thursday 10/17/19
No bellwork today! Get started right away.
Your goal is to have 3 Calligrams completed by the end of the day Friday.
Your goal is to have 3 Calligrams completed by the end of the day Friday.
Tuesday, 10/15/19
Bellwork: Title your entry, “Envelope Warp” and date it.
Explain how to find Envelope Warp in Illustrator and how it works. If you can't remember the process, revisit this tutorial.
Things to do:
Explain how to find Envelope Warp in Illustrator and how it works. If you can't remember the process, revisit this tutorial.
Things to do:
- Calligram designs- Three different words. Three different designs. Three different artboards so we can jpeg them separate.
Monday, 10/14/19
Bellwork: Title your entry, "Punch a shape" and date it.
Explain how to punch a shape into a letter. (Using the shape on top to cut into the shape or letter on the bottom) If you can't remember the process, revisit this tutorial.
Things to do:
Explain how to punch a shape into a letter. (Using the shape on top to cut into the shape or letter on the bottom) If you can't remember the process, revisit this tutorial.
Things to do:
- Calligram designs- Three different words. Three different designs. Three different artboards so we can jpeg them separate.
Friday, 10/11/19
Bellwork: Title your entry, "Release compound path" and date it.
Explain how to release a compound path.
How could you use this technique in one of your calligram designs?
A compound path is a shape that has two or more paths that create 'holes' in the shape, like the letter 'o' or 'B'. If you can't remember the process, revisit this tutorial.
Things to do:
Explain how to release a compound path.
How could you use this technique in one of your calligram designs?
A compound path is a shape that has two or more paths that create 'holes' in the shape, like the letter 'o' or 'B'. If you can't remember the process, revisit this tutorial.
Things to do:
- Did you tell me what your three words are going to be? Make sure you do today! You will sketch it first so I can see what you are thinking BEFORE you get started in Illustrator. I want to make sure you are on the right track!
- Calligram designs created in Illustrator. Three different words. Three different designs. Three different artboards so we can jpeg them separate.
Thursday, 10/10/19
Bellwork: Title your entry, "Converting text to objects" and date it.
Explain how to turn text into objects so that each letter can be modified with paths and anchors. How could you use this in one of your calligram designs?
If you can't remember the process, check out this video.
Your goal before you leave today is to tell me the three words you plan to change into a Calligram. Remember, you are manipulating the text so that it creates an image, an image that stands for the meaning of the word. You will create 3 different Calligrams for this project.
If you haven't done the brainstorming from Monday yet, do it. I'll be looking for it in your journal AND it's a good kickstart to get your mind moving.
These designs will be your creations so don't Google research too much. In fact, once you understand what a Calligram is, I'd stop looking at examples and start coming up with your own.
Your final project will include 3 separate Calligram images. Use today to get a head start on experimenting.
Your goal for Friday is to have the three words you intend to illustrate along with a basic idea/sketch of how you will manipulate the letters to make the image.
Things to do: SHOW ME WHEN YOU COMPLETE SOMETHING NEW!
- Syllabus/Expectations in Google Folder
- Email sent for Digital Contract
- Tutorial from BTS (Back to School) links completed with .ai and jpeg in Google Folder.
- Original Creation from techniques/tools learned in tutorial completed with .ai and jpeg in Google Folder.
- Weebly site created and email sent with url to Jones.
- First blog post
- Brainstorm for calligram assignment (see 10/7/19 for details)
Wednesday, 10/9/19

|
|
calligram
ˈkaləˌɡram/
noun
This is a typography review. While you won't be creating an entire picture filled with words like you did last year. You will take a single word and manipulate the letters in that word to illustrate its meaning.
If you haven't done the brainstorming from Monday yet, do it. I'll be looking for it in your journal AND it's a good kickstart to get your mind moving.
These designs will be your creations so don't Google research too much. In fact, once you understand what a Calligram is, I'd stop looking at examples and start coming up with your own.
Your final project will include 3 separate Calligram images. Use today to get a head start on experimenting.
Your goal for Friday is to have the three words you intend to illustrate along with a basic idea/sketch of how you will manipulate the letters to make the image.
Things to do: SHOW ME WHEN YOU COMPLETE SOMETHING NEW!
ˈkaləˌɡram/
noun
- a word or piece of text in which the design and layout of the letters creates a visual image related to the meaning of the words themselves.
This is a typography review. While you won't be creating an entire picture filled with words like you did last year. You will take a single word and manipulate the letters in that word to illustrate its meaning.
If you haven't done the brainstorming from Monday yet, do it. I'll be looking for it in your journal AND it's a good kickstart to get your mind moving.
These designs will be your creations so don't Google research too much. In fact, once you understand what a Calligram is, I'd stop looking at examples and start coming up with your own.
Your final project will include 3 separate Calligram images. Use today to get a head start on experimenting.
Your goal for Friday is to have the three words you intend to illustrate along with a basic idea/sketch of how you will manipulate the letters to make the image.
Things to do: SHOW ME WHEN YOU COMPLETE SOMETHING NEW!
- Syllabus/Expectations in Google Folder
- Email sent for Digital Contract
- Tutorial from BTS (Back to School) links completed with .ai and jpeg in Google Folder.
- Original Creation from techniques/tools learned in tutorial completed with .ai and jpeg in Google Folder.
- Weebly site created and email sent with url to Jones.
- First blog post
- Brainstorm for calligram assignment (see 10/7/19 for details)
Tuesday, 10/8/19
No Bellwork! Get started right away.
Things to do:
Things to do:
- Syllabus/Expectations in Google Folder
- Email sent for Digital Contract
- Tutorial from BTS (Back to School) links completed with .ai and jpeg in Google Folder.
- Original Creation from techniques/tools learned in tutorial completed with .ai and jpeg in Google Folder.
- Weebly site created and email sent with url to Jones.
- First blog post
- Brainstorm for calligram assignment (see 10/7/19 for details)
Friday, 10/4/19 and Monday, 10/7/19
Your next project will get you thinking about type and remind you of the tricks we've used in the past to manipulate it. (Create Outlines around a letter to move the paths/anchors, Distort > Envelope Warp, Releasing Compound Paths to make a letter solid, Using Minus Front to punch shapes into letters, etc.)
Review the following sites to see where we are headed for your 'Words as Images' Project.
View the following sites:
Link #1 http://designtaxi.com/news/394412/Creative-Typographic-Logos-Cleverly-Visualizes-The-Meanings-Of-Words/
Link #2 https://digitalsynopsis.com/design/creative-typographic-logos/
Examples from past year's students:
The official term is called a Calligram. You can always Google for more examples, there are tons out there.
The tricky thing about that is that you want to create something new.....if you see it all......it makes it harder to create a calligram that hasn't been done before.....so be careful. Research enough to understand what it is, then start brainstorming some possibilities.
The tricky thing about that is that you want to create something new.....if you see it all......it makes it harder to create a calligram that hasn't been done before.....so be careful. Research enough to understand what it is, then start brainstorming some possibilities.
- Brainstorm- List at least 10 interesting verbs in your journal, the more the better. Then, list 10 interesting objects, again, the more the better. At this point, it is better just to list away without judging how good the words are.....just free write.
- Review your words and change the font color of those that have the best 'visual' possibilities (The letters can be used to create a visual that symbolizes it's meaning.) Show me for credit.
- Experiment with some possibilities. You will turn in your best 3 for a grade.
Thursday, 10/3/19
This is it! Last day for final edits.
How does it look small? Do you need to remove some details or rescale some things so it is visible?
Don't forget to set the bleed. See me so we can work on that together :)
Ms. Grewe said to heap a ton of thanks on you for taking on this for her.
Show it to me before the end of the hour so we have time for critique and edits.
Things to remember:
- Yes, you can have it printed on both sides.
- The size I gave you can be increased to 2.7 x 5.4 if you need a bigger space.
- The Print Shop also suggested setting a Color Bleed to .05. ( See 9/20 video)
- Don't forget how you design the text and images together (Contrast, Repetition, Alignment, and Proximity and White Space and Hierarchy of Text).
- Design needs to be in the Student Council's hand by 10/4/19
Wednesday, 10/2/19
2 more days!!! We'll need to get your design to Student Council by Friday so set your goal for finishing up by end of hour Thursday.
Design Tip:
Think about 'Proximity' when placing your text! The date and time (Level 2 text) should be grouped away from (remember white space) the name of the dance (Level 1 text).
Things to remember:
Design Tip:
Think about 'Proximity' when placing your text! The date and time (Level 2 text) should be grouped away from (remember white space) the name of the dance (Level 1 text).
Things to remember:
- Yes, you can have it printed on both sides.
- The size I gave you can be increased to 2.7 x 5.4 if you need a bigger space.
- The Print Shop also suggested setting a Color Bleed to .05. ( See 9/20 video)
- Don't forget how you design the text and images together (Contrast, Repetition, Alignment, and Proximity and White Space and Hierarchy of Text).
- Design needs to be in the Student Council's hand by 10/4/19
Tuesday, 10/1/19
3 more days!!! We'll need to get your design to Student Council by Friday so set your goal for finishing up by end of hour Thursday.
Design Tip:
Think about 'Contrast' when designing your text! Not only should the text stand out against the background but the name of the dance should be much larger than the rest of the text.
Things to remember:
Design Tip:
Think about 'Contrast' when designing your text! Not only should the text stand out against the background but the name of the dance should be much larger than the rest of the text.
Things to remember:
- Yes, you can have it printed on both sides.
- The size I gave you can be increased to 2.7 x 5.4 if you need a bigger space.
- The Print Shop also suggested setting a Color Bleed to .05. ( See 9/20 video)
- Don't forget how you design the text and images together (Contrast, Repetition, Alignment, and Proximity and White Space and Hierarchy of Text).
- Design needs to be in the Student Council's hand by 10/4/19
Monday, 9/30/19
4 more days!!! We'll need to get your design to Student Council by Friday so set your goal for finishing up by end of hour Thursday.
Design Tip:
Think about 'Alignment' when placing your text! Are there major graphic landmarks you can align with? What about the other text? Can they align with each other AND major graphic landmarks?
Things to remember:
Design Tip:
Think about 'Alignment' when placing your text! Are there major graphic landmarks you can align with? What about the other text? Can they align with each other AND major graphic landmarks?
Things to remember:
- Yes, you can have it printed on both sides.
- The size I gave you can be increased to 2.7 x 5.4 if you need a bigger space.
- The Print Shop also suggested setting a Color Bleed to .05. ( See 9/20 video)
- Don't forget how you design the text and images together (Contrast, Repetition, Alignment, and Proximity and White Space and Hierarchy of Text).
- Design needs to be in the Student Council's hand by 10/4/19
Wednesday, 9/25/19 and Thursday, 9/26/19 and Friday, 9/27/19
Myles! Where are you??? Come back!!!!
Design Tip:
Remember Hierarchy of Text! The most important text is the biggest and stands out (Level 1 text). Homecoming Dance perhaps?
Level 2 is smaller, subheadings. Cost? Time?
Level 3 would be the smallest, any bulk informational text. Not so sure this applies to this, do you?
Things to remember:
Remember Hierarchy of Text! The most important text is the biggest and stands out (Level 1 text). Homecoming Dance perhaps?
Level 2 is smaller, subheadings. Cost? Time?
Level 3 would be the smallest, any bulk informational text. Not so sure this applies to this, do you?
Things to remember:
- Yes, you can have it printed on both sides.
- The size I gave you can be increased to 2.7 x 5.4 if you need a bigger space.
- The Print Shop also suggested setting a Color Bleed to .05. ( See 9/20 video)
- Don't forget how you design the text and images together (Contrast, Repetition, Alignment, and Proximity and White Space and Hierarchy of Text).
- Design needs to be in the Student Council's hand by 10/4/19
Tuesday, 9/24/19
Design Tip:
Remember the tickets will be printed much smaller than what you see on your screen. In order to see if the details get lost or unreadable at that smaller size, go to the VIEW menu and slide down to 'View Actual Size' or Ctrl +1. This will give you a good idea of size and how legible the design is that small.
Things to remember:
- Yes, you can have it printed on both sides.
- The size I gave you can be increased to 2.7 x 5.4 if you need a bigger space.
- The Print Shop also suggested setting a Color Bleed to .05. ( See 9/20 video)
- Don't forget how you design the text and images together (Contrast, Repetition, Alignment, and Proximity and White Space and Hierarchy of Text).
- Design needs to be in the Student Council's hand by 10/4/19
Monday, 9/23/19
You don't want to miss this new update to the gradient panel!!! It may change how you do gradients from now on!
Take the time to watch this and experiment with it. Try to recreate what he made. Then you can go back to the ticket :)
(if you want to use the same color palette copy and paste the screenshot below into your Illustrator file so you can sample them)
Take the time to watch this and experiment with it. Try to recreate what he made. Then you can go back to the ticket :)
(if you want to use the same color palette copy and paste the screenshot below into your Illustrator file so you can sample them)
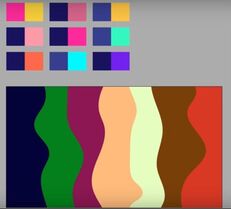
|
|
Things to remember:
- Yes, you can have it printed on both sides.
- The size I gave you can be increased to 2.7 x 5.4 if you need a bigger space.
- The Print Shop also suggested setting a Color Bleed to .05. ( See 9/20 video)
- Don't forget how you design the text and images together (Contrast, Repetition, Alignment, and Proximity and White Space and Hierarchy of Text).
- Design needs to be in the Student Council's hand by 10/4/19
Friday, 9/20/19
Watch this to understand how to set your bleed and what it means to have a bleed.
Here are some things to consider as you design:
Theme: 4 Seasons
Copy (Required Text): Date, Time, Homecoming 2019
Yes, you can have it printed on both sides.
The size I gave you can be increased to 2.7 x 5.4 if you need a bigger space.
The Print Shop also suggested setting a Color Bleed to .05.
Brainstorming symbols or images that would suggest the four seasons along with colors would be a good place to start.
Don't forget how you design the text and images together should use CRAP (Contrast, Repetition, Alignment, and Proximity.)
Thursday, 9/19/19
Ok, so we are shifting gears to create the Homecoming Tickets :)
Here are some things to consider as you design:
Theme: 4 Seasons
Copy (Required Text): Date, Time, Homecoming 2019
Yes, you can have it printed on both sides.
The size I gave you can be increased to 2.7 x 5.4 if you need a bigger space.
The Print Shop also suggested setting a Color Bleed to .05. See me for help on that one. You can set it when you create the document but we haven't done it before.
Brainstorming symbols or images that would suggest the four seasons along with colors would be a good place to start.
Don't forget how you design the text and images together should use CRAP (Contrast, Repetition, Alignment, and Proximity.)
I'll touch base with you for your plans and troubleshooting.
Monday, 9/16/19- Wednesday, 9/18/19
If you haven't done so already, publish your weebly site. I'm checking every day to see if it is live yet. Your goal is to have the site published and your blog post completed as soon as possible.
This week you will get your first commenting assignment. Both blogging and commenting will become a regular way for you to communicate with each other this year in terms of explaining techniques and getting feedback on your work. EMAIL ME THE URL ADDRESS FOR YOUR SITE!!
If you have published your site and posted your first blog post, you can start getting ready for your first project.
Your first project will get you thinking about type and remind you of the tricks we've used in the past to manipulate it. (Create Outlines around a letter to move the paths/anchors, Distort > Envelope Warp, Releasing Compound Paths to make a letter solid, Using Minus Front to punch shapes into letters, etc.)
Review the following sites to see where we are headed for your 'Words as Images' Project.
View the following sites:
Link #1 http://designtaxi.com/news/394412/Creative-Typographic-Logos-Cleverly-Visualizes-The-Meanings-Of-Words/
Link #2 https://digitalsynopsis.com/design/creative-typographic-logos/
Examples from past year's students:
Friday, 9/13/19
Get started right away! Your goal is to have your original creation based on the tutorial techniques finished today. See me if that is not going to happen. Otherwise, new assignments start Monday.
Things to do (In Skyward):
Things to do (In Skyward):
- Syllabus/Expectations in Google Folder (9/9/19)
- Email sent for Digital Contract (9/9/19)
- Tutorial from BTS (Back to School) links completed with .ai and jpeg in Google Folder. (9/3/19)
- Original Creation from techniques/tools learned in tutorial completed with .ai and jpeg in Google Folder.
- Weebly site created and email sent with url to Jones. (9/4/19)
- First blog post (9/11/19)
Wednesday, 9/11/19 and Thursday, 9/12/19
Get started right away! Your goal is to have your original creation based on the tutorial techniques finished by Friday.
Things to do (In Skyward):
Include in your post:
1. The link to the tutorial you chose.
2. The exported JPEG from that tutorial. If your colors are off-save
your .ai file as RGB and export a new jpeg.....title it RGB so you
know which is which.
3. Describe in detail what areas or techniques in the tutorial gave you
the most trouble. Also, in order to help others, describe how you
solved the problem. (If the tutorial was breezy for you, describe an
area that might cause others problems with tips how to get through
it.)
4. Describe something new you learned either about the tutorial or
something within this new version of Illustrator that is different from
the way you are used to do that technique.
5. Review the tutorial itself, like a Rotten Tomato review :)
6. Include the jpeg for YOUR CREATION based on what you learned or
the style of the tutorial you chose.
7. Give a description of HOW you used the first tutorial to help you
with your second creation.
Things to do (In Skyward):
- Syllabus/Expectations in Google Folder (9/9/19)
- Email sent for Digital Contract (9/9/19)
- Tutorial from BTS (Back to School) links completed with .ai and jpeg in Google Folder. (9/3/19)
- Original Creation from techniques/tools learned in tutorial completed with .ai and jpeg in Google Folder.
- Weebly site created and email sent with url to Jones. (9/4/19)
- First blog post (9/11/19)
Include in your post:
1. The link to the tutorial you chose.
2. The exported JPEG from that tutorial. If your colors are off-save
your .ai file as RGB and export a new jpeg.....title it RGB so you
know which is which.
3. Describe in detail what areas or techniques in the tutorial gave you
the most trouble. Also, in order to help others, describe how you
solved the problem. (If the tutorial was breezy for you, describe an
area that might cause others problems with tips how to get through
it.)
4. Describe something new you learned either about the tutorial or
something within this new version of Illustrator that is different from
the way you are used to do that technique.
5. Review the tutorial itself, like a Rotten Tomato review :)
- Was it easy to understand the directions?
- Did you have to modify it a lot? If so, how and where?
- What level of difficulty would you rate this tutorial (Easy,
6. Include the jpeg for YOUR CREATION based on what you learned or
the style of the tutorial you chose.
7. Give a description of HOW you used the first tutorial to help you
with your second creation.
Tuesday, 9/10/19
Get started right away! Your goal is to have your original creation based on the tutorial techniques finished by Friday. You will have a blog post assignment that comes from this too so make sure you have your site in order personalized with a blog page to be ready. (See ALL of the instructions on 9/4/19)
Things to do (In Skyward):
Things to do (In Skyward):
- Syllabus/Expectations in Google Folder (9/9/19)
- Email sent for Digital Contract (9/9/19)
- Tutorial from BTS (Back to School) links completed with .ai and jpeg in Google Folder. (9/3/19)
- Original Creation from techniques/tools learned in tutorial completed with .ai and jpeg in Google Folder.
- Weebly site created and email sent with url to Jones. (9/4/19)
Monday, 9/9/19
- Download each of the files below and upload them to your Google Folder for this class.
- The expectations have changed slightly from last year in reference to food and drink. Review them. Read the syllabus for this year.
- EASY POINTS NEXT! Then, you will send Mrs Jones ([email protected]) an empty email from your school gmail account with the subject as, "I have read and understand the syllabus and expectations for Digital Design."
|
| ||||
Your goal by the end of this week is to have completed your tutorial AND your original design you made based on the style and techniques learned in the tutorial. .Ai files and JPEGS for BOTH should be in your folder when completed.
Friday, 9/6/19
Bellwork: Title it, "Tutorial bits" and date it.
What, if anything, have you found in your tutorial that is new, doesn't make sense, or is giving you trouble.
Use the rest of the hour to get as far as you can on the tutorial.
Remember, once you are done with the tutorial you will create your own design based on what you learned in the tutorial.
I'll be around today to see pacing needs as we go into next week.
Thursday, 9/5/19
Bellwork: Illustrator should be on your computers now. It's different with student log-ins. Just log in with Google as it is the same username and password.
Look ahead in your tutorial. With serious focus all hour in the days ahead, determine how many days you think you will need to finish. Put it in your journal.
ALSO, you are expected to create your own design based on the techniques and style from your tutorial. How long do you expect to need for that?
I will be around to check with you today and will decide when we are moving on.
Things to do:
- Back to School Tutorial-9/4/19
- Weebly site creation (send published link to me when done formatting)- 9/5/19
Wednesday, 9/4/19
Bellwork: Title it "Back to School Tutorial" and date it.
What tutorial did you decide to create? Why?
Check to see if the Adobe software has been uploaded yet. If so, use the rest of the hour to get as far as you can on the tutorial. OR Remind be about my desktop OR my laptop.....
If not, lets jump ahead to making your weebly sites :). You may choose to use the same one as last year...if so, email me the domain name again and create a new page for this year. If not, continue on to create a new one.
Today you will create a website for a digital portfolio. Watch the video below for quick tips for setup and how to create on the site. ALSO READ THE Additional Instructions BEFORE YOU BEGIN BUILDING.
Things to do:
- Set up weebly site.
- Email domain name to Jones.
- Customize weebly site to your liking (DELETE ALL OF THE TEXT/PHOTOS THAT ARE NOT YOURS).
Tuesday, 9/3/19
Seating will change tomorrow! Seating charts starting early this year :)
Tutorials Link
(As of Friday, Adobe had not been installed yet on the new computers. If that is still the case, use today to find the tutorial you will attack and how you might use it in your own design.)
- Create a Google Folder and name it your Last name, First name. Share the Folder with Mrs. Jones ([email protected])
- With your Folder open, create a New Google Doc. Name it '1 Journal' and share with Mrs. Jones ([email protected]) Click 'Can Comment'.
- No Journal entry today but at least it's ready to go :)
- To refresh your memory in basic Illustrator, you will begin by choosing a tutorial from the link below to follow and create. Do not expect to finish all in one day.
- While I will be teaching you new techniques in small group, there will times when I am teaching 1st year students and/or 2nd year students cannot immediately come to your aid. Use this time to reacquaint yourself with Illustrator basics, but also to become independent learners.
- If you are stuck, use Adobe Help or Google to find your answer...or ask a fellow 2nd or 3rd year student. If all else fails, move on to a different area until Design 1 and/or 2 students are independent and I can help you.
Tutorials Link
(As of Friday, Adobe had not been installed yet on the new computers. If that is still the case, use today to find the tutorial you will attack and how you might use it in your own design.)

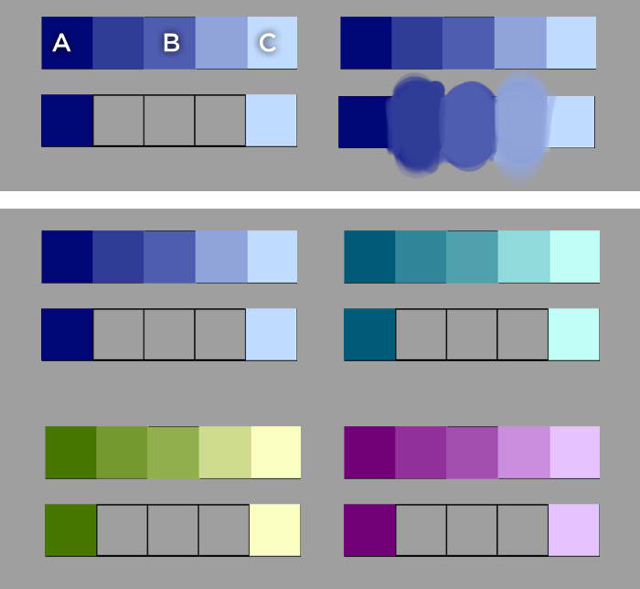